Methods and Technical Key Points for Building a Leech Farm
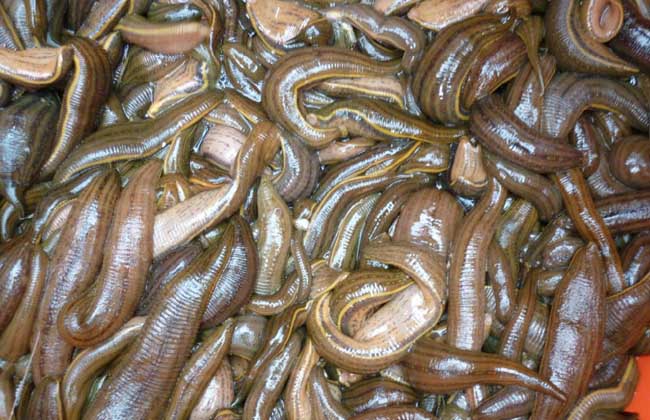
Historically, leeches were mainly obtained through natural harvesting. Due to the abuse of pesticides and chemical fertilizers in recent years and the pollution of the environment by the "three wastes" of industry and agriculture, wild natural resources have sharply declined. Around 1995, southern China began harvesting natural seedlings and carried out artificial breeding for the first time, achieving success. In northern regions, due to seedling and technical reasons, there had been no farming. Let us take a look at the methods for building a leech farm below!
Selection of a Leech Farm Site
1. Farm site selection: Leech ponds should be in a wind-sheltered, sunny location with convenient drainage and irrigation, a self-contained water system, and easy escape prevention. Construction should be adapted to local conditions. Generally, length is unrestricted, and the water surface width is best at about 3 m. For contiguous ponds, adjacent pond ridges are shared. The ridge width is 1.5-2 m and the height is about 1.5 m, though it can be raised higher depending on the amount of excavated soil.
2. Pond excavation: First excavate a single pond into a rectangular pond of unrestricted length, 8 m wide, and 0.3 m deep, using the excavated soil to build the surrounding pond ridges. Along the lengthwise direction of the pond, excavate a small ditch 0.7 m wide and 0.7 m deep centered 2 m from each of the two sides of the pond as the deep-water area. Pile the excavated soil in the middle of the pond, in the same direction as the small ditches, to form an island in the pond with a bottom width of 1.5 m and a fan-shaped cross-section.
Construction of the Leech Pond
1. Escape prevention net installation: Promptly level the surrounding pond ridges and install escape prevention nets to prevent natural enemies from entering in advance. The escape prevention net should be made of 30-50 mesh polyvinyl chloride netting. It should be buried in the pond ridge, with the underground portion at least 0.2 m, and the upper end folded inward 0.1-0.2 m, wrapped over the net rope and sewn securely, and fixed with wooden stakes or similar. If the upper end of the net is less than 1 m above the ground outside the net, fish netting of 30 mesh or lower can be used to raise the height and prevent natural enemies such as snakes and frogs from entering.
2. Deep-water resting shelters: On the inner and outer sides of the deep-water areas around the leech pond, build a leech deep-water resting shelter every 5 m in a staggered pattern. Use a shovel to dig a deep pit slightly larger than a tile at the edge of the step transitioning between deep and shallow water. Note that on the side near the shallow-water area, that is, the side near the pond ridge, dig a slope of about 30 degrees, then stack tiles from bottom to top along the slope, leaving gaps between the tiles. Generally, placing front sides facing front sides and back sides facing back sides will create gaps. The advantage of placing the tiles along the slope is to provide the leeches with a climbing platform for entering the nest.
3. Central island resting shelters: In the middle of the pond, every 7.5 m, dig a trough about 0.6 m wide crosswise in the central island, with the trough bottom about 0.5 m from the bottom of the deep-water pond. Then place tiles upright shoulder to shoulder on both sides of the trough, leaving a gap of about 0.2 m in the middle. Finally, lay a layer of bricks flat on top of the tiles to form a bridge, put soil back on the bricks, and restore the original appearance. The central island resting shelter is then completed.
4. Inlet and outlet water treatment: The water inlet can use a hard clinker pipe with a diameter of 0.25 m, and the outlet should be above the water surface to prevent leeches from escaping. The overflow outlet can also use a hard clinker pipe with a diameter of 0.25 m. The pipe is buried horizontally under the pond ridge, with one end in the deep ditch of the deep-water area inside the pond and the other end extending outside the pond, keeping a horizontal position. On the end inside the pond, install a 90-degree elbow connector with the opening facing upward, then connect another 1 m straight pipe. After the pond is filled with water, measure the depth of the shallow-water area, which should preferably be 0.3 m. Otherwise, adjust the length of the 1 m pipe until it is suitable. Install a 50 mesh escape prevention net at the overflow pipe opening.
5. Construction of egg beds: When water overflows from the overflow outlet, the water level in the shallow-water area should be 0.3 m deep. At this time, use a shovel to level the soil of the central island, grading the part near the water surface into a gently rising slope to facilitate leeches climbing onto the island to lay eggs, so the central island becomes a natural egg-laying bed for leeches. The middle part of the central island should be more than 0.5 m above the water surface. The inner side of the ridges around the pond should also be cut into slopes, and at a place 0.2 m above the water surface, leave a platform at least 0.2 m wide, which can also serve as an egg-laying bed.
Disinfection of the Leech Pond
1. Quicklime disinfection: Place quicklime at several points on the pond bottom, with a dosage of about 100 g per sq m. Add water to the pond to a depth of 10-20 cm. After the lime has slaked, use a ladle to splash the lime slurry over the entire pond. After some time, mix the lime slurry and water evenly. About 1 week after pond clearing, add new water, and then the leech seedlings can be stocked. Using quicklime for pond clearing and disinfection can kill parasites, pathogens, and other harmful organisms in the pond, help keep the pond water at a certain degree of freshness, improve the soil, and release nutrients such as nitrogen, phosphorus, and potassium from the pond bottom, increasing water fertility.
2. Bleaching powder disinfection: For pond clearing and disinfection with bleaching powder, use 5-10 kg per mu of pond surface. If disinfecting with water present, at a water depth of 0.5-1 m, the amount of bleaching powder used should be doubled, that is, 10-20 kg per mu of pond surface, splashed over the entire pond. When bleaching powder meets water, it releases hypochlorous acid. The nascent oxygen released by hypochlorous acid can kill pathogens and other harmful organisms. Its effect is similar to quicklime, but its potency disappears faster than quicklime. Generally, 3-5 days after pond clearing and disinfection with bleaching powder, seed leeches can be stocked for rearing.
3. Dealkalization of cement ponds: Newly built cement ponds have a strong oxygen absorption effect on their surface, which can reduce the dissolved oxygen content in the water and raise the pH value (making it alkaline), forming excessive calcium carbonate precipitate. In order to create a good growth environment for leeches, it is necessary to dealkalize newly built cement ponds before use. The common dealkalization methods are as follows.
① Superphosphate method: After filling a newly built cement pond with water, add superphosphate at a ratio of 1 kg per cubic meter of water, soak the pond for 1-2 days, drain the old water and replace it with new water, and then the seedlings can be stocked.
② Acid sodium phosphate method: After filling a newly built cement pond with water, dissolve 20 g of acid calcium phosphate per cubic meter, soak for 1-2 days, replace with new water, and then the seedlings can be stocked.
③ Glacial acetic acid method: For a newly built cement pond, use 10% glacial acetic acid to scrub the surface of the cement pond, then fill it with water and soak for about 1 week. After replacing with new water, the seedlings can be stocked.
④ Tuber dealkalization method: If building a small-area cement pond and treatment is urgently needed but the above chemicals are unavailable, use sweet potato, potato, or other tubers to rub the pond walls so that the starch paste sticks to the pond surface, then fill with water and soak for 1 day to dealkalize.