How to plant lily bulbs? Detailed method and step-by-step explanation
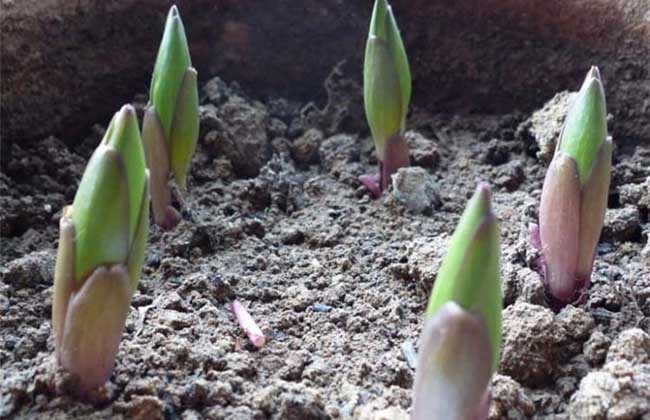
The lily, also known as Qiangqu, Fanjiu, Shandan, Daoxian, etc., is a perennial herbaceous bulbous plant of the genus Lilium in the family Liliaceae. It originated in China and is mainly distributed in the temperate regions of the Northern Hemisphere such as East Asia, Europe, and North America. Its flowers are elegant, its leaves are verdant and graceful, and its stems stand tall and slender. It is regarded as a valuable new cut flower. Let us take a look below at how to plant lily bulbs!
The growth habits of lilies
Lilies prefer cool and moist environments. Places with sufficient sunlight and slightly shaded environments are more suitable for lilies. They are averse to drought and extreme heat, and their cold tolerance is somewhat weaker. The temperature for growth and flowering is 16-24°C. If the winter nighttime temperature is below 5°C for 5-7 consecutive days, flower bud differentiation and flower bud development will be severely affected, delaying flowering or even causing blind flowers and flower splitting. They prefer fertile, deep soil rich in humus, and most of all avoid hard clay. Slightly acidic soil with good drainage is best. Propagation methods include bulb division propagation, scale cutting, seed propagation, and tissue culture.
Lily cultivation techniques
1. Soil disinfection: Before planting lilies, the soil must be disinfected. The commonly used disinfection methods are steam disinfection and chemical disinfection. Steam disinfection is rarely used at present because it consumes a lot of energy and is troublesome to operate. Chemical disinfection uses 40% formalin mixed into a 1:50 or 1:100 solution and splashed onto the soil, with an amount of 2.5 kg per sq m. After splashing, cover with plastic film for 5-7 days, then uncover and air dry for 10-15 days before planting, or sprinkle 8-10 grams per sq m of carbendazim original powder into the soil for disinfection.
2. Thawing bulbs: After the bulbs arrive, immediately open the packaging and place them in a 10-15°C environment to thaw. After they are completely thawed, disinfect them. Soak the bulbs in a one-thousandth aqueous solution of captan, chlorothalonil, carbendazim, potassium permanganate, etc. for 30 minutes. You can also
3. Bulb storage: If the thawed bulbs cannot all be planted immediately, they must not be frozen again, otherwise there is a risk of freezing damage. They can be stored at 0-2°C, but for no more than two weeks. They can also be stored at 2-5°C for no more than one week, and the plastic film packaging must be opened.
4. Planting density: In spring and summer, the planting depth requires the top of the bulb to be 8-10 cm from the soil surface, and in winter 6-8 cm. Planting density varies depending on the variety, bulb size, and seasonal factors. In spring and summer, they can be planted more densely; in winter, when sunlight is weaker, they should be planted more sparsely.
Lily planting management
1. Temperature management: To obtain high-quality lily cut flowers, temperature control in the greenhouse is very important. Within 3-4 weeks after planting, the soil temperature must be maintained at a low temperature of 9-13°C to promote rooting. Too low a temperature will unnecessarily prolong the growth period, while a temperature above 15°C will lead to poor development of stem roots.
2. Moisture management: The soil moisture before planting should be such that it forms a ball when squeezed tightly and breaks apart when dropped. In hotter seasons, if conditions permit, water once with cold water before planting to lower the soil temperature. After planting, water again so that the soil and bulbs are fully in contact, creating good conditions for the development of stem roots. Subsequent watering should be based on keeping the soil moist, that is, a handful of soil forms a ball when squeezed but does not release water. Watering is generally done in the morning on sunny days. The relative humidity should preferably be 80-85%, and large fluctuations in relative humidity should be avoided, otherwise leaf scorch may occur.
3. Fertilizer management: In the early stage of growth, flowering lily bulbs mainly consume the nutrients stored in their own scales, so too much base fertilizer is not needed before planting. One month after planting, some fertilizer can be applied as a top dressing according to soil fertility. Apply 10 kg per mu each time, once every 10-15 days, until 3 weeks before flower harvesting. At the same time, attention should also be paid to supplementing trace elements such as iron, boron, and zinc.
4. Light management: Light is an important condition for controlling quality, and lily flower bud development especially requires sufficient light. Insufficient light will cause poor plant growth and cause lily buds to drop, making leaf color and flower color lighter and shortening vase life. When planting lilies in winter in northern China, due to the influence of insulation materials such as glass or plastic film, about 25-30% of sunlight is blocked. Therefore, in addition to keeping the surface of glass and plastic film clean to ensure good light transmission, some varieties also need supplemental lighting, which can be done with incandescent lamps.
5. Carbon dioxide: Carbon dioxide is beneficial to the growth and flowering of lilies. From 8-10 a.m. on sunny days, apply carbon dioxide gas tablets in an unventilated greenhouse to increase the carbon dioxide content in the greenhouse. Other methods can also be used.
Lily disease prevention and control
1. Penicillium rot
[Symptoms] During storage, white spots grow on the rotten spots of the scales, and then fuzzy green-blue patches grow. After infection, decay will gradually increase even at a low temperature of -2°C. The pathogen will eventually invade the basal plate of the bulb, making the bulb worthless or causing the plant to grow slowly. Although infected bulbs look unhealthy, as long as the basal plate of the bulb is intact, the growth of the plant during planting will not be affected. After planting, the infection will not transfer to the stem, nor will it infect the plant from the soil.
[Control] Store the bulbs at the recommended minimum temperature. Do not plant bulbs whose basal plates have already been damaged. Before planting, infected bulbs must be soaked for 30 minutes in a one-thousandth aqueous solution of fungicides such as captan, chlorothalonil, and carbendazim, and then planted. After planting, maintain an appropriate soil temperature.
2. Rhizoctonia
[Symptoms] If the infection is mild, it only harms the leaves in the soil and the green leaves at the lower part of young shoots, and sunken light brown spots appear on the leaves. Generally speaking, although plant growth is somewhat affected, it can still continue to grow. In severely infected plants, upper growth is hindered, and the white leaves underground as well as the lowest leaves above ground will rot or wilt and fall off, leaving only brown scars on the stem.
[Control] Use a soil disinfectant to disinfect soil that is suspected of being infected. After disinfection, it must be ensured that the soil is no longer infected. If the previous crop has already shown infection, general soil disinfectants cannot be applied, so before planting, treat the soil in advance with a chemical for controlling Rhizoctonia (fully infiltrating 10 cm deep into the soil).
3. Phytophthora
[Symptoms] Phytophthora foot rot will hinder growth or cause sudden wilting. Soft rot occurs at the infected part of the stem base, turning dark green to dark brown, and spreads upward. Leaves turn yellow, and discoloration begins at the stem base. Similar soft rot infections often also occur on the above-ground stem, causing stem damping-off or bending.
[Control] Disinfect infected soil with a general soil disinfectant. During cultivation, fungicides that control Pythium can also effectively control foot rot. Ensure good drainage conditions in the soil, prevent the crop from remaining wet for a long time after watering, and keep the soil temperature as low as possible in summer.
4. Pythium
[Symptoms] This type of fungus infects both individual plants and plants within an area. Plants are stunted, lower leaves turn yellow, upper leaves become narrower, leaf color is lighter, and they often wilt. In plants affected by root rot, flower buds shrivel. When the plant is pulled up, transparent, light brown rotting spots can be seen on the bulb and root crown, or they have completely become soft and rotten.
[Control] Disinfect infected or suspected infected soil with a general soil disinfectant. Keep the soil temperature low in the early stage of cultivation. Throughout the cultivation period, adopt correct cultivation procedures. Cultivation in boxes containing potting soil and peat can keep Pythium under control. After the crop has emerged or in cases where Pythium infection may have occurred, fungicides for controlling Pythium that are easy to spray onto the crop can be used, preferably in the evening. Spraying water for a few minutes (about three minutes) before applying the fungicide will significantly enhance the effect of the fungicide, and the crop can also be rinsed clean.