How to Grow Geraniums? A Detailed Guide to Cultivation Methods
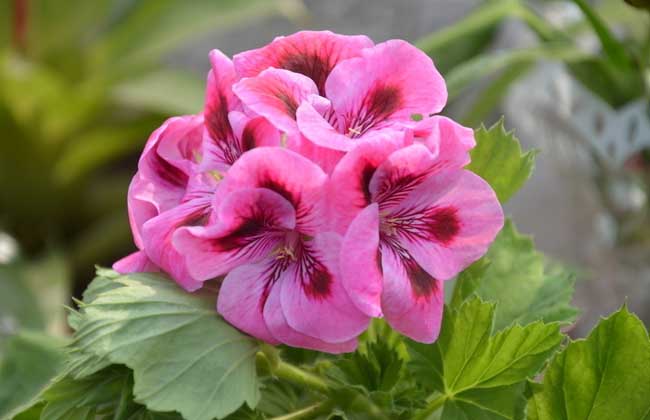
Geranium is a perennial herbaceous plant of the genus Pelargonium in the family Geraniaceae, native to southern Africa and widely cultivated around the world. It has strong adaptability, bright flower colors and a long blooming period, and is suitable for indoor display, flower bed arrangement and more. In the West it is an excellent flower for decorating windowsills, and on the European continent, such as in Germany and Austria, it is especially common. Let's take a look at how to grow geraniums!
Propagation Methods for Geraniums
1. Seed propagation: This can be done in spring or autumn, with indoor pot sowing in spring being preferable. The suitable germination temperature is 20-25°C. Geranium seeds are not large, so after sowing the soil covering should not be deep, and they germinate in about 2-5 days. If sown in autumn, they can bloom in the summer of the following year. Seedlings grown from seed propagation can be selected to produce excellent intermediate-type varieties.
2. Cutting propagation: Cuttings can be taken at any time except in June-July when the plant is in a semi-dormant state, but spring and autumn are preferable; in summer's high temperatures, cuttings tend to blacken and rot. Choose cuttings 10 cm long, with those from the top being best, as they have vigorous growth and root quickly. After cutting, let the cut end dry for several days to form a thin film, then insert into a sand bed or a mixed medium of expanded perlite and peat. Be careful not to damage the stem skin of the cutting, otherwise the wound will easily rot. After inserting, place in a semi-shaded spot and maintain a room temperature of 13-18°C. After insertion, roots form in 14-21 days, and when the roots are 3-4 cm long they can be potted.
3. Tissue culture: Geraniums can also be propagated by tissue culture. Using MS medium as the basic medium, add 0.001% indoleacetic acid and kinetin to promote the explant to produce callus and adventitious buds, and use 0.01% indoleacetic acid to promote rooting. The tissue culture method provides a new approach for the breeding of superior geranium varieties and the selection of new varieties.
How to Grow Geraniums
1. Temperature control: The most suitable temperature for geraniums is 10-20°C, which means spring and autumn are the most suitable seasons; winter is too cold and summer is too hot. So in summer you must prevent exposure to the blazing sun and place it in a cool spot. In winter, the indoor temperature should not be lower than 0°C, otherwise it will suffer frost damage. If there is no heating equipment, turning on a 200° large light bulb in a small room also has a certain anti-freezing effect.
2. Water control: Geraniums should not be overwatered. If you find the roots of the geranium rotting, it may be because of excessive watering combined with rather muggy weather. Control the watering frequency to once every two or three days, and each time water generously to ensure thorough watering.
3. Soil selection: Geraniums are suited to sandy soil. Mixing some sandy soil into the soil bought at the flower market is more conducive to the growth of geraniums.
4. Weather effects: Windy weather will snap geraniums, while rainy weather will cause the root system of geraniums to be soaked by rainwater, resulting in a lack of oxygen for root respiration and thus rot.
6. Fertilizer control: Applying too much fertilizer at once will cause dehydration of the geranium. If too much fertilizer is applied, for example too much nitrogen fertilizer, the plant will grow wildly and not bloom. After over-fertilizing, watering frequently can alleviate the symptoms.
7. Light conditions: Sufficient sunlight helps geraniums bloom, but when the temperature is too high, direct sunlight is not advisable. In spring and autumn, expose them to more sunlight; in summer, pay attention to the temperature, and when the temperature is too high, avoid exposing geraniums to light.
Precautions for Geraniums
January: Place in a spot with sufficient sunlight to prevent damage. When the weather is clear, water, preferably at noon, and avoid using snow water or cold water.
February: Apply a thin liquid fertilizer once every 2 weeks, appropriately increase the amount of watering, and on fine days pay attention to ventilation.
March: Cutting propagation can be carried out in combination with pruning. For cuttings, it is best to select one-year-old robust branches cut from mother plants that bloom frequently, are of pure variety and grow well. Each cutting should be 4-6 cm long with 2-3 nodes, remove the lowest leaf, place in a cool spot for a day, and insert after the cut end has dried. Choose sandy land with high, dry terrain and good drainage, deep plow and rake it level to make a seedbed, then mix 60% yellow mud with 40% rice husk ash and spread it on the seedbed for cutting.
April: Continue cutting propagation. For seed propagation, since the seeds are not large, the soil covering should not be too deep; after sowing, keep warm at 20-25°C, and germination can occur about 2 weeks after sowing. After the cuttings have rooted, they should be potted in time. Use a mix of leaf mold, rice husk ash and garden soil in equal parts, plus some bone meal, phosphorus and potassium compound fertilizer. April-June is the full blooming period, and a thin liquid fertilizer can be applied once a week. In late April, they can be moved outdoors for cultivation. When the seedlings are 12-15 cm tall, pinch off the tips to encourage side branches.
May: After the flowers fade, promptly cut off the spent flowers. When cutting, it is best to cut 3-4 cm from the first leaf below the flower stalk, to help reduce nutrient consumption and promote new flower growth. Do a good job with fertilizing, watering and pest and disease control. About 40-50 days after blooming, the seeds mature and should be harvested promptly, dried and stored.
June: As the blooming period ends, pruning back should be carried out to make the plant short, sturdy, full and attractive. Do not water or fertilize for one week after pruning, so that the cut ends shrink and dry, avoiding rot from moisture. By late June, the plant enters a semi-dormant state and should be placed in a cool, shaded spot for cultivation, with watering controlled and fertilizing stopped.
July: Water mainly in the early morning each day, with a supplementary watering in the evening, watering when dry. After rain, drain promptly, and never allow water to accumulate in the pot.
August: Autumn cutting propagation can be carried out. Geraniums grow rapidly and need repotting every year, replacing the soil and pruning heavily, leaving about 10 cm at the base. Also appropriately trim away some of the longer fibrous roots, and appropriately remove excess sprouts from the upper part.
September: Continue cutting. Growth is rapid, so apply a thin liquid fertilizer about once every 10 days, and when fertilizing do not splash it onto the leaves.
October: Blooming begins and continues until June of the following year. Pay attention to placing it in a wind-sheltered, sunny spot to prevent cold air from attacking it. In late October, move it into the greenhouse and pay attention to ventilation.
November: Ensure sufficient sunlight, control watering, fertilize in time, strengthen ventilation, and prevent and control pests and diseases.
December: The room temperature must not be lower than 5°C; do not water unless dry, and promptly remove spent flowers and withered leaves.