How to grow lavender seeds? Detailed sowing method
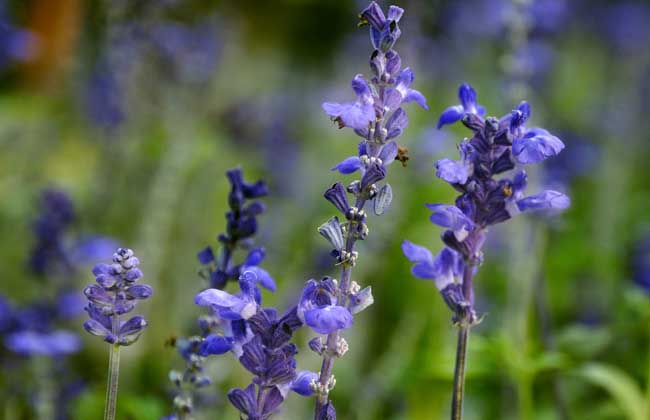
Lavender is a herbaceous plant, and because the whole plant has a fragrant scent, many people like to grow it at home. For ordinary gardening enthusiasts, the sowing method is basically what they use, so how to grow lavender seeds is the first question facing gardening enthusiasts. Let's take a look below at how to grow lavender seeds!
Preparation for growing lavender
1. Container selection: For sowing lavender seeds at home, you can use a relatively short small flower pot, or use other containers instead, such as a yogurt cup. Poke a few small holes in the bottom of the cup with an awl. Disposable plastic cups also work, but because they are transparent, it is best to cover the outside with black paper or put it inside a paper cup (if the plant's roots are exposed to sunlight it will affect growth, and the soil is prone to growing green moss).
2. Growing medium selection: Lavender seeds are relatively small and have a low germination rate, so the soil generally used for sowing needs to be loose, breathable, highly water-retentive, and thoroughly disinfected. You can use a mix of vermiculite, peat, sphagnum moss, perlite, osmund fiber, etc. If conditions allow, you can also mix it yourself.
How to grow lavender seeds
1. Soaking seeds in warm water: Lavender seeds should be soaked in 40°C warm water, which can improve the germination rate of lavender seeds. After the water cools, continue soaking for 24 hours, which makes them easier to sprout.
2. Sowing method: Generally, for slightly larger seeds (such as lavender, sage), you can sow 2-3 seeds per container in spots. After germination, depending on the growth of the seedlings, keep one stronger plant. For very small seeds (such as marjoram), you can broadcast sow: dip your hand in some seeds and gently scatter them on the soil, then thin the seedlings after germination. Keep 1-3 seedlings as appropriate.
3. Covering seeds with soil: The thickness of the soil covering the seeds depends on seed size, generally 2-3 times the diameter of the seed. Very small seeds should be covered with thinner soil. Lavender seeds are larger, so they can be covered with thicker soil. Some seeds are strongly photoblastic and do not need to be covered with soil (such as lemon balm, rosemary).
4. Watering to keep moist: After sowing lavender, water thoroughly. Use a fine spray bottle and do not use force, so as not to wash away the seeds. It is best to use the bottom-watering method: fill a large basin with water to 2/3 full, set the container in the basin, and let water slowly seep in through the bottom holes of the container. The water level in the large basin should not exceed the height of the soil in the container. After sowing, cover the container with plastic wrap, poke a few small holes in the plastic wrap for ventilation, place the container in sunlight, and maintain a temperature of about 20°C. Most seeds can germinate after one week.
5. Germination management: After lavender seeds germinate, you can remove the plastic wrap. For small seeds, you can wait until the seedlings are a little stronger before removing it.
6. Potting at the right time: After lavender seeds germinate and the seedlings grow 4-6 true leaves, they can be potted. At first, use small pots for potting. After the seedlings grow larger, replace them with larger pots as appropriate. When repotting, wait until the soil is somewhat dry before repotting (because after repotting you need to water; if the soil is wet, the moist period lasts too long and the seedlings are prone to poor growth). First add more than half of a nutrient-rich growing mix to the small pot. To avoid damaging the root system, do not shake off the soil near the roots during transplanting. Move it directly into the small pot, then fill the soil around the roots. After transplanting, be sure to water thoroughly and shade it for a few days, then it can be placed in sunlight for care.
Lavender growing management
1. Soil: Lavender seeds are suitable for slightly alkaline or neutral sandy soil with good drainage requirements. You can use a mix of 1/3 perlite, 1/3 vermiculite, and 1/3 peat moss. If growing in open ground, pay attention to soil drainage; you can mound up the soil before planting.
2. Watering: Lavender does not like water to remain around the roots often. After one thorough watering, you should wait until the soil is dry before watering again, aiming for the surface growing medium to be dry and the interior moist, and for the leaves to be slightly wilted. Watering should avoid sunlight, usually in the morning. Water must not splash on the leaves and flowers, otherwise they easily rot and pests and diseases develop. A continuously humid environment will prevent the roots from getting enough air to breathe, leading to poor growth and even sudden death of the whole plant. This is often where lavender cultivation fails.
3. Light: Lavender is a full-sun plant and needs plenty of sunlight and a suitably humid environment. It is better if it can be given a full-sun environment. It can also grow in half sun. In summer, at least 50% of sunlight should be blocked, and ventilation should be increased to lower the ambient temperature. Although growth will be weaker this way, it will not die. In winter, lavender can grow well on flat ground and should be cultivated under full sun.
4. Temperature: Lavender likes warm winters and cool summers. The suitable growth temperature is 15-25°C, and it can grow at 5-30°C. If it is above 38-40°C for a long time, the top stems and leaves turn yellow and wither. If the temperature is too low, below 0°C, it begins dormancy. During dormancy, mature plants can tolerate low temperatures of -20 to -25°C.
5. Fertilizing: For fertilizing, bone meal can be placed in the pot soil as a base fertilizer, usually once every quarter. For seedlings, you can apply Hyponex No. 2 (20-20-20). After the plant matures, apply a fertilizer with higher phosphorus, such as Hyponex No. 3 (20-30-20). Apply dilute fertilizer.
6. Pruning: Lavender flowers have the richest essential oil content. When using them, the flowers or inflorescences are the main part. To make harvesting easier, in the early cultivation stage you may as well trim some small inflorescences flat with large scissors. The newly grown inflorescences will be at a consistent height, which helps with harvesting all at once. Some varieties can reach 90 cm in height. This method is also used to keep the plant short, promote more branching and flowering, and increase the harvest. After flowering, pruning must be done. You can prune the plant to 2/3 of its original size. The plant shape will be more compact and it will help growth. Pruning is generally done in spring; pruning in autumn will affect cold hardiness. Finally, note that when pruning, do not damage the woody part, so as to avoid the plant dying.