How to Grow Camellias and Key Points to Note
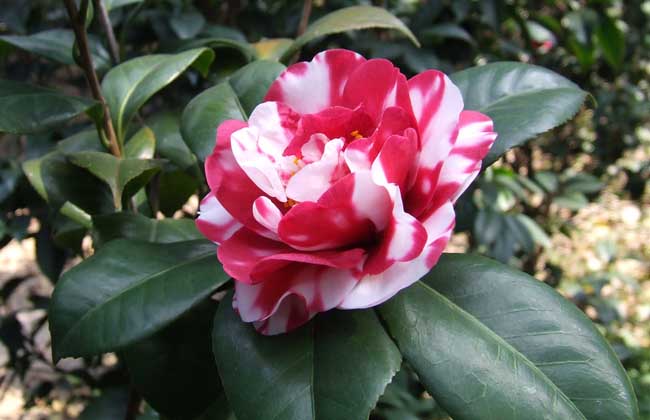
The cultivation history of camellias in China can be traced back to the Shu Han period, when people already placed great importance on the status of the camellia. The camellia was ranked as one of the "seven grades and three ranks," and because of its graceful plant form, thick green and glossy leaves, and brilliantly colorful blooms, it was highly sought after by people. Now let us take a look at how to grow camellias!
Growth Habits of Camellias
Camellias fear wind and love sunlight, and prefer high, airy terrain, good air circulation, warmth and moisture, good drainage, and loose, fertile sandy loam, loess or humus soil, with a pH of 5.5-6.5 being optimal. The suitable temperature is between 20-32°C; growth stops above 29°C, and at 35°C the leaves will show scorching. A certain temperature difference is required, and environmental humidity should be above 70%. Most varieties can tolerate low temperatures of -8°C (natural overwintering; Yunnan camellias are slightly less cold-tolerant). In areas south of the Huai River, they can generally overwinter naturally. They prefer acidic soil and require good air permeability. Usually peat, rotted sawdust, red soil, humus soil, or a mixed substrate of the above can be used for cultivation. In spring, autumn and winter, no shading is needed; in summer, 50% shading can be used.
How to Grow Camellias
1. Placement: Camellias prefer semi-shade and dislike blazing sun, and are suitable for placement in warm, humid, well-ventilated and well-lit spots. When growing camellias, there should be ample light in spring, and in summer attention should be paid to shading to avoid direct sunlight. If a camellia is placed on a balcony, it will often be scorched to death if one is not careful. During storage and transport, camellias must be protected from high temperatures and dry air; otherwise the buds and flowers are prone to dropping, affecting quality.
2. Temperature: Camellias are fond of a warm climate, with an optimal growing temperature between 18-25°C. The temperature at which flowering begins is 2°C. They are slightly cold-tolerant; common varieties can withstand low temperatures of -10°C, and they can also tolerate summer heat, but above 36°C their growth will be inhibited. Cultivating camellias requires a certain temperature difference, and an environmental humidity above 60% is optimal. In areas south of the Huai River, they can generally overwinter naturally, while the Yunnan camellia varieties among them are slightly less cold-tolerant.
3. Watering: Potted camellias should be kept with moist soil, but not waterlogged, so as to avoid alternating dry and wet conditions affecting growth. Generally, in spring, watering can be appropriately increased to promote budding and new shoots; in summer, water in the morning and evening, and it is best to spray the leaves so they are thoroughly wet. Do not water with hot water, and watering should avoid the high temperatures around midday; in autumn, watering should be moderate; in winter, watering is best done around midday, with a spray every two or three days.
4. Fertilizing: Camellias like fertilizer. When potting, be sure to place a layer of base fertilizer in the potting soil, mainly phosphorus and potassium fertilizer. The best fertilizer is a mixture of rotted bone meal, hair, chicken feathers, rice husk ash, poultry manure, and superphosphate. Normally, do not fertilize too much. Generally, 2-3 applications of dilute fertilizer water are given between April and May after flowering, and one application of slightly more concentrated liquid fertilizer in November in autumn. When fertilizing camellias, note that the proportion of phosphorus fertilizer should be slightly higher to promote abundant and vividly colored flowers.
5. Pruning: Camellias grow relatively slowly, so excessive pruning is not advisable. Generally, it is enough to cut off leggy shoots as well as diseased, pest-damaged and weak branches. If there are too many flower buds on each branch, thin them out, keeping only 1-2 and maintaining a certain distance, while the rest should be removed early to avoid consuming too many nutrients. In addition, faded flowers should be promptly removed, which also reduces nutrient consumption, helping the camellia grow robustly and form new flower buds.
6. Repotting: Potted camellias are best repotted once every 1-2 years. The new pot must be one size larger than the old one, which helps the camellia's root system spread and develop. The best time to repot camellias is in April in spring, though it can also be done in autumn. When repotting, combine it with changing the soil, appropriately removing part of the compacted old soil, replacing it with fertile, loose, breathable new potting soil, and first placing a layer of base fertilizer.
Flowering Period Management of Camellias
Generally after "Start of Winter" (Lidong), camellias will bloom one after another. To make camellia flowers large and vividly colored and to enhance their ornamental value, the following technical points must be well handled in flowering period management.
1. Fertilizer and water management: After "Start of Winter," the flower buds of most camellia varieties are already quite swollen. At this time, rotted organic fertilizer mainly composed of phosphorus fertilizer must be applied, watered on once every 7 days until the flowers open. A single camellia plant often has several flower buds, and most varieties cannot bloom all at once. After the first flowers to open have faded, fertilizer still needs to be supplemented so that the later flowers bloom well and fully. However, after the flowers have opened, no more fertilizer should be applied; otherwise, the plant will suffer fertilizer damage and die. During the flowering period, camellias have a relatively large water demand. As long as the potting soil is dry, water thoroughly at midday, and never let the plant lack water, which would cause the flowers to fade early.
2. Move them as little as possible: Camellias are very delicate during the flowering period and should be moved as little as possible, especially when moving them from indoors to outdoors. If they must be moved from indoors to outdoors, move those that have finished flowering or are currently blooming, and cover them with nylon bags tied shut to prevent cold wind from causing freeze damage. Unopened flower buds have stronger cold resistance and do not need to be bagged.
3. Pay attention to ventilation: Camellias should not be placed in an unventilated room for long periods. Windows should be opened daily for air exchange to facilitate normal opening of the flower buds.
4. Supplementary light fertilizing: For larger potted camellia varieties, such as Xiaotaohong and Jinjiang Peony, if many flowers open at the same time, control the flowering period to no more than 10 days, and promptly apply light fertilizer after flowering, paying attention to careful care so as to help them recover their "vitality."
Pest and Disease Control of Camellias
1. Anthracnose
[Symptoms] Anthracnose is one of the common diseases of camellias. It generally occurs from June to July on the leaves of the current year's seedlings, with lesions mostly starting from the leaf tip or leaf margin. At the initial stage, water-soaked greenish-brown lesions appear on the edges of the basal leaves, then expand into irregular large patches arranged in streaks with a layer of small black spots spreading over the entire leaf, and finally cause the leaves to drop.
[Control methods] ① Strengthen cultivation management, pay attention to applying organic fertilizer and phosphorus-potassium fertilizer to improve the plant's disease resistance, and promptly remove and burn diseased leaves. ② After the spring shoots emerge, spray with 1% Bordeaux mixture to prevent pathogen infection. ③ At the early stage of disease, spray with 65% zineb wettable powder plus a 600-fold water solution; or spray with 70% thiophanate-methyl wettable powder at 1000-1500-fold dilution.
2. Sooty mold
[Symptoms] Sooty mold can damage both branches and leaves, and is more obvious on the leaves. At the early stage of infection, small sooty mold spots appear on the diseased parts, then gradually expand and connect into patches, covering most of the plant with a sooty mold layer. After the pathogen parasitizes, it not only absorbs nutrients from the flowers but also seriously affects the plant's photosynthesis and respiration, causing the plant to drop a large number of leaves.
[Control methods] ① Do not plant too densely; keep ventilation and light penetration around the plants good. ② Do not let humidity become too high; control the conditions for pathogen growth. ③ During the disease period, spray with 0.3-degree Baume lime sulfur mixture, once every 10-15 days, for a total of 3 sprays. ④ You can also spray with 50% thiophanate wettable powder at 500-fold dilution, once every 7-10 days, for 3 sprays, which can achieve a therapeutic effect.
3. Root-knot nematode disease
[Symptoms] Root-knot nematode disease damages the roots of camellias, turning the roots dark brown, with root nodules rotting and splitting. The main root swells, new fibrous roots do not grow, and the aboveground plant stops growing, gradually leading to the death of the entire plant.
[Control methods] ① Before potting, disinfect the potting soil to kill the pathogenic nematodes. ② After discovering the disease, immediately use sterilized potting soil as the potting medium and repot. ③ Before repotting, the potting soil can be exposed to the blazing sun for 2-3 days before use. ④ A solution of dibromochloropropane plus 100-150 times water can be used to spray and disinfect the soil, but soil treated with this chemical must be piled for 20 days before being used for potting. Otherwise, it will damage the root system.
4. Cloud-pattern leaf blight
[Symptoms] Cloud-pattern leaf blight damages young branches, leaves and flower buds. Leaf lesions mostly occur at the leaf tip and leaf margin. At the early stage, the lesions are semicircular or irregular and yellow-green, then gradually turn brown, and at the later stage the lesions become grayish-white with dark brown edges. In the later stage, diseased leaves are brittle and fall off very easily; lesions on the shoots are strip-shaped and dark brown, slightly sunken, and in severe cases the branches wither and die. The disease period is from May to August.
[Control methods] In early summer in June, when temperatures rise sharply and blight spots appear on the leaves, spray for protection. In August, when rainfall exceeds 40 mm and the average relative humidity is above 80%, spray immediately. You can choose 75% chlorothalonil at 800-fold dilution, 50% carbendazim at 1000-fold dilution, or 50% benomyl or 70% thiophanate-methyl at 1500-fold dilution for control. After spraying carbendazim, benomyl or thiophanate-methyl, tea can only be picked after an interval of 10 days; the safety interval for chlorothalonil is 14 days. Non-picking tea gardens can also be sprayed with 0.7% half-strength lime Bordeaux mixture.