A detailed guide to Clivia propagation methods, easy enough for beginners to get started
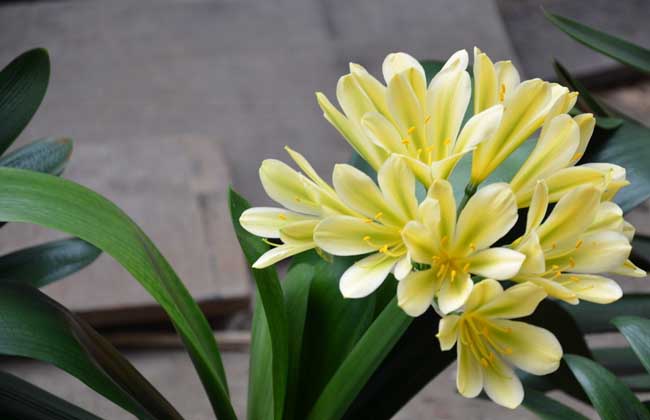
Clivia (Clivia miniata) originates from the subtropical mountain forests of southern Africa and is a perennial evergreen herbaceous plant. It is commonly propagated by seed sowing and division, and can also be propagated from old roots. Below, the editor introduces each of these Clivia propagation methods!
Clivia seed sowing propagation method
Clivia prefers slightly acidic soil, with a pH of 6-6.5 being ideal. There are no strict time requirements for propagating Clivia by sowing; it can be sown in spring, autumn and winter, but temperature is an important factor. It is best to sow at 20-25°C, which meets the temperature requirements for germinating the embryo.
1. Propagation substrate: Use wood shavings, or sawdust, or fine sand; some also use leaf mold, but wood shavings or sawdust are best. Then find a plastic basket, or a breathable unglazed clay pot can also be used. Taking wood shavings as the substrate example, first disinfect them, then soak the disinfected wood shavings thoroughly with water, put them in the basket, press down a little and level them off.
2. Seed treatment: Put the seeds in warm water, about 20-30 degrees, and soak for 30 minutes, or one hour, then place the seeds one by one with the small eye facing down, spaced apart and in order. After arranging them, cover the seeds with 2-3 cm of wood shavings and gently press flat and neat. Once the above steps are done, spray with water until thoroughly wet, and place the basket in a breathable, ventilated place and it is done.
3. Daily management: Propagation should follow the principles of ventilation, breathability and maintaining moisture. If it is your first time propagating, you will generally open the wood shavings to look at the seeds, so be careful to wash your hands clean, or use a clean small wooden stick to turn them over and check. The substrate must not be contaminated by anything oily. If there is oil, the seeds will become infected.
4. Moisture retention: Normally, judge by whether the wood shavings are moist; there is no need to water every day. Too much water will make the seeds take on too much moisture and rot. If it is too dry and you water again only then, there is no moisture, and if the seeds are too dry they cannot sprout.
5. Heat retention: Generally between 15-30 degrees, do not place the seeds in a place above 10 degrees; in the north it is best to keep it above 10 degrees and below 32 degrees. If it is generally too cold, use a lamp to keep it warm; orchid growers in the south can move it to a sunny spot on the balcony at noon to raise the temperature.
6. Water quality: Tap water needs to be left to sit for a day before watering; do not use tap water directly, because tap water contains chlorine, which affects seed germination.
7. Germination: Normally, with good care, they will sprout in half a month, and some even earlier. After germination, it is best not to turn them over and check all day, because after germination the sprouts will hold the wood shavings into a ball, which benefits growth.
After about forty-five days, the germinated seeds become longer and longer, the roots grow downward, and a tender green small sheath leaf emerges beside the seed, which will naturally grow upward. For daily care, just water well.
Clivia division propagation method
Asexual propagation of flowers includes cuttings, division, layering, grafting and other methods, but the asexual propagation of Clivia generally only uses division. This method is even more common for the nodding Clivia (Clivia nobilis). To propagate by division, first do several preparatory tasks:
1. Preparatory work for division propagation
① For home pot cultivation, prepare flower pots. Unglazed clay pots are best; do not buy porcelain or ceramic ones just for the sake of a pretty pot surface, because they have poor breathability and are not good for the plant's development and growth.
② Prepare the growing medium soil, and it is best to disinfect it. If using leaf mold mixed with fine sand, the leaf mold should be sprayed and disinfected with a 1000-2000 times water solution of potassium permanganate. Fine river sand should also be scalded and disinfected with boiling water to avoid the seedlings being infected by pathogens and rotting.
③ Prepare a small amount of charcoal powder to apply to the wounds to absorb moisture and prevent rot.
④ Sharpen the cutting knife, and finally give it several dozen quick dry strokes (without adding water) on the whetstone, so that the blade becomes very hot, in order to kill pathogens.
2. Operation method for division propagation
1. First take the mother Clivia plant out of the pot, remove the old soil, and find the axillary buds that can be divided. If the offset grows on the outer edge of the mother plant and the plant body is relatively small, you can hold the bulb part with one hand and pinch the base of the offset with the other hand, tear and pry it a little, and the offset can be broken away from the mother plant. If the offset is thick and strong and not easy to break off, you should use the prepared sharp knife to cut it off. Never force it off, so as not to damage the young plant. After the offset is cut off, immediately apply dry charcoal powder to the wound to absorb the flowing sap and prevent rot. Next, pot the offset for planting.
2. The planting depth should be such that the false bulb at the base of the offset is buried. The part near the seedling should be made slightly higher, and then cover with disinfected sandy soil. After planting, water thoroughly once immediately, and when the wound heals after 2 weeks, add another layer of growing soil. Generally, new roots grow in 1-2 months, and it blooms in 1-2 years. Clivia propagated by division has relatively stable heredity and can maintain the various characteristics of the original species.
Clivia old root propagation method
The fleshy roots of Clivia have a strong regenerative capacity. Based on this characteristic, for those Clivia plants that are older, you can break off the old roots when repotting and changing soil in spring, and after treatment force them to regenerate new roots, so that within the same year they can become a new Clivia plant. The specific method is as follows:
1. Choose old Clivia roots of moderate thickness, with a diameter of 1.2 cm to 1.5 cm being good. If too thin, the seedlings produced grow slowly; if too short, it affects the plant's growth. Insert a pin into the middle of the root, or use a blade to cut a 0.3 cm to 0.5 cm slit at the part where the old root is attached, and apply B12 solution to the wound to stimulate growth and promote sprouting.
2. Bury the treated old root in disinfected fine river sand or leaf mold soil, with a depth of 0.5 cm being ideal. Place it in an environment of 20°C to 25°C. After 3 months, at the cut or where the pin was inserted, a green spherical small nodule forms. After about 25 more days of care, the spherical small nodule gradually sprouts new buds and becomes a new Clivia plant.