How to grow hydrangeas? Learn the correct care methods
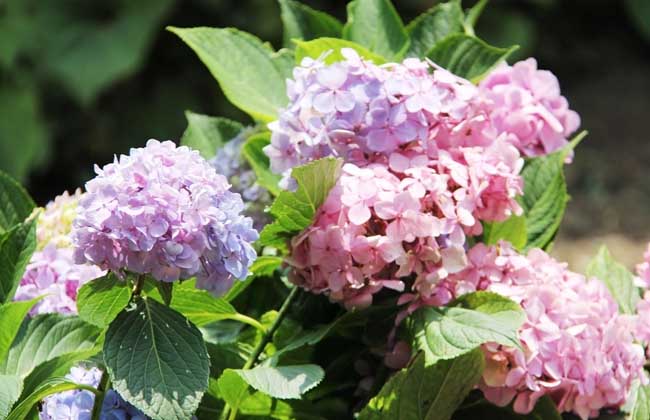
Hydrangeas are shaped like a ball of flowers. Hydrangeas are afraid of drought, waterlogging, cold, and heat; they love fertilizer and moisture, making them a very "delicate flower." Many people may be quite fond of this flower, but growing hydrangeas also requires a lot of skill. Let's take a look below at how to grow hydrangeas!
How to grow hydrangeas?
1. Temperature and light must be moderate: warm them in winter and cool and shade them in summer. To grow hydrangeas well, you must pay attention to the temperature and light of the surrounding environment. Hydrangeas can only grow normally between 15 and 27 degrees, so in winter try to move them indoors to a bright, sunny spot, and the lowest room temperature must not fall below 5 degrees, otherwise the hydrangea will freeze to death or stop growing. In summer, focus on cooling and shading to prevent the leaves from being scorched; overly strong sunlight will only cause the leaves to change color or even drop off.
2. Watering and fertilizing must be moderate: water and fertilize more during bud formation, water less and do not fertilize during dormancy. Normally when watering hydrangeas, you only need to keep the soil surface moist. In summer, you can spray water to lower the temperature around the leaves. In winter, water as little as possible, keeping the soil half moist and half dry. During bud formation, water more, at least 2 times a day, and fertilizing must also be done properly. During bud formation, give the hydrangea a light fertilizer every ten days. You can add a little ferrous sulfate to the light fertilizer to make alum fertilizer water, or spray some liquid fertilizer on the leaves every half month. This can encourage the buds to bloom. During dormancy, do not fertilize anymore; let the hydrangea get plenty of rest.
3. Be ruthless with weeding and pruning: weed thoroughly, and when pruning, pinch out the growing tips and remove diseased and dead branches. The growing environment of hydrangeas must be kept clean at all times. Weeds that compete for nutrients should be removed promptly as soon as they appear; absolutely do not show mercy or leave any stragglers. Generally speaking, to make the plant shape more attractive, when there are too many new leaves it is necessary to pinch out the growing tips. Also pay attention to pruning some leggy branches and overly dense branches. In addition, after the flowers have bloomed, diseased branches and withered leaves are also our main pruning targets. These miscellaneous branches must be removed promptly to prevent them from competing with the main branches for nutrients.
The growing environment for hydrangeas
1. Temperature: The suitable growing temperature for hydrangeas is 18-28°C, and the winter temperature should not be lower than 5°C. Flower bud differentiation requires 6-8 weeks at 5-7°C. A temperature of 20°C can promote flowering. After flowers appear, maintaining 16°C can extend the viewing period. However, high temperatures make the flowers fade quickly.
2. Humidity: The potting soil should remain moist, but watering should not be excessive. Especially in the rainy season, pay attention to drainage to prevent root rot caused by waterlogging. In winter, indoor potted plants are better kept slightly dry. If too dry or too wet, the leaves are prone to rot.
3. Light: Hydrangeas are short-day plants. With more than 10 hours of dark treatment per day, flower buds form in about 45-50 days. During normal cultivation, avoid direct sunlight; 60%-70% shading is ideal.
4. Soil: A loose, fertile, and well-drained sandy loam is best. However, changes in soil pH cause great changes in hydrangea flower color. To deepen the blue color, apply aluminum sulfate during the flower bud formation stage. To maintain pink, apply lime to the soil.
Repotting and pruning hydrangeas
1. Repotting and changing soil: For potted hydrangeas, generally repot and change the soil once a year. Repotting and changing soil is best done in early March. The new soil should be prepared with a ratio of 4 parts leaf mold, 4 parts garden soil, and 2 parts sand, then add an appropriate amount of decomposed cake fertilizer as a base fertilizer. When repotting, prune the plant's root system, cutting off rotten roots, decayed roots, and overly long root fibers. After moving the plant into the new pot, press the soil firmly, water thoroughly, place it in a shaded place for about 10 days, then move it outdoors for normal management.
2. Pruning and shaping: To make the crown of a potted hydrangea beautiful and produce more flowers, the plant must be pruned. Hydrangeas grow vigorously and tolerate pruning. Generally, after the seedlings survive and grow to 10-15 cm tall, pinch out the growing tips so that the lower axillary buds can sprout. Then select 4 well-sprouted new branches in the middle and upper parts, and remove all the lower axillary buds. When the new branches grow to 8-10 cm, pinch out the growing tips a second time. Hydrangeas generally bloom on two-year-old strong branches. After flowering, the old branches should be cut short, keeping only 2-3 buds, to limit the plant from growing too tall and to encourage new shoots. After autumn, cut off the tops of the new shoots to stop the branches from growing, which helps them overwinter. After such pruning, the plant's shape becomes more graceful, greatly enhancing its ornamental value.
Pest and disease control for hydrangeas
1. Leaf spot disease: Mainly harms the leaves. The spots are round to polygonal, brown or dark gray, with purple-brown or nearly blackish-brown edges. In the early stage of the disease, spray 65% zineb wettable powder at 500 times dilution or Bordeaux mixture (1:1:200), once every 7 days, for 2-3 consecutive treatments.
2. Rust disease: Mainly harms the leaves. Larger pale yellow to rust-brown spore masses appear on the leaf surface, and the diseased leaves dry up and break apart. During the disease season, spray 15% triadimefon wettable powder at 800 times dilution.
3. Damping-off: Mainly harms the leaves and stems. Water-soaked yellow-brown spots appear on the leaves near the ground and spread to the stems, causing the leaves to dry up and the stems to turn black and rot. In the early stage of the disease, spray 75% chlorothalonil wettable powder at 800 times dilution, or 50% thiram wettable powder at 500 times dilution.
4. Powdery mildew: Mainly harms the leaves, and in severe cases can infect the stems. A layer of light gray mold appears on the leaf surface, later gradually turning light brown. During the disease period, spray 15% triadimefon wettable powder at 1000 times dilution, or 70% thiophanate-methyl wettable powder at 1000 times dilution, once every 7 days, for 2-3 consecutive sprays.
5. Scale insects: Mainly harm young tender stems and leaves, causing the leaves to turn yellow and the branches to dry up. When only a few occur, gently brush them off with a soft brush, then rinse clean with water. When using chemical control, it is best to spray 80% dichlorvos at 1000 times dilution or 50% fenitrothion emulsifiable concentrate at 1000 times dilution during the nymph hatching period.