How Do Cacti Reproduce? A Detailed Guide to Common Propagation Methods
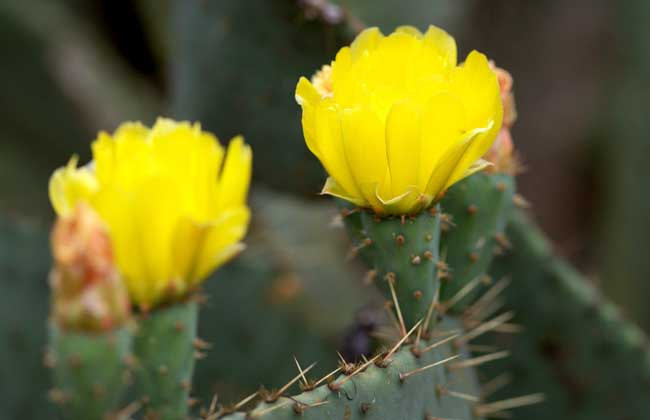
Cacti and succulents originated in the tropical regions of North and South America, the tropical mainland of Asia, and some nearby islands, with some growing in forests. The four commonly used propagation methods are cuttings propagation, division propagation, seed propagation, and grafting propagation. Let's take a look below!
Grafting Propagation of Cacti
Grafting is a horticultural technique commonly used on cacti. Because some cacti have very fragile root systems, after long-term cultivation the roots gradually lose their original function and disappear, causing the plant to lose its vitality as well. Grafting is the miracle cure for saving these cacti. In addition, uses such as accelerating a cactus's growth rate or keeping a plant with root rot growing after the affected part is removed can all be achieved through grafting.
When grafting, the chosen rootstock - the triangular column cactus (Trichocereus spachianus) - is one type of such cactus. The method is to cut off the growth point of the triangular column and make a slanted cut on the ridges, then place the cactus whose root system has been removed in the center of the rootstock, and secure the position with string or a weight. After 1-2 weeks, the string and weight can be removed.
Division Propagation of Cacti
Many cacti can produce offsets. For example, globe-shaped cacti grow small offsets on the stem, while prickly pear cacti (Opuntia) or segmented cacti all produce offsets. For these varieties, a knife must be used to cut off the growth point of the cactus. After cultivating for a period of time, many small offsets will grow near the growth point. When the offsets grow to an appropriate size, they can be cut off for cuttings propagation.
Seed Propagation of Cacti
1. Artificial pollination: Among cacti and succulents, very few species are self-pollinating. Most are cross-pollinated and require artificial pollination to set seed, and even more species require pollination between different plants of the same species. Therefore, at least two plants of the same species must be prepared. Pollination must be carried out when the stamen anthers have split open, the pollen has matured, and the pistil stigma is fully secreting sticky fluid. However, different species do not necessarily mature their stamens and pistils at the same time. If the mother plant blooms later than the father plant, the father plant can first be placed in a cool place to delay its blooming, or the father plant's pollen can be collected and stored in a cool, dry place. When the mother plant's pistil matures, take out the pollen for pollination. For most species, the pollination success rate is highest 1-2 hours after noon on the second day of blooming. Use a clean brush to dip up pollen and lightly apply it to the mother plant's stigma, or use fine tweezers to pick up pollen and place it on the stigma. If the weather is extremely hot, the humidity is too high, or there is water on the flowers, the fertilization rate will not be high.
2. Removing petals: After pollination, if the ovary gradually swells, it indicates successful pollination. At this point, the withered petals can be cut off to prevent mold and rot. The plant should be protected from rain and water washing, and fertilizer and water management should be strengthened.
3. Timely seed collection: Cactus fruits generally mature in 50-60 days. Some species produce berries, which are easily pecked by birds and other small animals when ripe, so netting should be used to protect the fruit. Some fruits have skins that split easily, so timely harvesting must be noted. Harvested berries should have the flesh removed, the seeds washed clean, and then the water drained. The obtained seeds should be placed in a paper bag, stored in a dry, cool place, and labeled with the seed name and harvest date.
4. Disinfection and seed soaking: The soil used for sowing should be disinfected river sand or mixed sand and leaf mold, which must be disinfected by frying in a pan or steaming, and cannot be disinfected with chemicals. Before sowing, moisten the potting soil by the immersion method, then soak the seeds in 1% formalin or 2.5% copper sulfate solution for 15 minutes, remove and rinse before sowing. Small seeds can be mixed with sand and evenly broadcast on the soil surface without covering with soil. Large seeds can be sown in holes at a spacing of 5 mm × 5 mm.
5. Sowing at the right time: The best time for seed propagation of cacti is spring and autumn, when the temperature difference between day and night is large. A large temperature difference not only increases the germination rate but also accelerates seedling growth. Sowing should be avoided on rainy days, and sunny weather should be chosen. In a greenhouse, seed propagation can be carried out in all four seasons.
6. Careful management after sowing: After sowing, a glass pane should be placed over the flower pot, and a gap must be exposed at regular times each day for ventilation. Generally, cactus species can germinate within 15 days. After germination, carefully observe the dryness and moisture inside the pot and keep the soil surface somewhat moist. Seedlings must have their light controlled; white paper with holes punched in it can be placed over the glass. As the seedlings grow, replace the white paper so that the holes correspondingly become larger and more numerous, to allow light through. During the seedling stage, cactus management should strictly control temperature, humidity, water, light, and ventilation. In spring and autumn, the peak growing seasons, maintain a relatively large day-night temperature difference and give the seedlings light at appropriate times and in appropriate amounts. In summer, strengthen ventilation and lower the temperature. In winter, place them in a warm spot indoors and appropriately increase light, but not excessively. Watering should mainly use the immersion method; the pot surface just needs to be moist.
Cuttings Propagation of Cacti
1. Cutting time: Under normal conditions, cutting in May to June is most suitable. Where a greenhouse is available, it can be done year-round.
2. Preparation of the substrate: Cacti are drought-tolerant and tolerant of poor soil, and dislike waterlogging. Therefore, the substrate must have good air permeability, good drainage, and the ability to retain moisture, with vermiculite and perlite being best. It can also be prepared with 4 parts coarse river sand, 3 parts loam, 2 parts leaf mold, and 1 part rice husk ash.
3. Cutting the cuttings: From mother plants with strong growth and no pests or diseases, select robust, mature stem segments as cuttings. Use a rust-free scraper to cut the cuttings from the mother plant. Before and after each cut, wipe and disinfect the tool with alcohol.
4. Drying the cuttings: Freshly cut cuttings should not be planted immediately. First place them indoors in relatively dry air to dry for 5 to 7 days, and only plant them after the cut surface has dried and the stem flesh has begun to shrink.
5. Hormone soaking: For varieties that are difficult to root, soaking the base of the cuttings in plant growth hormone can greatly increase the survival rate. The method is: soak the base of the cuttings in a 50 to 100 ppm GGR (plant growth regulator) solution for half an hour to one hour, or soak the base of the cuttings in a 200 ml/L naphthalene acetic acid solution for 4 hours. For most other varieties that root easily, hormone treatment may be omitted when taking cuttings.
6. Planting the cuttings: Bury the base of the cutting shallowly into the substrate; never bury it too deep, as this causes rot. At this point the cutting is difficult to stand upright (because it has softened after drying), so it can be laid flat on the substrate; it can also be supported with a small wooden stick, then use both hands to gently press the soil on both sides of the cutting so that it fits closely with the soil.
7. Management after planting
① Water management: When planting cuttings, the substrate should be moist; if too dry, rooting is difficult, so pour a little water from the edge of the pot. But the substrate must not be too wet, otherwise the cuttings easily rot. Before rooting, keep the potting soil moist at all times. To reduce water evaporation, a plastic bag can be used to cover the pot. After about one month the cuttings will root, and at that point the plastic bag should be removed immediately.
② Light management: Before rooting, protect from direct sunlight and place in a semi-shaded spot for care. After rooting, routine management of water and light can be carried out.