Detailed Explanation of Key Points for Bag-Cultivated Oyster Mushroom Growing Techniques
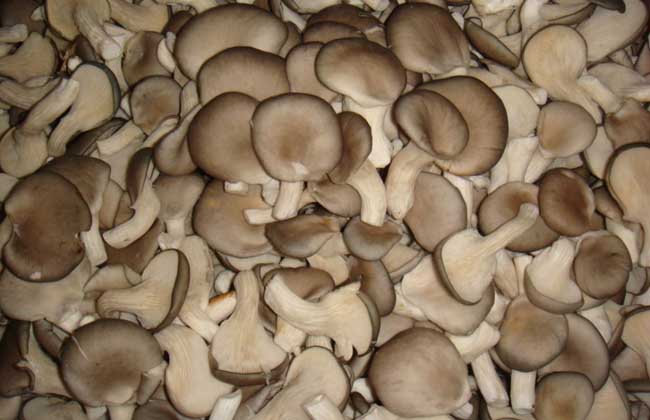
Oyster mushroom is a widely cultivated edible fungus. In biological taxonomy, it belongs to the phylum Basidiomycota, class Agaricomycetes, order Agaricales, family Pleurotaceae, genus Pleurotus. It is a tetrapolar heterothallic edible fungus, and its life cycle is similar to that of many higher basidiomycetes. The mature fruiting body produces basidiospores and is rich in nutrients. Let's take a look at bag-cultivated oyster mushroom growing techniques!
Advantages of Bag Cultivation
Bag cultivation of oyster mushrooms helps control the harm of contaminant microorganisms and pests, has a high success rate, makes full use of space, and occupies a small area (a 15-18 sq m cultivation room can hold 1500-2000 bags). Moreover, the production cycle is shortened; by using stacked incubation to raise the substrate temperature, incubation is accelerated and the mycelial growth period is shortened. At the same time, it is convenient for mobile management, makes full use of the site, helps control temperature, maintains humidity, and produces uniform fruiting, good mushroom shape, and stable yield.
Substrate Formulas
There are many sources of oyster mushroom substrate, such as cottonseed hulls, sawdust, rice straw, tree leaves, and the stems of other crops and vegetables, all of which can be used to cultivate oyster mushrooms. Usually, cottonseed hulls and rice straw are the main substrates for cultivating oyster mushrooms. (1) Formula 1: cottonseed hulls 98%, lime powder 1%, gypsum powder 1%, pH 6.5. (2) Formula 2: cottonseed hulls 60%, rice straw powder 33%, lime powder 1%, gypsum powder 1%, pH 6.5. (3) Formula 3: rice straw powder 80%, corn flour or rice bran 18%, superphosphate 1%, lime powder 1%, pH 6.5.
Mixing Method
After weighing the raw materials and chemicals according to the formula, place them in a clean room or on open ground, add water at a dry material to water ratio of 1:1.3-1.8, and mix thoroughly with a rake or shovel. After mixing, squeeze the substrate tightly in your hand; if water seeps out between your fingers but does not drip, the moisture content is suitable.
Bagging and Sterilization
Use low-pressure polyethylene tube film 22-25 cm wide for the plastic bags, cut into plastic tubes about 40-50 cm long, fill the prepared substrate into the plastic tubes, press tightly, put plastic neck rings or fiber belt rings on both ends, fold the mouth of the plastic tube down, tuck it inward along the outer side of the ring from the side near the center, then cover the ring opening with kraft paper or newspaper and secure it with a rubber band. Place the substrate bags into a large earth steamer for steaming and disinfection, placing multiple bags together, and after steam rises (100°C), maintain for 8-10 hours.
Cooling and Inoculation
Place the high-temperature-sterilized substrate bags in a clean, dry, ventilated place free of dust and insects to cool. Once the substrate has cooled to about 28°C, inoculation can begin. When inoculating, use tweezers to pick up the spawn from the bottle and directly insert it into the bag, placing 3 pieces of spawn about the size of a broad bean into each opening. Tools such as the tweezers used for inoculation must be disinfected in advance; they can be washed with soapy water, wiped with alcohol, or wiped with potassium permanganate solution. Inoculation should be done quickly, and do not talk while inoculating. The spawn should be selected from healthy, short-aged, contamination-free good spawn, preventing contamination by foreign microorganisms at every step.
Mycelial Culture
After the plastic bags are inoculated, place the substrate bags in a clean, ventilated room for stacked incubation. In winter and early spring, they can be stacked in large piles in double rows, with a pile height of about 1 m, covered with insulation materials such as plastic film and straw curtains. In autumn and late spring, they can only be arranged in single rows, preferably three to four layers. During the cultivation process, pay attention to the substrate temperature at all times. If the temperature exceeds 30°C, turn the pile promptly to dissipate heat, swapping the positions of the upper and lower bags with the middle bags, to prevent excessively high substrate temperature from damaging the mycelium and to promote uniform mycelial growth. After 20 to 30 days, the mycelium will have fully colonized the bags.
Growth Management
After the mycelium has fully colonized the bags, promptly move them into the fruiting room and arrange the fungus bags in single rows, preferably 5-7 layers, with a 70-80 cm wide gap between rows for workers to operate. At this time, the fruiting room should maintain sufficient air and appropriate humidity and temperature to promote the formation and growth of fruiting bodies. Ventilate for 1-2 hours daily to keep the indoor air fresh, and increase air humidity by watering the floor and spraying the bags and the air. After the fruiting bodies form and grow out of the bag openings, spray the mushrooms 1-2 times daily; spray more on sunny days and less or not at all on rainy days.
Timely Harvesting
Oyster mushrooms are for fresh consumption; timely harvesting not only yields soft, delicious mushrooms but also higher yield. When the cap color changes from dark to light and the depressed part has white fluffy material, it is the suitable harvest time, or harvest when the mushrooms reach eight-tenths maturity. After harvesting, promptly clean the fruiting surface, remove dead and rotten mushrooms in time, and after the mycelium rests for a period, the next batch of mushrooms can grow. Generally, 3-4 harvests can be obtained.