How to build a greenhouse? Master these construction techniques
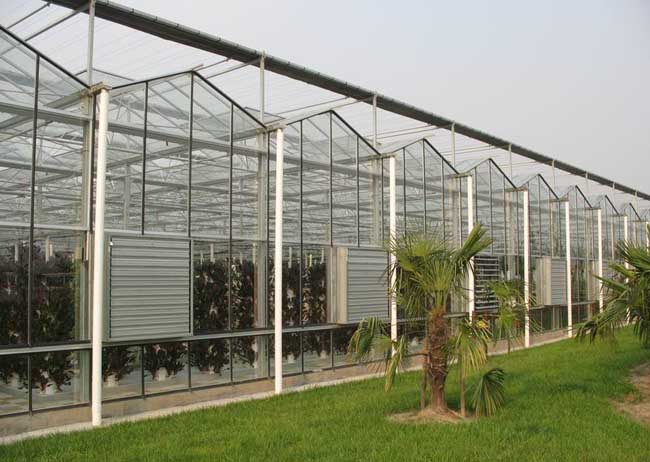
A greenhouse is also called a hothouse, such as glass greenhouses, plastic greenhouses, etc. The greenhouse structure should be sealed and insulated, but it should also be easy to ventilate and cool. Modern greenhouses have equipment for controlling temperature, humidity, light and other conditions, using computers to automatically control and create the optimal environmental conditions needed by plants. Below, the editor of Qiannong Network introduces the construction techniques for greenhouses!
1. Leveling the land and setting out lines: According to the designed solar greenhouse floor plan, measure and determine the azimuth angle, determine the four corners of the greenhouse, drive concealed stakes at the four corners of the greenhouse, and then determine the positions of the gable wall and the back wall.
2. Building walls: The soil used for building earth walls can be soil from the outer side of the greenhouse back wall, or soil from below the cultivation layer at the front of the greenhouse. If using soil from the front of the greenhouse, the cultivation layer (about 25 cm thick) can be dug out and placed to one side, water the subsoil layer below, and after one day, dig out the subsoil to make the earth wall. First set up formwork according to the thickness of the earth wall, fill in the freshly dug wet soil, and compact it with a soil rammer or electric rammer, about 20 cm per layer. After compacting one layer, make the second layer until the required height is reached. The gable wall and back wall should be built together, not in sections; only in this way will it be sturdy. If the soil viscosity is insufficient, wheat straw can be mixed in. In some areas the soil viscosity is very low, and the compaction method cannot be used to build walls. In this case, first mix a certain amount of wheat straw and mud into the soil, make adobe bricks, and after the adobe bricks dry, build the adobe wall. When laying the wall, the gaps between adobe bricks must be tightly filled with straw mud, and both the inside and outside of the wall must be coated with straw mud. When constructing a brick wall, the foundation must first be compacted before the wall can be laid. During construction, the mortar must be full, the brick joints pointed up well, and the plastered surface smoothed well. Both the inside and outside of the wall must be plastered to avoid air leakage. The hollow spaces between brick wall layers should not be too large or too small. Generally, the width of the hollow space is controlled between 5-8 cm. The hollow space should not be left all the way to the top; every 3-4 m, bricks should be used to connect each layer to improve the wall's firmness. Hollow walls can be filled with slag, perlite, or wheat straw as filler, or nothing can be added and only air used for insulation. Hollow walls without filler must be made without cracks. When capping the brick wall, it is best to cap it with mud and chaff for 30 cm, so that the back wall and the rear roof are closely connected and insulation performance is improved.
3. Burying posts and erecting roof frames: According to the drawings, determine the position of each post and mark them with lime. Dig pits 30-40 cm deep, use stones as post bases to prevent the posts from sinking, then install the dug beams on the rear row of posts. The beam heads rest on the posts, and the beam tails rest on the back wall or on the rear auxiliary posts. Place 3-4 purlins on the beams. The ridge purlin is connected at the beams, forming a straight line, and the other purlins are placed in a staggered manner. To prevent the purlins from sliding down, a small wooden block can be nailed onto the beam below the purlin to block the purlin wood. Some greenhouses use only posts to support the ridge purlin.
4. Covering the rear roof: Cover a layer of waste plastic film on the purlins or rafters, place bundles of corn stalks on the film, with their placement direction perpendicular to the purlins or rafters. Then spread wheat straw or rice straw on the corn stalks, then lay another layer of plastic film on top, and coat straw mud on it. The rear roof, made of straw and wheat straw wrapped in two layers of plastic film, forms a covering like a quilt, and its insulation performance is greatly improved compared with ordinary rear roofs without plastic film. After the rear roof is covered, use straw mud to seal tightly the joint between the inner side of the rear roof and the greenhouse back wall.
5. Digging cold-proof trenches: Dig a cold-proof trench 20 cm wide and 40 cm deep along the front edge of the greenhouse.
6. Burying ground anchors and fixing the galvanized wire for the rear roof film-pressing line: Lay flat an 8-gauge galvanized wire as long as the greenhouse at the bottom of the cold-proof trench, with ground anchors threaded on it. The ground anchors are made of 8-gauge galvanized wire with both ends made into iron rings. According to the spacing of the arch rods to be buried, every 3 m, tie a brick or wooden stick to the galvanized wire and place it between these fixed objects. On the outer side of the greenhouse back wall, dig a trench and bury ground anchors in the same way, except that the spacing of the ground anchors can be increased to 2-3 m. After burying, fill the soil and tamp it firm, with the upper ring of the iron anchor exposed above the ground. On the rear roof of the greenhouse, stretch an 8-gauge galvanized wire, with both ends buried underground outside the greenhouse gable wall. When burying, tie a heavy object to the head. Use galvanized wire or nylon rope to fix the galvanized wire, with one end tied to the galvanized wire and the other end tied to the iron anchor buried outside the back wall.
7. Building the front roof: After the post positions are buried, adjust them front and back so that the rows and columns of posts are aligned. Tie 4 m long bamboo strips together in pairs; the length should be appropriate. Insert one end into the cold-proof trench, and press the lower part against the south side of the cold-proof trench with bricks. The angle should make the arch rod vertical to the ground or slightly inclined toward the south when erected. Tie a crossbeam on the posts supporting the front roof, with the crossbeam 20-30 cm from the top of each row of posts. On the crossbeam, set up small hanging posts. Both the upper and lower ends of the small hanging posts must be drilled, and 8-gauge galvanized wire is passed through the holes respectively to bend the arch rod. One end of the small hanging post is tightly tied to the arch rod, and one end is supported on the crossbeam and tied tightly. The upper end of the arch rod can be inserted above the ridge purlin. Then, continuously adjust the small hanging posts so that the front roof is at a consistent height at the same position.
8. Covering the film: The greenhouse film is two or three sheets. When using two sheets, their widths are 3 m and 5 m respectively. When using three sheets, their widths are 2 m, 4 m, and 2 m respectively. First roll back one side of the 3 m or 2 m wide film, bond it with adhesive or iron it with an electric iron into a 5-6 cm wide tube, insert a nylon rope, fix the 3 m wide one at 2.5 m above the ground, and fix the 2 m wide one at 1.5 m above the ground. Roll the film into rolls first, and while covering, pull it tight while filling soil into the cold-proof trench. The nylon rope should be pulled tight and, together with the film, buried underground at the greenhouse gable wall. The upper sheet or sheets of film are likewise rolled into rolls first, with one end buried underground near the gable wall, and then spread out toward the other end, and after reaching the end, buried underground near the gable wall. There are two ways to fix the end of the film near the rear roof. One is to directly fix it on the ridge purlin with bamboo strips and iron nails; the other method is to fix it on the ridge purlin with bamboo strips and iron nails, then fold it back and fasten it onto the rear roof. The width that can be fastened onto the rear roof is about 0.5-1 m, and the more the better, with straw mud compacted on top. For rear roofs without added waste film, this method has a relatively good effect of improving insulation performance.
9. Fixing the film-pressing line: After the film is covered, use film-pressing line to press it tight and fix it. The film-pressing line can be commercially available polypropylene special greenhouse film-pressing line, or nylon rope or iron wire can be used instead, but it is best not to. Special film-pressing line is best. First tie one end of the film-pressing line to the 8-gauge galvanized wire on the greenhouse rear roof, throw it down from the greenhouse, press it on the film between two arch rods, and tie the lower end tightly to the ground anchor ring. The order of fixing the film-pressing line is first sparse then dense. First fix a few film-pressing lines at large spacing, then gradually fix one film-pressing line between each arch rod. Both the film-pressing line and the plastic film have a certain elasticity, so on the second and third days after fixing the film-pressing line, tighten it another 2-3 times to ensure it is truly pressed tight. The tightly pressed front roof film appears wavy.
10. Installing straw curtains and paper quilts: The paper quilt is made of 4-6 layers of kraft paper. The straw curtain is made of rice straw or cattail grass. The rice straw curtain is 1.2-1.3 m wide, and the cattail grass curtain is 1.5-1.6 m wide. The length is based on covering the front roof of the greenhouse. When there is no paper quilt, two layers of straw curtains can be covered or the overlap between straw curtains increased. Each straw curtain uses two nylon ropes whose lengths are respectively 2 times the length of the straw curtain or slightly longer for pulling and releasing. Both ends of each rope are respectively fixed at one edge position of one end of the straw curtain, forming two loops to hold the straw curtain. By pulling and releasing the two ropes on the surface of the straw curtain, the straw curtain can be rolled up or spread out on the front roof of the greenhouse. The rolled-up straw curtains are placed on the rear roof in a staggered manner or one in front of the other. To prevent the straw curtains from sliding down, a stone or two or three bricks can be placed behind each rolled straw curtain.
11. Handling the entrance and exit: A solar greenhouse can have a door left at the east gable wall of the greenhouse. The door should be as small as possible, and an insulation room should be built outside the door. Door curtains should be hung on both the inside and outside of the door. Generally, no door is left at the west gable wall or back wall of the greenhouse.