Straw Mushroom Cultivation Techniques Explained: Growing Methods and Management Essentials
The straw mushroom (Volvariella volvacea) has tender flesh, a crisp and smooth texture, and a delicious flavor. It is nutritious and has excellent health benefits, making it a high-quality edible mushroom. Whether fresh, dried, or canned, its products are well loved by consumers in both domestic and international markets. Especially in the hot summer weather, when other edible mushrooms are scarce, it is precisely the peak season for straw mushrooms, which also coincides with the off-season for vegetables. So it can not only enrich people's shopping baskets but also commands a relatively high price, delivering good economic returns. The straw mushroom is the fastest-maturing of the edible mushrooms, taking only about 2 weeks from spawning to harvest, with a whole cultivation cycle of just 20-30 days. It also requires no special equipment and can be cultivated both indoors and outdoors. Developing straw mushroom cultivation can make use of agricultural by-products such as cottonseed hulls, rice straw, sugarcane bagasse, and corn stalks as growing substrates.
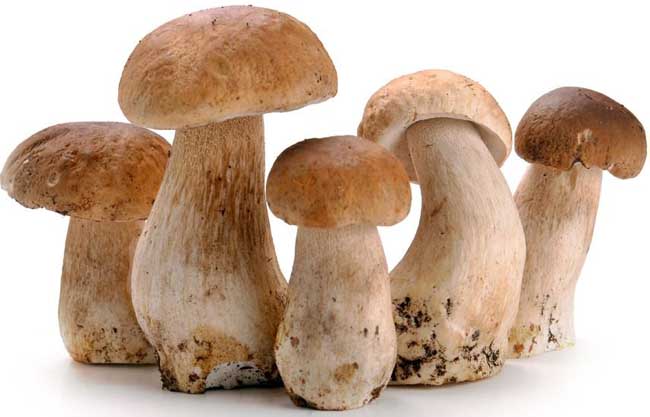
Growing Conditions for Straw Mushrooms
1. Nutrition: The nutrients needed for the growth and development of straw mushrooms are mainly carbohydrates, nitrogenous nutrition, and minerals; in addition, a certain amount of vitamins is required. These substances can generally be obtained from materials such as rice straw or cottonseed hulls. The straw mushroom is a saprophytic fungus, and it must absorb nutrients from dead plant matter and soil. For cultivation, select raw materials such as rice straw and cottonseed hulls that are free of mold and deterioration. Wet straw that has not been sun-dried rots easily and should not be used. In addition, waste cotton, sugarcane bagasse, green thatch grass, and peanut vines can all serve as raw materials for cultivating straw mushrooms. If a certain amount of supplementary materials is appropriately added to the above raw materials, such as dried cow dung, chicken manure, wheat bran, rice bran, and cornmeal, to supplement nitrogenous nutrition and vitamins, the yield of straw mushrooms can also be increased.
2. Temperature: The straw mushroom is a high-temperature fungus. The temperature range for mycelial growth is 10-42°C, with the optimum at 28-32°C. Growth stops at 10°C, and above 45°C or below 5°C the straw mushroom mycelium dies. Straw mushroom spawn must not be stored in a refrigerator, to avoid freezing to death. The temperature range for fruiting body growth is 22-40°C, with the optimum at 28-32°C. When the average temperature is below 23°C, fruiting bodies are difficult to form. When the substrate temperature is below 28°C, fruiting body formation is affected; below 25°C, fruiting bodies are difficult to form. Air temperatures below 21°C or above 40°C, as well as sudden weather changes, have a fatal effect on small mushroom buds. Fruiting bodies are extremely sensitive to sudden temperature changes; if the substrate temperature changes by more than 5°C within 12 hours, the straw mushrooms die easily.
3. Humidity: The straw mushroom is a fungus that favors high-temperature, high-humidity environments. Only under suitable moisture conditions can the growth and development of straw mushrooms proceed normally. With insufficient moisture, mycelial growth is slow and fruiting bodies are difficult to form; with excessive moisture, poor aeration results, the mushrooms die easily, and contaminating microorganisms readily occur. The optimum moisture content of the substrate is about 70%; the optimum air humidity during the mycelial growth stage is about 80%; and during the fruiting body growth stage, the relative air humidity is required to be above 90%.
4. Oxygen: The straw mushroom is an aerobic fungus, and sufficient oxygen is an important condition for its growth. If oxygen is insufficient and carbon dioxide accumulates too much, fruiting bodies will be inhibited or even die. Contaminating microorganisms also readily occur. Therefore, during the management of straw mushroom cultivation, attention must be paid to ventilation and air exchange to keep the air fresh. But moisture retention must also be attended to, and the relationship between ventilation, moisture retention, and heat preservation must be correctly handled.
5. Acidity and alkalinity (pH value): The straw mushroom is a fungus that favors alkaline conditions. The optimum pH for straw mushroom mycelial growth is 7.8-8.5, and the optimum pH for fruiting body growth is 7.5-8. An acidic environment is unfavorable to the growth and development of the mycelium and makes it prone to infection by contaminating microorganisms. During cultivation, lime is generally added to adjust the pH value, usually at about 5% of the dry material weight, bringing the pH value to 10-12. As the mycelium grows, the pH value gradually decreases; by the time fruiting bodies form, the pH value is around 7.5, which is exactly suitable for the growth and development of straw mushroom fruiting bodies.
6. Light: Neither the germination of straw mushroom basidiospores nor mycelial growth requires light; direct sunlight instead hinders mycelial growth. Light, however, promotes the formation of fruiting bodies. Fruiting body formation requires a certain amount of scattered light, with the most suitable light intensity being 300-350 lux. The intensity of light not only affects the yield of straw mushrooms but also directly affects the quality and color of the fruiting bodies. Under strong light, the fruiting bodies are dark in color and glossy, and the fruiting body tissue is dense; under insufficient light, the fruiting bodies are dull or even grayish-white, and the fruiting body tissue is looser. With no light, the fruiting bodies are white. Strong direct sunlight severely inhibits fruiting bodies, and open-field cultivation must have shading conditions.
Cultivation Season for Straw Mushrooms
The cultivation season for straw mushrooms under natural conditions should be determined according to the temperature required for their growth and development and the local air temperature. Generally, cultivation can only begin when the daily average temperature reaches above 23°C. In the south, the period for cultivation using natural air temperature is from late May to mid-September on the Gregorian calendar. Cultivation from early June to early July is most favorable, because the temperature is suitable at this time and it is the moldy rain season, with high humidity, making temperature and humidity easy to control, with high yields and good mushroom quality. In midsummer (mid-July to late August), the temperature is relatively high and dry, with a large amount of water evaporation. Management is relatively difficult, and it is harder to obtain high yields and high quality of straw mushrooms. In provinces such as Guangdong and Hainan, under natural air temperature conditions, April to October is more suitable for cultivating straw mushrooms. In northern regions, cultivation from June to July is advisable. When using greenhouses or plastic sheds for cultivation, it can be advanced or delayed as appropriate. If foam mushroom houses with heating equipment are used, year-round production is possible.
Varieties of Straw Mushrooms for Cultivation
By color, there are two major strains: one is called the black straw mushroom, whose main feature is that the wrapper of the unopened fruiting body is mouse-gray or black, egg-shaped, and not easy to open; the base of the straw mushroom is relatively small and easy to pick. However, its stress resistance is relatively poor, and it is especially sensitive to temperature changes. The other is the white straw mushroom, whose main feature is that the wrapper of the fruiting body is grayish-white or white, the wrapper is thin, and it opens easily; the base of the mushroom body is relatively large, making picking more difficult, but it fruits quickly, has high yields, and has relatively strong stress resistance. According to the size of the straw mushroom individuals, they can be divided into large, medium, and small types. Due to different uses, the requirements for straw mushroom varieties also differ. For making dried straw mushrooms, large types with thick wrappers are preferred; for canning, medium and small types with thick wrappers are needed; for fresh-sale straw mushrooms, there are no strict requirements on wrapper and individual size. Each locality can select suitable varieties for cultivation according to its needs.
Preparation of Straw Mushroom Substrate
There is a wide range of raw materials for cultivating straw mushrooms, mainly raw materials rich in cellulose and hemicellulose, such as waste cotton residue, cottonseed hulls, rice straw, and wheat straw. Waste cotton residue gives the highest yield. Several commonly used substrate formulations are introduced below:
1. Preparation of waste cotton residue substrate
Waste cotton residue, also called waste cotton, broken-seed cotton, floor cotton, or foot cotton, comes from cotton processing plants. Waste cotton residue generates heat for a long time and has good heat and moisture retention, making it currently the most ideal straw mushroom cultivation material. About 12 kg of waste cotton residue is needed per square meter. Commonly used formulas are:
Formula 1: Waste cotton residue + 5% lime
Formula 2: Waste cotton residue + 10% bran (or rice bran) + 5% lime powder
There are two methods for preparing the substrate: One is to build a pool, soak the waste cotton residue in lime water, adding 5 kg of lime powder per 100 kg of waste cotton residue, soak for 5-6 hours, then scoop it out and make a pile 1.2 m wide and about 70 cm high, with unlimited length, ferment for three days, and turn the pile once in between. The other is to make a wooden frame, 3.0 m long, 1.8 m wide, and 0.5 m high, placed on a concrete floor. Then spread a layer of waste cotton residue about 10-15 cm thick in the wooden frame, sprinkle a thin layer of lime powder, sprinkle water and press down with feet so that the waste cotton residue absorbs enough water, then sprinkle a layer of bran or rice bran, spread another layer of waste cotton residue, and so on layer by layer, pressing down until the frame is full; then lift the wooden frame upward and continue adding material and pressing down until the pile is about 1.5 m high. Ferment for 3 days.
2. Preparation of cottonseed hull substrate
Cottonseed hulls, also called cottonseed skins, are also a relatively nutrient-rich straw mushroom cultivation material, but their heat retention, moisture retention, and heat generation are not as good as waste cotton residue. The substrate formula is the same as for waste cotton residue. In addition to the above two treatment methods, the cottonseed hulls can also be spread on a concrete floor, lime powder or supplementary materials added, thoroughly mixed while wet, then piled up, covered with plastic film, and fermented for three days, turning the pile once in between. When turning the pile, if the inside is too dry, lime water should be added to adjust it. When moved to the bed, the moisture content of the material should be about 70% and the pH value 8-9.
3. Preparation of rice straw or wheat straw substrate
Rice straw and wheat straw are abundant raw materials and are traditional straw mushroom cultivation materials. Because the physical properties of rice straw and wheat straw are relatively poor and their nutrients are lacking, only with appropriate treatment and added supplementary materials can relatively good yields be obtained. 10-15 kg of dry rice straw is needed per square meter.
Formula 1: 87% rice straw or wheat straw + 5% plant ash + 1% compound fertilizer + 2% gypsum powder + 5% lime;
Formula 2: 88% rice straw or wheat straw + 5% bran or rice bran + 2% gypsum powder + 5% lime;
Formula 3: 73% rice straw or wheat straw + 5% dried cow dung + 15% fertile soil + 2% gypsum powder + 5% lime;
Formula 4: 83% rice straw or wheat straw + 5% bran + 5% dried cow dung + 2% gypsum powder + 5% lime
There are two ways to treat the above rice straw or wheat straw: One is not chopping the rice straw or wheat straw, using long rice straw for cultivation. Soak the rice straw for about 12 hours, weighing it down with a heavy object on top so it fully absorbs water. After soaking thoroughly, scoop it out and pile it, with a pile width of 2 m and height of 1.5 m, cover with plastic film to retain moisture, and pile-ferment for 3-5 days, turning the pile once in between. At cultivation time, the long rice straw should be twisted into a figure-"8" straw bundle and tied tightly, arranged closely bundle by bundle, stacked in two layers in a "pin" shape, with a thickness of 20 cm. The other is to cut the rice straw or wheat straw into 5-10 cm lengths or crush it with a grinder, soak it or directly mix it with lime water, and add supplementary materials, pile for 3-5 days, turning the pile once in between.
4. Preparation of mixed substrate
In order to reduce production costs, a cultivation method using waste cotton residue or cottonseed hulls plus rice straw or wheat straw can be adopted, and relatively ideal results can also be achieved. The mixing ratio is usually 1/3-2/3 waste cotton residue or cottonseed hulls; the rice straw can be cut into sections or crushed, and used after being piled with lime and supplementary materials.
Now let me introduce the shelf-type cultivation technique for straw mushrooms!
Shelf-Type Cultivation Technique for Straw Mushrooms
Shelf-type cultivation of straw mushrooms is currently a commonly used cultivation method in China. Building shelves in a house or shed not only makes full use of space and improves utilization, but also provides good moisture and heat retention, is easy to manage, and gives high and stable yields.
1. Building the shelves: Straw mushroom cultivation shelves are the same as mushroom cultivation shelves. The shelves should be arranged perpendicular to the mushroom house, that is, in an east-west oriented mushroom house, the shelves are arranged north-south. The shelves should not lean against the walls; the aisle along the wall is 50 cm, the aisle between shelf rows is 67 cm wide, the distance between shelf tiers is 67 cm, and the bottom tier is more than 17 cm above the ground. The number of shelf tiers depends on the height of the mushroom house, generally 4-6 tiers, and the shelf width is 1.3-1.5 m. The shelves can be built with bamboo or wood; reinforced concrete shelves are even better. On the walls at both ends of each aisle, a pair of upper and lower windows is opened. The window size is best at 40 cm wide and 50 cm high. On the roof in the middle of the aisle between the shelves, install a ventilation chimney, 1.5 m high and about 40 cm in diameter.
2. Secondary fermentation of the substrate: Loosen and mix the pile-fermented substrate evenly, and move it onto the shelves in the mushroom house while hot. At this time, the moisture content of the substrate is best at about 70%, and the pH value at about 9. The spreading thickness of the substrate also differs for different cultivation materials: for waste cotton residue or cottonseed hull substrate, generally spread 7-10 cm thick; for chopped rice straw substrate, spread 12-15 cm; for long rice straw, spread 20 cm. When the summer temperature is high, spread the substrate appropriately thinner. When the winter temperature is low, spread the substrate appropriately thicker.
After spreading the substrate, immediately introduce steam into the mushroom house or place a coal stove for heating, so that the substrate temperature reaches about 65°C, maintain for 4-8 hours, then let it cool naturally. When it drops to about 45°C, open the doors and windows. Secondary fermentation can kill pests and harmful contaminating microorganisms in the mushroom house and substrate, and is conducive to the massive reproduction of beneficial microorganisms such as high-temperature actinomycetes, further favoring straw mushroom growth and making it easy to obtain high yields.
3. Spawning and management after spawning: When the temperature of the substrate drops below 38°C, loosen and mix the substrate evenly, level the bed surface, compact it, and then carry out spawning. Dig the spawn out of the spawn bottles; for bagged spawn, tear off the plastic, put the spawn in a clean basin, and gently break the spawn blocks into pieces. The method of spot spawning plus broadcast spawning is best. The spacing of spot spawning is 3 cun (about 10 cm) square; the remaining 1/5 of the spawn is scattered on the surface of the substrate, then gently patted flat with a wooden board. Generally, 300-400 bottles (750 ml) of spawn are needed per 100 sq m of cultivation area.
After spawning, cover the bed surface with plastic film, uncover the film once or twice a day for ventilation, and pay attention to controlling the temperature inside the substrate. The temperature inside the substrate goes through a process of changing from low to high and then from high to low. After spawning, the temperature inside the substrate gradually rises, generally reaching the highest temperature in 3-4 days. The highest temperature inside the substrate should be kept below 42°C as much as possible; otherwise, if the temperature is too high, a large amount of water in the substrate evaporates, and the straw mushroom mycelium is severely inhibited or dies. If the temperature inside the substrate is too high, the cause should be analyzed in a timely manner and measures taken to solve it. If the moisture inside the substrate is insufficient and the substrate is too dry, water should be sprinkled to replenish moisture and lower the temperature; if the substrate is too thick, indoor ventilation should be strengthened, the plastic on the substrate surface opened, and holes made in the substrate to release the temperature inside.
About 4 days after spawning, remove the plastic covering the substrate surface, and it is best to cover with a thin layer of pre-wetted long rice straw, or pre-wetted rice husks, or cover with about 1 cm of granular soil, and spray 1% lime water; this can also increase the yield of straw mushrooms.
4. Management during the fruiting period. Generally 5-6 days after spawning, when the straw mushroom mycelium begins to knot, promptly increase the moisture of the substrate surface, apply the "fruiting water" well, and increase indoor light to promote the formation of straw mushroom fruiting bodies. When a large number of small white dots of mushroom buds form, focus on moisture retention, maintaining the relative air humidity above 90%, and temporarily stop spraying water on the bed surface. When the fruiting bodies are the size of a button, gradually increase the amount of water sprayed.
Bed-Type Cultivation Technique for Straw Mushrooms
Bed-type cultivation of straw mushrooms is a commonly used outdoor open-field cultivation method. Its characteristics are low investment, low cost, great flexibility, and simple operation. With good management, relatively high yields can be obtained.
The best site for outdoor straw mushroom cultivation is loose, fertile, well-drained sandy loam. This kind of soil has good heat retention, moisture retention, nutrient storage, and aeration performance, which is beneficial to the growth and development of straw mushroom mycelium and fruiting bodies. Rice fields, vegetable plots, orchards, forest land, and vacant flatland and gaps in front of and behind houses can all serve as sites for cultivating straw mushrooms. Rice fields have fewer earthworms and contaminating microorganisms, which is beneficial to the growth and development of straw mushrooms. When the temperature is low, choose a wind-sheltered, sunny place; when the temperature is high, plant under a cool, ventilated shade shed, melon shed, or trees, so that relatively ideal yields can be obtained.
After selecting the cultivation site, first hoe and turn the land once, generally 15-20 cm deep, expose it to the sun for 2-3 days, then level the land and make beds. The bed height is 15-20 cm, the bed width is about 1 m, generally 5-6 m long, and the aisle between beds is 50 cm wide. Make soil ridges about 10 cm wide and 10 cm high around the beds and in the middle of the beds, so as to produce more ground mushrooms. If the terrain is low, deep ditches should be opened around the field for drainage. For places with high and dry terrain, low beds should be made, with the aisle about 20 cm higher than the bed, in order to retain moisture.
After the bed surface is leveled, because the bed soil is relatively dry, water should be irrigated or sprinkled on the bed surface one day before the material is added, so that the soil is thoroughly wet, or tea-seed cake water, ammonia water, or bleach water can be directly poured on the bed surface to eliminate pests and contaminating microorganisms. Then sprinkle a layer of lime powder on the bed surface, and spray insecticide to eliminate pests and contaminating microorganisms in the soil.
After the cultivation bed is disinfected, move the previously pile-fermented substrate onto the bed surface, spreading the material directly on the soil. It should be thicker than the material used in indoor shelf-type cultivation. For waste cotton residue or cottonseed hull substrate, spread about 10 cm thick; for chopped rice straw substrate, spread 15-18 cm; for long rice straw, spread about 20 cm. After spawning, especially for rice straw substrate, it is best to cover the substrate surface with a layer of fine soil about 2 cm thick. Then cover with plastic on top, and uncover the film once or twice a day.
After spawning, use bamboo strips and hedge bamboo to build a ring-shaped arched shed frame on the bed surface, with the center of the shed frame 50 cm above the bed surface. Cover the shed frame with plastic, and then cover the plastic with a shade net or rice straw curtain. This can not only prevent direct sunlight on the bed surface but also retain heat and moisture. The spawning method and post-spawning management are the same as for indoor shelf-type cultivation.
Bag-Type Cultivation Technique for Straw Mushrooms
Bag-type cultivation of straw mushrooms is a relatively new cultivation method and a high-yield straw mushroom cultivation method. Its per-unit yield is about 1 times higher than traditional pile-straw cultivation. The biological efficiency can reach 30-40%.
1. Soaking the straw: Cut the rice straw into 2-3 sections, or if conditions permit, cut it into about 5 cm lengths, and soak it in 5% lime water for 6-8 hours. The water used for soaking the rice straw can be reused 2 times, and lime must be added each time.
2. Mixing the material: Scoop out the rice straw and place it on a slightly sloped concrete floor, spread it out to drain off excess water, or wring it dry by hand. When you grip the rice straw tightly and one or two drops of water drip down, that is the appropriate moisture, with a water content of about 70%. Then add supplementary materials and mix evenly, so that the various supplementary materials are evenly distributed and adhere within the rice straw. Commonly used formulas when mixing are as follows:
Formula 1: About 87% dry rice straw + 10% bran + 3% peanut cake powder or soybean powder + 0.1% potassium dihydrogen phosphate.
Formula 2: About 85% dry rice straw + 10% rice bran + 3% cornmeal + 2% gypsum powder + 0.2% potassium dihydrogen phosphate.
Formula 3: 83.5% dry rice straw + 10% rice bran + 3% peanut cake powder + 2% gypsum powder + 1.5% compound fertilizer.
Formula 4: 56.5% dry rice straw + 30% fertile soil + 10% rice bran + 2% gypsum powder + 1.5% compound fertilizer.
3. Bagging: For the thoroughly mixed material, use 24 cm × 50 cm polyethylene plastic bags. Tie one end of the bag tightly with a slip knot of thick cotton thread, tied 2 cm from the bag opening. Put the mixed substrate into the bag, pressing it tight as you fill, with each bag holding 2-2.5 kg wet weight of material. Then tie the bag opening tightly with a cotton thread slip knot.
4. Sterilization: Use atmospheric-pressure sterilization. After loading the pot, heat over high fire so that the temperature in the pot reaches 100°C as quickly as possible, maintain at 100°C for about 6 hours, then stop the fire and take the bags out of the pot, and move them into the inoculation room.
5. Inoculation: Use aseptic or inoculation box inoculation. The disinfection treatment of the aseptic room or inoculation box is the same as for other edible mushrooms. During inoculation, untie the tying string at one end of the material bag, inoculate with straw mushroom spawn, and tie the string again. Untie the tying string at the other end, similarly inoculate with spawn, and tie the string again. One bottle (or one bag) of spawn can inoculate about 12 bags.
6. Mycelial growth management: Move the inoculated spawn bags into the culture room, arrange them on culture shelves or stack them on the ground. The stacking height of the spawn bags should be determined according to the season: when the temperature is high, the stack should have fewer layers; when the temperature is low, the number of stacked layers can be appropriately increased. Generally, stacking 3-4 layers is advisable. The temperature of the culture room is best controlled at 32-35°C. Four days after inoculation, when the mycelium in the spawn bag has colonized 2-3 cm of the material, loosen the tying string at the bag opening a little to increase oxygen inside the bag and promote mycelial growth. Under suitable conditions, the mycelium usually can fill the whole bag in 10-13 days.
7. Fruiting management: Move the spawn bags full of mycelium into the cultivation room, roll up the bag openings, arrange them on shelves or stack them wall-style in 3-5 layers, cover with plastic film, and increase the relative air humidity of the cultivation room to about 95%. After 2-3 days of management, mushroom buds begin to form, and at this time the film can be lifted open. Only when the mushroom buds grow to the size of a small button can water be sprayed onto the spawn bags. When the mushroom buds grow to the egg-shaped stage, they are ready for harvest. Generally, 2-3 flushes of mushrooms can be harvested.
Year-Round Cultivation Technique in Plastic Foam Houses
Cultivation in plastic foam houses is the main method for year-round straw mushroom cultivation. It has good heat and moisture retention, can insulate against heat in summer and be heated in winter. It requires little investment and has low cost. It has few contaminating microorganisms and high yields.
There are many types of plastic foam houses; at present there are mainly two, introduced as follows:
1. Two-bed type: The mushroom house is 5 m long and 2.2 m wide, with two rows of shelves, each row having 4 tiers. The mushroom house has a wooden frame structure with a "figure-eight" shaped roof. First build the shelves, then cover with film and foam boards. The shelf frame is built with Chinese fir square timber, generally 4 cm × 4 cm or 3 cm × 3 cm in specification. Each shelf is 70 cm wide, the distance between tiers is 0.6 m, and the bottom tier is about 0.4 m above the ground. The aisle between shelf rows is about 0.6 m wide. After the shelves are built, cover the outer sides and top of the shelves with plastic film, and after covering with plastic, seal with foam boards. The thickness of the foam boards is best at 2.5-3 (cm). Seal the film joints with plastic tape. Press and nail the joints of two foam boards firmly with fir strips. Open one door and window at each end of the aisle. For the top layer of the mushroom house, in addition to covering with plastic and foam boards, it is best to cover with a layer of asbestos tiles if conditions permit.
The aisle of the foam house has a built-in underground stove 0.3 m in diameter and 0.5 m deep, with a grate at the bottom and air inlet and exhaust outlets. The air inlet has a pipe leading to outside the mushroom house, and the exhaust outlet is connected to a heating pipe, which extends along the aisle all the way to outside the wall at the other end of the mushroom house. Half of the pipe is below the ground surface, and half is above the ground surface. The upper part of the stove is tightly covered with a cement board. The heat from the stove is dispersed into the mushroom house through the pipe, and the smoke produced is discharged outside the mushroom house through the pipe. In winter, the mushroom house can be heated for cultivation.
2. Three-bed type: The mushroom house is 4 m wide and 5 m long, with three rows of shelves inside. The left and right rows of shelves are 0.7 m wide, and the middle row of shelves is 1.2-1.4 m wide. There are two aisles, each 0.6 m wide. The rest is the same as above.
Pile-Straw Cultivation Technique for Straw Mushrooms
For the relatively long rice straw and wheat straw cut from rice fields, the traditional pile-straw cultivation method is adopted. The cultivation site can be indoors, outdoors in rice fields, in greenhouses, or under fruit trees, all of which are possible.
The size of the pile should be specifically determined according to the outside air temperature. When the temperature is low, the pile shape should be large; when the temperature is high, the pile shape should be small. Generally, when the temperature is around 25°C, the pile width is 75 m and the pile height is about 35 cm; when the temperature is around 30°C, the pile width is 70 cm and the pile height is about 30 cm; when the temperature is above 33°C, the pile width is 60 cm and the pile height is about 25 cm. There are many ways to tread the pile; the following are mainly introduced:
1. Cut-straw style: First make the cultivation bed on the cultivation site, level the bed surface, and pour lime water or sprinkle lime powder on the bed surface. To produce more "ground mushrooms", first sow a strip of spawn about 1.5 cm wide on the soil around the cultivation bed, then tread the first layer of straw, just pressing down the spawn. Cut the rice straw soaked in 5% lime water into two sections with a straw cutter, piling while cutting, with the neat cut ends facing outward and the straw heads and tails facing inward, bundle tightly against bundle, treading firmly with feet, filling the middle of the pile with loose rice straw, and watering appropriately according to whether the straw is dry or wet. Around the first layer of straw, sow spawn 1.5 cm wide about 2 cm inward from the pile edge. Then tread the second layer, with the straw bundles just pressing down the spawn, and the spawning method is the same as the first layer. Generally 2-4 layers are piled, with each upper layer retracted inward by about 2 cm all around compared with the lower layer, forming a rectangular trapezoid. On the top layer, broadcast spawn, and after spawning cover with a thin layer of rice straw, tread firmly, forming a turtle-back shape, and cover the pile surface with plastic and rice straw. Generally, about 5 bottles of spawn are sown per 50 kg of rice straw. Appropriately increasing the spawning amount results in fewer contaminating microorganisms, faster fruiting, and higher yields.
2. First soak the rice straw in 5% lime water for 5-6 hours, then twist the rice straw into figure-"8" bundles, tie tightly with straw, each bundle about 0.25 kg dry weight. The other methods are the same as above.
3. Folded-tail style: This method is suitable for long rice straw over 65 cm, each bundle about 0.4 kg dry weight. Tie the bundle at about 1/3 near the straw head, requiring the straw heads to be neat. When treading the pile, the straw heads are on one side of the bed and the straw tails on the other side, while folding and turning the straw tails and treading firmly. After sowing, tread the second layer. The direction of the straw heads is opposite to the first layer, pressing on the straw tails of the first layer. The other methods are the same as above.
Harvesting Straw Mushrooms
From spawning to the start of harvest, straw mushrooms take only about 12 days. Straw mushrooms grow quickly and open their caps easily, so timely harvesting must be achieved. The appropriate harvest time for commercial straw mushrooms is when the mushroom buds have grown to full size and the foot wrapper has not yet opened. During the peak production period, harvest 2-3 times a day. When harvesting, press down the substrate with one hand and gently twist off the fruiting body with the other hand, taking care not to damage the immature young buds. The harvested mushrooms should promptly have the rotting straw and mud-sand at the base of the fruiting bodies cut off with a sharp knife, and be promptly sent to market for fresh sale. Besides fresh sale, they can also be processed into dried straw mushrooms or canned straw mushrooms.
After the first flush of mushrooms is harvested, the second flush generally appears after 4 days. With proper management, 2-3 flushes can be harvested. But the first flush is the main one; generally the yield of the first flush accounts for about 80% of the total yield. Some mushroom houses, in order to improve bed utilization, usually harvest only one flush.
Main Problems and Control Measures in the Straw Mushroom Cultivation Process
1. Causes of ink cap mushroom occurrence and control measures
Coprinus comatus and Coprinus plicatilis are the most common competitive contaminating microorganisms in the straw mushroom cultivation process. They favor high temperature and high humidity and generally appear one week after spawning or after fruiting. Once they occur, they contaminate the substrate surface and consume large amounts of nutrients and water in the substrate, thereby affecting the normal growth and development of straw mushroom mycelium and causing reduced straw mushroom yields. Therefore, controlling the occurrence of ink cap mushrooms and how to prevent and control them after occurrence is a key technical measure for increasing straw mushroom yields. The causes of ink cap mushroom occurrence and control measures are introduced as follows:
(1) Poor quality of cultivation raw materials. When cultivating straw mushrooms, using old, moldy raw materials as cultivation material easily leads to pests and diseases. Therefore, when cultivating, raw materials free of mold must be selected. Before use, they should be turned and sun-dried in the sun for 2-3 days, using the ultraviolet rays in sunlight to kill contaminating microorganism spores.
(2) Unreasonable substrate formula. The formula and treatment of the cultivation material also have a great relationship with the occurrence of ink cap mushrooms. Ink cap mushrooms have a higher nitrogen source requirement than straw mushrooms. Therefore, when preparing the substrate, if too much cow dung or urea is added, reducing the C/N ratio, the ammonia content increases during substrate piling, which can lead to massive occurrence of ink cap mushrooms. Therefore, when adding urea, cow dung, etc. to the substrate as supplementary nitrogen sources, urea should be controlled at about 1%, cow dung at about 10%, and they should be used only after thorough fermentation and decomposition.
(3) The pH value of the substrate is too low. The pH value of the substrate is also one of the important causes of contaminating microorganism occurrence. Straw mushrooms favor alkaline environments, while contaminating microorganisms favor acidic environments. Therefore, when preparing the substrate, appropriately increase lime, generally about 5% of the material, to raise the pH value, bringing the substrate pH value to 8-9. In addition, after straw mushroom spawning, immediately sprinkle a thin layer of plant ash on the substrate surface, or spray lime water after harvesting, to adjust the pH value of the substrate; this can also inhibit the occurrence of ink cap mushrooms and other contaminating microorganisms.
(4) Incomplete substrate fermentation. Too high a water content of the substrate, insufficient aeration during piling, low fermentation temperature during piling, and failure to loosen the substrate after it enters the house, with much ammonia in the substrate, can all cause the occurrence of ink cap mushrooms. Carrying out secondary fermentation of the substrate can make the substrate ferment thoroughly, which is an important measure to prevent pests and diseases. It is also a key technique for increasing straw mushroom yields.
In addition, spawn carrying contaminating microorganisms, too high a temperature in the cultivation room, and poor ventilation also make pests and diseases prone to occur. Once ink cap mushrooms occur on the mushroom bed, they should be removed promptly to prevent the spread of ink cap mushroom spores. In addition, during the straw mushroom cultivation process, mycelial shrinkage can also occur, causing large numbers of young mushrooms to die.
2. Causes of mycelial shrinkage and control measures
Under normal circumstances, about 12 hours after straw mushroom spawning, straw mushroom mycelium can be seen germinating and growing into the substrate. If 24 hours after spawning the mycelium still does not germinate or does not grow into the substrate, or if mycelial shrinkage occurs during cultivation, the main causes are:
(1) The cultivation spawn is too old. Straw mushroom mycelium grows fast and also ages fast. If the mycelium does not germinate after spawning and the mycelium of the spawn block shrinks, it is often due to too old a spawn age or storage under too low a temperature condition. Select spawn of appropriate age; generally, it is best to use cultivation spawn whose mycelium has reached the bottom of the bottle for about one week before spawning.
(2) The substrate temperature is too high. If the substrate is spread too thick, the bed temperature will rise spontaneously. If the temperature inside the substrate exceeds 45°C, it will cause mycelial shrinkage or death. After spawning, closely monitor the indoor temperature and substrate temperature. If the temperature is too high, promptly take measures to lower it, such as strengthening indoor ventilation, removing the plastic film covering the substrate surface, misting the air, loosening the substrate, and pouring water on the ground.
(3) The substrate water content is too high. At spawning time, if the substrate water content is too high, exceeding 75%, the substrate is not ventilated, and if after spawning the plastic film is covered too tightly and not lifted for a long time, plus poor ventilation in the mushroom house, the straw mushroom mycelium shrinks due to oxygen deprivation and suffocation.
(4) Ammonia damage inside the substrate. Adding too much urea to the substrate, plus covering with plastic film after spawning, means the ammonia inside the substrate cannot escape, causing harm to the straw mushroom mycelium.
3. Causes of massive death of young mushrooms and control measures.
In the straw mushroom production process, patches of small mushrooms wilting and dying are often seen, causing serious losses to straw mushroom yields. There are many causes of young mushroom death, mainly:
(1) The substrate is too acidic. Straw mushrooms favor alkaline environments. When the pH value is less than 6, although mushrooms can form, they are difficult to grow larger. An acidic environment is more suitable for the growth of contaminating microorganisms such as green mold and yellow mold, which compete for nutrients and cause the death of straw mushrooms. Therefore, when preparing the substrate, appropriately increase the pH value in the substrate. After harvesting the first flush, spray 1% lime water or 5% plant ash water to keep the pH value in the substrate at about 8.
(2) The substrate temperature is too low or the temperature changes suddenly. Straw mushroom growth is very sensitive to temperature. Generally, when the substrate temperature is below 28°C, straw mushroom growth is affected or even dies. If the temperature changes too much, such as encountering a cold wave or typhoon, it will cause a sharp drop in air temperature, leading to the death of young mushrooms, and in severe cases, large mushrooms also die.
(3) Improper water use. Straw mushrooms have certain requirements for water temperature, generally requiring the water temperature to be about the same as room temperature. If deep well water at about 20°C is sprayed in hot summer, it will cause massive death of young mushrooms. Therefore, water spraying should be done in the morning and evening, and the water temperature is best at about 30°C.
Correctly master water spraying according to the different stages of growth and development of straw mushroom fruiting bodies. If the fruiting bodies are too small, too heavy water spraying will cause the death of young mushrooms. During the pinhead stage and small button stage of the fruiting bodies, water spraying on the substrate surface must be stopped. If the substrate surface is relatively dry, misting can only be done in the aisle of the cultivation room, with water poured on the ground, to increase the relative air humidity.
(4) Damage during harvesting. Straw mushroom mycelium is relatively sparse and extremely easily damaged. If the movement during picking is too large, it will disturb the surrounding substrate, causing mycelial breakage, and the broken mycelium of surrounding young mushrooms means water and nutrients cannot be supplied. Therefore, movements during harvesting must be as gentle as possible. When picking straw mushrooms, press the growth base of the mushroom with one hand to protect other young mushrooms, and twist and pick up the mature mushroom with the other hand. If there are densely clustered mushrooms, they can be picked together, so as to avoid causing the death of many immature mushrooms due to the disturbance of individual mushrooms.