Detailed Explanation of Key Points for High-Efficiency Welsh Onion Cultivation Techniques
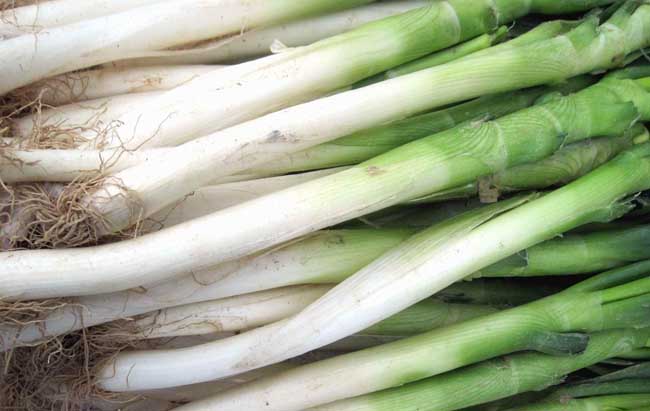
Welsh onion is a type of onion and can be divided into four types: common Welsh onion, bunching onion, shallot, and multiplier onion. Welsh onion is pungent in taste and slightly warm in nature, with the effects of inducing sweating and unblocking yang; detoxifying and seasoning. It is mainly used for wind-cold common cold, aversion to cold with fever, headache and nasal congestion, cold pain in the abdomen, dysentery and diarrhea, internal accumulation of parasites, insufficient lactation, and difficult urination and defecation. Welsh onion contains volatile oil, the main component of which is allicin, and also contains diallyl sulfide and calcium oxalate. In addition, it also contains fat, carbohydrates, carotene, vitamin B, vitamin C, niacin, calcium, magnesium, iron and other components. It is a perennial herbaceous plant with cylindrical, hollow, fragile and easily broken green leaves.
Welsh Onion Seedling Raising
1. Sowing time: It can be sown in all four seasons according to different product requirements. The best sowing period for high-yield Welsh onion cultivation is autumn sowing (when the average temperature per ten days is stable at 16.5°C-17°C, which is exactly early October). Due to different climatic conditions in the north and south of the country, sowing times also vary. The best time is determined by the size of the seedlings before overwintering; if too large, they easily pass through vernalization and bolt the following spring; if too small, they cannot overwinter safely. The standard for pre-winter seedlings is to grow to two leaves and one heart. Spring sowing is around Qingming Festival.
2. Preparing the seedbed: The seedbed should be selected as flat, fertile land close to a water source with convenient drainage. Before making the beds, the seedling land should be shallowly plowed and finely harrowed so that the top is loose and the bottom is firm. Apply 50 kg of compound fertilizer per mu as base fertilizer, and at the same time apply 2.5 kg of carbofuran per mu and 0.5 kg of carbendazim powder to kill underground pests and pathogens (very important). The bed length is 20-25 m, inner width 1 m, bed ridge 30 cm. After the bed ridges are trampled firm, use an iron rake to repeatedly level the bed surface until there are no clods.
3. Sowing: Before sowing, first take out the covering soil from the bed, then irrigate the bed with sufficient water (the irrigation amount must be large). After the water has seeped away, mix the seeds with sandy soil and scatter them twice in the bed (spread evenly). Finally cover with soil at a thickness of 1.5 cm-2 cm. The covering soil should be uniform. Seed quantity for the seedling field: 1.3 kg per mu, which can transplant to 3-5 mu of Welsh onion. On the morning of the second day after sowing, use an iron rake to shallowly rake the bed surface once to prevent uneven soil covering.
Seedling Stage Management
1. Autumn-sown seeds emerge 7 days after sowing, and spring-sown seeds emerge 8-12 days after sowing. Before the cotyledons straighten, control watering to avoid crusting and smothering the seedlings. If rain occurs during this period and the soil crusts, use an iron rake to lightly break the surface. The first watering should wait until the cotyledons straighten. Weed (herbicides cannot be used). When the seedlings grow to about 2 cm and are about to straighten, apply pesticides promptly to prevent fungal diseases, generally spraying once every 5 days (mainly using pesticides for treating dead roots and rotten seedlings, viruses, and gray mold). After the seedlings grow above 5 cm, apply urea as appropriate according to soil fertility to promote seedling growth.
2. Before winter, the main focus is on cultivating strong seedlings. The standard: plant height 8-10 cm, true leaves reaching two leaves and one heart, leaves green and robust, basal diameter not exceeding 0.3 cm. During this period, water 1-3 times according to soil moisture. Before freezing, water with winter protection water and generally cover with a layer of farmyard manure, plant ash, or fine barnyard manure, with a thickness such that the ground is not visible and leaf sheaths are exposed.
3. After the Beginning of Spring for autumn-sown seedlings, the roots, hearts, and leaves of the onion seedlings begin to sprout. Rake the bed surface thoroughly to remove debris to prevent pressing the seedlings, achieving moisture retention, temperature increase, and early growth. In early March, water with green-returning water, but not too early, to avoid low temperatures affecting early growth of onion seedlings. Combined with watering, apply 10 kg of urea per mu to promote seedlings. From late March to early April, when seedlings are about 30 cm tall, thin the seedlings 1-2 times, thinning dense areas and filling sparse areas to maintain a spacing of 3-5 cm. From late April to early May, when seedlings are about 50 cm tall, this is the vigorous growth period of onion seedlings. Manage fertilizer and water well, applying urea, diammonium phosphate, compound fertilizer, etc. in stages as appropriate, at least twice, at most three times, 10-15 kg each time, and combined with pesticide spraying apply compound micro-fertilizer 2-3 times. Apply pesticides promptly to prevent fungal diseases, with special attention to controlling onion maggot, onion thrips, and leafminer. Stop watering 15 days before transplanting and carry out seedling hardening to promote steady growth.
Transplanting and Field Planting
1. Select land with high terrain, good drainage, and fertile soil, preferably oriented north-south. Apply sufficient base fertilizer. Base fertilizer can be 5000 kg of farmyard manure per mu, 100 kg of phosphate fertilizer, 10 kg of urea, 15 kg of potassium fertilizer, or 30 kg of diammonium phosphate, or 50 kg of compound fertilizer. Then plow and sun-dry the soil to eliminate disease sources and weeds and improve fertility. Finally, open furrows with a furrow spacing of 80 cm and a furrow depth and width of about 25 cm each.
2. Plant early at the appropriate time, generally from mid-June to early July. Water once two days before lifting seedlings. When lifting seedlings, dig deep to get the roots, or lift in bundles, shake off the soil, and lay flat. Eliminate damaged and diseased seedlings. Grade into three levels according to seedling size, height, and thickness. When seedlings are sufficient, generally do not use third-grade seedlings. Lift, grade, and transplant as you go, so that onion seedlings remain fresh when transplanted. The transplanting spacing should be 3-4 cm.
3. Field planting methods
(1) Dry planting method: After opening the furrow, arrange the onion seedlings in order at a certain spacing along one side of the furrow wall, with the onion leaves lying flat against the furrow wall, then use a hoe to cover with soil. The soil depth should not bury the heart leaves. After planting, tread firm. Or use a shovel to plant at a certain spacing, then tread firm. After planting, water once immediately, preferably without delay.
(2) Water planting method: Place the selected seedlings on the ridge in handfuls of one meter, evenly arranged. First water in the furrow. After the water seeps down, every 8-10 m one person squats on the ridge to insert the seedlings. When inserting, use a rice-transplanting stick made from a peeled tree branch with a "v"-shaped fork at the top. Mostly hold the seedlings with the left hand and the transplanting stick with the right hand, use the fork to press against the fibrous roots of the onion seedlings, and while the soil at the bottom of the furrow is wet and soft, insert the onion seedlings straight down. Seedlings of different grades should be planted in different plots or in separate sections, and should not be arranged with tall and short mixed together, so as to facilitate management.
Management After Field Planting
After transplanting, it is the hot season with high temperature and frequent rain. Generally no watering is done. Continuous rain can cause root rot and seedling death, so drainage should be done promptly. If high temperature and drought occur, water to lower the temperature and promote growth. As the white stalk continues to elongate, earth up and topdress in time. The final ridge height after earthing up is 70-80 cm. When earthing up, do not bury the heart leaves. Topdressing and earthing up are carried out at the same time. The first time should start from the Beginning of Autumn: apply 5000 kg of farmyard manure per mu and 10-15 kg of urea, then water. The second topdressing is at the End of Heat: apply 15-20 kg of urea per mu and 50 kg of cake fertilizer. The third topdressing is at White Dew. At this time, the white stalk enters the peak swelling period, and fertilizer and water management is key. Apply 1000 kg of human feces and urine, 15 kg of urea, 50 kg of phosphate fertilizer, and 5-10 kg of potassium fertilizer along the furrow, then water. The fourth topdressing is at the Autumn Equinox: apply 10-15 kg of urea per mu, earth up and water. Around White Dew, spray compound micro-fertilizer, generally once every 5-7 days, spraying 2-3 times in succession, with obvious yield-increasing effects.
Harvest and Storage
Around the Beginning of Winter, the onions have grown fully and can be harvested by digging. After harvesting, bundle in 15 kg bundles and place in a cool, well-ventilated place, with 5-6 bundles per row and a 50 cm passage left between rows. If high-temperature weather occurs, untie the bundles and air them. During storage, they fear heat but not cold, and rainwater should be prevented.
Main Pests and Diseases
1. Leafminer: Mainly damages leaves. The larvae tunnel under the epidermis and feed on leaf flesh, leaving epidermal mines that appear as white lines due to loss of green color.
2. Onion thrips: Mainly damages leaves, sucking leaf flesh to form white spots. In severe cases, the entire leaf turns grayish-white due to loss of green color.
3. Onion maggot: Mainly damages the white stalk, stem disc, and roots underground, causing stem rot and leaf withering, resulting in missing seedlings and broken rows.
4. Welsh onion purple blotch: Damages green leaves. Lesions start from small white spots and gradually expand to 3-5 cm, spindle-shaped or date-pit-shaped. The largest lesions reach 6-7 cm long, slightly sunken and dark purple, hence called purple blotch.
5. Welsh onion downy mildew: Diseased plants are twisted, deformed, and stunted, with relatively large yellowish-white, oval lesions that look water-soaked, and leaves droop and dry up.
6. Welsh onion rust: Commonly known as red blight, it is a devastating disease in Welsh onion production areas. Lesions occur on the surface of tubular leaves and flower stalks, initially round, oval, or spindle-shaped, standing upright along the direction of leaf veins, deep yellow gradually changing to orange-brown, raised, scattered, and varying in spot size. Affected plants turn yellow and wilt, dry up, and even lodge, causing reduced yield.