Detailed Explanation of Chive Cultivation Techniques and Management Key Points
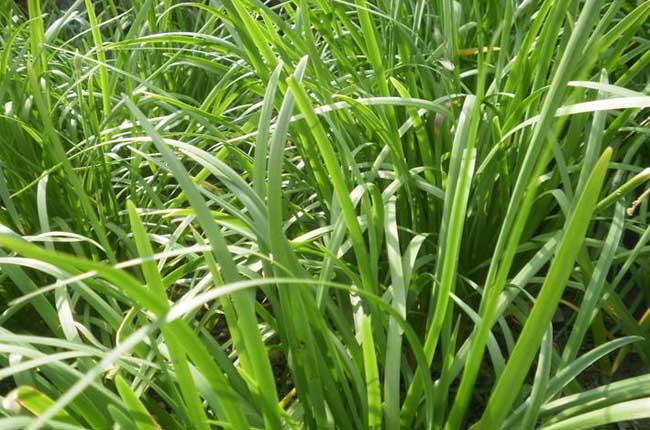
Chives (Allium tuberosum), a perennial herbaceous plant of the Liliaceae family, are used in medicine as seeds and leaves. They have effects such as strengthening the stomach, refreshing the mind, stopping sweating and astringing, tonifying the kidney and supporting yang, and securing essence. In traditional Chinese medicine, chives have a resounding name: "yang-tonifying herb," and some people also call chives "colon-cleansing herb." Not only that, chives have many other names. Chives are also called Caozhongru, Qiyangcao, Changshengcao, and also Biancai.
Pre-sowing Preparation
Dry seeds can be sown directly (mainly for spring sowing). Seeds can also be soaked in warm water at 30-40°C for 8-12 hours, with impurities and shriveled seeds removed. After washing off the mucilage on the seeds, wrap them in a damp cloth and place them in an environment of 15-20°C for germination. Rinse with clean water 1-2 times daily. Sow when 50% of the seeds show white tips (mainly for summer and autumn sowing).
Land Preparation and Fertilization
1. Land preparation. Before sowing, deep-plow the soil to below 20 cm. Combined with fertilization, fine-rake after plowing, level and make beds. Where conditions permit, high ridges can be raised for cultivation to facilitate drainage, or flat beds can also be used.
2. Fertilization. Combined with land preparation, broadcast 5000-6000 kg of high-quality decomposed organic fertilizer per mu, 6 kg of urea, 10 kg of superphosphate, or use compound fertilizer converted at this ratio.
Sowing
1. Sowing time. Sowing can be done anytime after the soil thaws until the Autumn Equinox. Generally, late March to early May is suitable, with spring sowing being preferable. Summer sowing should be done early rather than late.
2. Seeding rate. 4-5 kg of seeds per mu. For open-field seedling raising and transplanting, 1.5-2 kg.
3. Sowing method. Before sowing, first remove a portion of the surface soil from the bed (sieve it for use as covering soil after sowing), then shallow-hoe and rake level. First water with a base watering about 3.3 cm deep. After the water infiltrates, water again to about 3.3 cm deep. After the water infiltrates, evenly broadcast the seeds, then cover with about 1.5 cm of soil. The next day, rake level with a toothed rake, keeping the surface soil both loose and moist, which benefits seed germination and emergence. After sowing, cover with plastic film to preserve moisture. After more than 30% of seeds have emerged, promptly remove the plastic film to prevent seedling burn. If white-tipped or collapsed seedlings are found, add some moist soil.
A "dry sowing method" is also used. The dry sowing method involves directly sowing non-germinated dry seeds in the seedbed. On the prepared seedbed, open small shallow furrows 10 cm wide and about 1.6 cm deep at a row spacing of 10 cm. Scatter the seeds into the furrows, then gently sweep the furrows level with a broom and firm them, then water once. Water again after 2-3 days. Before and after seed emergence, the soil must be kept in a moist state at all times.
Post-sowing Management
1. Watering and topdressing. Combined with watering, apply quick-acting nitrogen fertilizer 2-3 times, topdressing 6-8 kg of urea per mu. Generally, no harvest is taken before transplanting, in order to promote root development of the chive seedlings. By transplanting time, they should reach the standard of strong seedlings.
2. Strong seedling standard. Generally, seedling age of 80-90 days, seedling height of 15-20 cm, individual plants free of pests and diseases, and no lodging.
3. Weeding. After emergence, promptly hand-weed and remove diseased and residual plants. Herbicides such as quizalofop-p-ethyl and haloxyfop can also be used to control monocotyledonous weeds, or before emergence after sowing, spray 30% pendimethalin EC at 100-150 g per mu, diluted in 50 kg of water, onto the bed surface.
Transplanting
1. Transplanting time. Spring-sown seedlings should be transplanted after the Summer Solstice, and summer-sown seedlings should be transplanted around the Great Heat. Transplanting should avoid the high-humidity season, as it is unfavorable for the chives to recover and grow after transplanting.
2. Transplanting method. Lift the chive seedlings, trim the fibrous roots short (leaving only 2-3 cm), and trim the leaf tips short (leaving leaf length of 10 cm). In the bed, at a row spacing of 18-20 cm and hill spacing of 10 cm, plant 7-10 seedlings per hill, suitable for green chives; or open furrows at a row spacing of 30-36 cm, with a furrow depth of 16-20 cm and hill spacing of 16 cm, planting 20-30 seedlings per hill, suitable for producing blanched chives. The planting depth should be such that the tillering node is buried.
Field Management
1. Temperature management. After the greenhouse is sealed, maintain 20-24°C during the day and 12-14°C at night. When plant height reaches above 10 cm, maintain 16-20°C during the day. When the temperature inside the greenhouse exceeds 24°C, ventilate to reduce humidity. For winter cultivation in small arch sheds, strengthen insulation and maintain above 6°C at night.
2. Fertilizer and water management. After transplanting, when new roots and new leaves appear, topdress and water, applying 10-15 kg of urea per mu with the water. At the 4-leaf stage of seedlings, control water to prevent excessive growth, and strengthen cultivation and weeding. When reaching the 6-leaf stage and beginning to tiller, the "root-jumping" phenomenon occurs (the rhizome of tillering appears above the original rhizome). At this time, sand covering, soil pressing, or ridge building and soil banking can be done to prevent roots from being exposed above the soil surface. When seedling height reaches 20 cm, stop topdressing and watering in preparation for harvest. After harvesting begins, topdress once after each harvest. When plant height reaches 10 cm after harvest, combine with soil banking and apply quick-acting nitrogen fertilizer, topdressing 8 kg of urea per mu. When the weather turns cool, stop watering, and water once with freezing water before the soil freezes.
Pest and Disease Control
1. Control principles. Follow the policy of "prevention first, integrated control," adhering to the harmless control principle of "giving priority to agricultural control, physical control, and biological control, with chemical control as supplementary." Pesticides that are explicitly prohibited by the state, including highly toxic, high-residue, and triple-hazard (teratogenic, carcinogenic, mutagenic) pesticides and their mixed formulations, must not be applied.
2. Agricultural control. Strengthen cultivation and weeding, clean the field, strengthen fertilizer and water management, and improve stress resistance.
3. Physical control. Use sugar-wine-vinegar liquid to trap and kill adult insects. Prepare a solution with sugar, wine, vinegar, water, and 90% trichlorfon crystal at a ratio of 3:3:1:10:0.5. Place 1-3 boxes per mu, replenish at any time, keep it from drying out, to trap and kill various fly pests.
Chemical Control
1. Chive maggot
① Ground application. During the peak emergence period of adults, broadcast 2.5% trichlorfon powder along the rows at 2-2.6 kg per mu, or spray 40% phoxim EC at 1000 times dilution or 2.5% deltamethrin EC at 200 times dilution between 9-11 AM, or after watering to drive the pests upward, spray 75% cyromazine at 6-10 g per mu.
② Root drenching. Conduct chemical root drenching during the early peak period of young maggot damage (mid-to-late April in early spring, mid-to-late October in late autumn). Use 1.1% matrine powder at 2-4 kg per mu, diluted in 1000-2000 kg of water, or 50% phoxim EC at 500 times dilution or 48% chlorpyrifos EC at 400-500 mL diluted in 1000 kg of water, for 1 root drenching. Root drenching method: pull aside the surface soil near the chive rhizomes, use a sprayer with the nozzle removed to spray the pesticide directly at the chive roots, then immediately cover with soil.
2. Leafminer. From the peak egg-laying period to the early larval hatching stage, spray 75% cyromazine at 5000-7000 times dilution, or 2.5% deltamethrin, 20% fenvalerate, or other pyrethroid pesticides at 1500-2000 times dilution.
3. Thrips. During the peak larval occurrence period, spray 50% phoxim EC at 1000 times dilution, or 10% imidacloprid at 4000 times dilution, or 30% acetamiprid at 3000 times dilution, or 2.5% deltamethrin-type pesticides at 1500-2000 times dilution.
4. Gray mold
① Fumigation method. Use 45% chlorothalonil or iprodione smoke agent at 110 g per mu, or 10% procymidone smoke agent at 260-300 g, divided into 5-6 spots, lit in the evening, and close the greenhouse for overnight fumigation.
② Dust method. Use 6.5% dimethomorph dust at 1 kg per mu, spray once every 7 days. Spray 2 consecutive times.
③ Powder spray method. Spray 50% procymidone wettable powder at 1000 times dilution, or iprodione wettable powder at 1000-1600 times dilution, or 65% thiophanate-methyl and carbendazim wettable powder at 1000 times dilution, once every 7 days, for 2 consecutive sprays.
5. Phytophthora blight
① Dust method. Same as for gray mold.
② At the initial stage of disease, spray 25% metalaxyl wettable powder at 750 times dilution, or 50% metalaxyl-copper wettable powder at 600 times dilution, or 72% cymoxanil-mancozeb wettable powder, or 60% fosetyl-aluminum wettable powder at 600 times dilution for root drenching or spraying, once every 10 days, alternating use 2-3 times.
6. Rust disease
At the initial stage of disease, use 15% triadimefon wettable powder at 1000-1500 times dilution or 25% diniconazole EC at 3000 times dilution, once every 10 days or so, for 2 consecutive sprays. Diniconazole, triadimenol, and others can also be used for control.
Timely Harvesting
In the year of transplanting, focus on "nurturing roots and strengthening seedlings" without harvesting. If chive flowers appear, remove them promptly. Chives can be harvested when they grow to about 25 cm. Harvest on a sunny morning. During harvesting, the knife should be 2-4 cm above the ground, and the cut surface should preferably be yellow. The cut surface should be neat and uniform. Generally, harvest one crop every 20-25 days. During harvesting, all tools used must be clean, hygienic, and free of contamination.