Key Techniques for Cucumber Cultivation and Detailed Field Management Methods
Cucumber, also known as hu gua or qing gua, belongs to the Cucurbitaceae family. It is widely distributed throughout China and is one of the main greenhouse products. The stems of cucumber are covered with hairs and are rich in sap. The leaves have 3-5 lobes and are covered with fine hairs. The rind of cucumber is originally green, but turns yellow gradually over time, and is then called old cucumber.
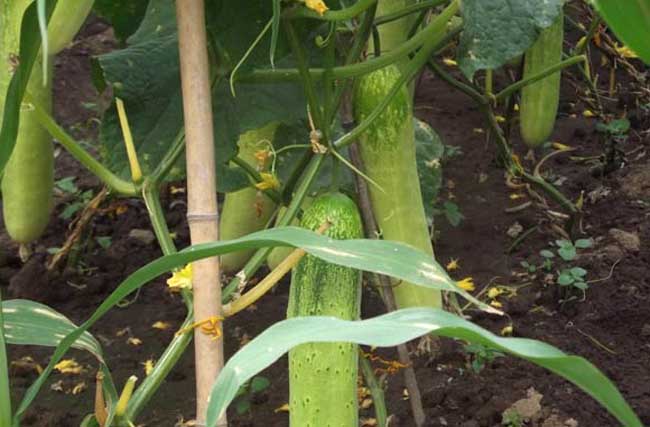
Morphological Characteristics
Cucumber roots are mainly concentrated in the 0-30 cm layer, with the main root reaching as deep as 1 m. It has a strong demand for air, weak cold resistance and weak nutrient uptake capacity, so it should be planted shallowly and is suited to fertile, loose soil. The root cambium is shallow and prone to aging; root development occurs quickly during the seedling stage, so the seedling period should not be too long and the roots must be protected during transplanting. The thickness and color depth of the stem and the hardness of the spines on the stem are important indicators of plant vigor and yield level. Generally, a stem diameter of 0.6-1.2 cm and internode length of 5-9 cm is ideal.
The nutrients stored and produced by the cotyledons are the main source of early nutrition for the seedlings. The cotyledons are also an important indicator of whether the growing environment for cucumber is good or poor, and they should be kept intact during cultivation. The true leaves are large and thin, with high transpiration, and wilt easily when water is lacking. Cucumber is monoecious with unisexual flowers and has the characteristic of single-row fruiting. Flower bud differentiation begins when the first true leaf appears. When the first true leaf unfolds, the growing point has differentiated to the 12th node, and flower buds have differentiated in the leaf axils of nodes 1-9, but the sex type is not yet determined. When the second true leaf unfolds, flower bud differentiation has reached nodes 12-16, and the sex type of nodes 3-5 has been determined. When the seventh true leaf unfolds, flower buds have differentiated at the 26th node, and the sex type of flower buds within node 16 has been determined. Therefore, by the end of the seedling stage, whether each node in the middle and lower parts of the plant will produce a female or male flower has already been determined. The number of female and male flowers is directly related to environmental conditions. Moderate daytime temperatures and appropriately lowered night temperatures favor female flower formation. When the first true leaf unfolds and the second true leaf has not yet unfolded, a night temperature of 12-14°C; when the second true leaf unfolds, it can be lowered to 10-12°C, which favors female fruit formation. At the 1-5 true leaf stage, 8 hours of light per day favors female flower formation, while more than 12 hours reduces female flowers. High water content favors female flower formation, but too high a level easily causes excessive vegetative growth and is unfavorable for female flower formation. Applying nitrogen and phosphorus all at once is unfavorable for female flower formation, while split application produces more female flowers. For example, with a one-time application, the female-to-male ratio is 1:91; with three applications, the female-to-male ratio is 1:65. Timely use of ethephon or Zenggualing can reduce male flowers, and treatment with silver nitrate can reduce female flowers.
Growth Cycle
1. Germination stage: from sowing to the appearance of the first true leaf, generally 5-7 days. During this stage, growth is small and slow, requiring relatively high temperature and humidity and sufficient light to promote early and uniform emergence and prevent excessive vegetative growth.
2. Seedling stage: from the unfolding of the first true leaf to the unfolding of the 4th-5th true leaf, generally about 30 days. Flower bud differentiation begins at this stage, but the growth center remains the vegetative organs such as roots, stems and leaves. The management goal is to combine promotion and control to cultivate strong seedlings.
3. Early flowering stage (vine extension stage): from the unfolding of the 4th-5th true leaf to the setting of the first female fruit, about 20 days. At this time, vegetative growth and reproductive growth proceed simultaneously, and the growth center gradually shifts from vegetative growth to reproductive growth. Promotion and control should be combined, promoting fruit set and controlling excessive vegetative growth.
4. Fruiting stage: from the setting of the first female fruit to vine removal. The duration varies depending on the cultivation method. During this stage, plant growth slows down and the center is fruit and flower bud development. Sufficient water and fertilizer should be supplied to promote fruit set and prevent premature senescence.
Open-field Cucumber Cultivation Techniques
1. Variety Selection
Varieties with high yield, strong disease resistance, good market quality and suitability for spring open-field cultivation should be selected, including Jinchun No. 4, Zhongnongda No. 11, Zhongnongda No. 12, Bomei No. 4, Deruite 902, Zhongnong No. 12, etc. Varieties suitable for autumn open-field cultivation include Jinyou No. 3, Jinyan No. 2, Tangshan Autumn Cucumber, etc.
2. Seedling Raising
The seedling age is about 35 days. Standards for strong seedlings: intact cotyledons, 3-5 true leaves, relatively short internodes, a 45-degree angle between the petiole and the main vine, dark green leaf color, thick leaves, thick stems, well-developed roots, and no pests or diseases.
3. Fertilization and Bed Preparation
Prepare the land and apply 5 cubic meters of decomposed organic fertilizer, 25-30 kg of superphosphate or 10-15 kg of diammonium phosphate. Before transplanting, plow and make beds 1.2 m wide and more than 15 cm high, and cover with plastic film.
4. Transplanting
1) Determination of transplanting time: transplant as early as possible on the premise of ensuring no freezing damage after transplanting. In the Chengde area, transplanting is generally carried out in late April to early May. Temperature requirements: minimum night temperature above 5°C, and soil temperature at 0-10 cm above 12°C. Autumn open-field cucumber uses direct seeding.
2) Transplanting density: 4000-4500 plants per mu, transplanted in wide and narrow rows, with narrow row spacing of 40 cm, wide row spacing of 80 cm, and plant spacing of 25-30 cm, using the dark water method for transplanting.
3) Field Management
a. Trellising: Set up trellises as early as possible after transplanting to prevent wind damage to seedlings. Flower-frame or A-shaped trellises can be used, set about 8-10 cm from the roots.
b. Vine tying: Use the “8” method for tying vines to prevent stem abrasion and vine drooping. Tie once every 2-3 nodes, and do it in the afternoon, as stems break easily in the morning. The tightness of tying should suppress the strong and support the weak; tie vigorous plants slightly tighter and keep growing points at a uniform height.
c. Pruning and pinching: For varieties that bear fruit on the main vine, remove all lateral branches. For those that bear fruit on lateral vines, leave one to two leaves after fruit set and pinch the tip, and remove all tendrils. When the stem exceeds the top of the trellis, pinch the tip in time to promote the growth of lower fruits. The twisting method can also be used to inhibit upper growth.
d. Fertilizer and water management: Water and cultivate in time. The amount and frequency of watering depend on the weather and growth stage. Water for seedling recovery 5-7 days after planting; control water, cultivate and restrain growth before fruit set; water to promote fruit growth when the root fruit is 10-12 cm long; during the fruiting stage, water once every 5-7 days. The principle of topdressing is light first and heavy later, with small amounts applied multiple times. Apply fruit-promoting fertilizer after the root fruit sets, and apply peak-fruiting fertilizer after the root fruit is harvested. The use of organic fertilizer for topdressing is recommended.
Plastic Greenhouse Cultivation Techniques
1. Variety Selection
For early spring cultivation, varieties that are early-maturing, highly cold-tolerant and fast in fruit development should be selected. Suitable varieties include Jinyou No. 10, Bojie No. 10, Deruite 721, Zhongnongda No. 21, Zhongnongda No. 22, Zhongnong No. 16, etc. For autumn delayed cultivation, varieties with strong disease resistance and concentrated fruiting should be selected. Suitable varieties include Nongda No. 23, Deruite 166, Zhongnong No. 12, Jinyou No. 1, Jinyou No. 5, etc.
2. Seedling Raising
For the early spring crop, the seedling age should be relatively long, with sufficient low-temperature hardening before transplanting, and seedlings should be raised in nutrient cups or paper bags. For the autumn delayed crop, direct seeding can be used.
3. Preparation Before Transplanting
Cover the greenhouse early and warm the soil. Cover the greenhouse film 20-30 days before transplanting. Old greenhouses should be disinfected. Trisodium phosphate or sodium hypochlorite can be sprayed on the posts and greenhouse film, or fumigation can be carried out with smoke agents such as chlorothalonil. After the soil thaws, plow the land in time and apply sufficient base fertilizer. The base fertilizer should be mainly organic fertilizer, and high beds should be used with plastic film mulching.
4. Transplanting
Transplant as early as possible on the premise of ensuring that the seedlings are not damaged by freezing. The soil temperature at 10 cm inside the greenhouse should be above 12°C, and the minimum night temperature should not be lower than 5°C. Plant at moderate density, about 4000 plants per mu, and transplant moderately shallowly.
5. Management After Transplanting
1) Temperature Management
For early spring cultivation, cucumber mainly needs heat preservation and cold prevention in the early stage. Generally, ventilation is not used before the seedling recovery stage, and night cold protection should be strengthened. Seedling recovery takes about 7 days. Various measures should be taken to raise the night temperature and promote seedling recovery. From seedling recovery to root fruit set, about 20 days, temperature should be properly controlled, with 20-25°C during the day and 12-16°C at night, to prevent excessive vegetative growth. During the peak fruiting stage, temperature should be properly controlled at 25-30°C during the day and 16-18°C at night.
2) Fertilizer and Water Management and Cultivation
In early spring cultivation, soil temperature is relatively low, so the transplanting water should be appropriately small. After seedling recovery, water for seedling recovery, then cultivate and restrain growth. After harvesting the root fruit, water, and thereafter water once every 5 days. Watering is best done on sunny mornings. After sudden clear weather following summer rainstorms, water once. After watering, ventilate in time to reduce air humidity inside the greenhouse. From transplanting to root fruit harvest, topdress 1-2 times, and once every 7-10 days during the peak fruiting stage. Alternate the use of diammonium phosphate and ammonium nitrate, or use water-soluble fertilizer applied with irrigation.
3) Vine Hanging and Pruning
When cucumber grows to 5 nodes, hang the vines or set up trellises in time. After that, wind or tie the vines once every 2-3 days, and promptly remove all lateral branches and tendrils. When the vines approach the greenhouse film, pinch the tip or twist the tip. promptly remove diseased and old leaves from the lower part.
Solar Greenhouse Winter-Spring Crop Cultivation Techniques
1. Variety Selection
Cucumber varieties should be selected that are tolerant to low temperature and weak light, have vigorous but not excessively sprawling growth, few branches, low female fruit node position, good fruiting performance, moderate fruit size, good appearance and flavor, high yield and strong disease resistance. Such as: Jinyou 35, Jinyou 38, Zhongnong No. 16, Zhongnong No. 29, Zhongnongda No. 31, Zhongnongda No. 32, Deruite 943. The rootstock should have strong affinity, low-temperature tolerance and strong stress resistance, and the resulting cucumber should have no off-flavor and good quality.
2. Seedling Raising
Seedling time arrangement (using black-seeded pumpkin as an example)
Day 1 Day 4 Day 12 Day 22 Day 35 Sow cucumber Sow pumpkin Graft Root cutting Transplant3. Preparation Before Transplanting
1) Covering the Greenhouse Film and Greenhouse Disinfection
Cover the greenhouse film one month before transplanting and disinfect the greenhouse. For disinfection, 200 mL of dichlorvos can be used, with 1.5-2 kg of sulfur added, mixed evenly with sawdust and ignited, then the greenhouse is sealed for 1-2 days, which can effectively kill pest eggs and disease spores in the greenhouse. For greenhouses with severe root-knot nematodes, 80 kg of calcium cyanamide per mu can also be applied and fully mixed.
2) Land Preparation and Base Fertilizer Application
The base fertilizer should be mainly organic fertilizer, applying 10000 kg of fully decomposed organic fertilizer per mu, and deeply plowing 40 cm to mix evenly. Fermented and rotted chopped grass, wheat straw, rice husks and other organic materials can also be applied year after year. The best measure is to use straw bio-reactor technology, which can effectively raise soil temperature, increase soil organic matter, improve the soil environment, reduce disease occurrence, improve product quality, and have a prominent yield-increasing effect.
3) Bed Preparation and Plastic Film Mulching
For winter greenhouse cucumber cultivation, high beds should be made, and drip irrigation or under-film dark irrigation should be adopted. The bed width is 1.2 m and the height is about 15 cm, with plastic film mulching. It is also possible to transplant first and then cover with film.
4) Determination of Transplanting Time
Winter-spring cucumber is generally transplanted from late November to early December.
5) Transplanting Method and Density
Cultivate about 3500 plants per mu. Transplanting seedlings should be strictly selected, removing diseased seedlings, weak seedlings and unqualified grafted seedlings. Open transplanting holes at a plant spacing of 28-30 cm, place the seedlings into the holes, water well, and then cover with plastic film.
4. Management After Transplanting
1) Early Stage Management
The period from transplanting to the beginning of fruit harvest is called early stage management. The focus of early stage management is to promote roots and control vine growth. Although temperature and light have decreased significantly during this period, they have not yet reached the lowest point. It is necessary to make full use of the favorable climatic conditions of this period, strengthen management, promote root development, and enhance the plant's adaptability to low temperature, weak light and special weather. The technical level of early stage management has an important impact on plant growth, disease resistance, cold tolerance and yield in the middle and late stages.
a. Water the first three irrigations well: first, water the transplanting water well to prevent separation between the soil ball and surrounding soil, which would affect seedling recovery. 10-15 days after transplanting, water the seedling recovery water well. This irrigation should be sufficient and thorough, applied from the dark ditch in the middle of the bed, with the water level reaching the transplanting holes. After the root fruit is harvested, water the third irrigation on a sunny morning, also called the fruit-promoting water.
b. Promote roots and control vines: within one week after transplanting, maintain 25-32°C during the day and 15-17°C at night to promote seedling recovery. After seedling recovery, increase ventilation. On sunny days at noon, the maximum should not exceed 30°C, at night 15-12°C, and before the straw mats are lifted in the morning it can be maintained at 10°C. Increase the day-night temperature difference and control aboveground growth. If temperature management is too high, the plants grow too vigorously, and their ability to resist low-temperature cold waves decreases in the coldest January and February. At the same time, leaves become too large and severely shade the ground, which also affects the rise of soil temperature and root development.
c. Vine hanging and adjustment: when the plant grows to 6-7 leaves and begins to trail, promptly run lines and hang the vines. As the stem grows, wind the stem around the hanging string, once every 2-3 days thereafter.
2) Mid-stage Management
The period from root fruit harvest to early March is called mid-stage management. During this period, temperature is the lowest and light is the weakest in winter cucumber production. It is the most difficult time for management, and it is also the peak period for yield and output value formation.
a. Temperature management: temperature management is the core during this period. During the day, extend the lighting time as much as possible. On the premise of not affecting the indoor temperature, uncover straw mats as early as possible and cover them as late as possible, and implement four-stage variable temperature management. From 8:00 to 13:00, control the temperature between 25-32°C, and begin ventilation when it exceeds 32°C. From 13:00 to 15:30 in the afternoon, photosynthetic capacity declines markedly, and the temperature is maintained between 20-30°C. After covering the mats, the indoor air temperature drops gently. In the first half of the night, maintain the temperature at 20-15°C, and in the second half of the night at 12-10°C, which is conducive to nutrient transport and can also inhibit respiratory consumption. Soil temperature should be maintained above 15°C. Entering mid-to-late February, as air temperature rises, sunshine hours increase and light intensity increases, the nutrients produced by the plants increase, and the night temperature should also be raised, with 22-16°C in the first half of the night and 15-12°C in the second half of the night, which is conducive to nutrient transport and fruit growth.
b. Humidity management: because winter temperatures are low and ventilation inside the greenhouse is small, a high-humidity environment easily forms, causing various diseases. In response to this characteristic, low-temperature and low-humidity management measures should be implemented. During the day, air humidity should be controlled at 60-80%, and at night maintained between 85-90%. In the morning, leaves should as much as possible not have water droplets. Reduce the number of waterings as much as possible, do not water unless dry, ventilate heavily after watering, and when using pesticides, choose smoke agents and dusts as much as possible.
c. Topdressing: as the amount of harvested fruit increases, supplement nutrients in time. According to the harvest amount and plant performance, determine the type and amount of topdressing. Generally, topdressing with irrigation begins at the fourth irrigation. If the leaves and fruits are darker in color, topdressing should be mainly nitrogen fertilizer, supplemented by phosphorus and potassium fertilizer, and attention should be paid to supplementing calcium, magnesium and other trace elements. Before application, dissolve the fertilizer first and apply it with irrigation. If the plant color is lighter and the leaves are larger, then phosphorus and potassium fertilizer should be the main topdressing. The amount of topdressing should follow the principle of “small and frequent meals”, avoiding too large a single topdressing amount. After March, diluted manure and biogas slurry/biogas residue can be applied with irrigation, but it must be fully decomposed and fermented.
3) Late Stage Management
a. Vine lowering and leaf removal: as the plant grows and fruits are harvested successively, when the growing point approaches the roof, vine lowering should be adopted. The method is to untie the plastic string tied to the iron wire above the lowered vine, let the cucumber growing point fall to a suitable height, and then tie it again. Before lowering the vine, promptly remove old and diseased leaves from the lower part, which can reduce nutrient consumption, improve ventilation and light transmission conditions, and avoid disease spread.
b. Strengthen water and fertilizer management and extend the harvest period: after entering April, in order to prevent plant senescence and nutrient deficiency and to extend the harvest period as much as possible, attention should be paid to strengthening fertilizer and water management. Generally, water once every 5-7 days and topdress once every 7-10 days, and ensure the quality of water-soluble fertilizer. If flower topping occurs and the plant appears shrunken, sealed-tip pinching can be adopted to promote the growth of comeback fruits. To improve the marketable rate of fruits, promptly remove curved fruits, diseased fruits and excess small fruits. Harvesting must be timely, and delayed harvesting must not be allowed to affect the marketable rate and total yield of fruits.
4) Management Under Special Weather
Under special severe weather conditions such as cold waves, cloudy snow and continuous cloudy days, special management measures should be implemented to reduce or avoid losses caused by disastrous weather to production.
When a strong cold wave arrives, strictly prevent cold and preserve heat, add paper quilts, straw mats and other coverings, and adopt temporary heating measures indoors, such as lighting stoves and turning on light bulbs.
When it snows, clean it off in time to prevent snow accumulation on the greenhouse roof from increasing the load on the frame too much and causing the greenhouse frame to collapse.
During continuous cloudy days, harvest fruits early to reduce nutrient consumption by the fruits. On the premise of not obviously affecting the drop in indoor temperature, uncover the straw mats as much as possible to obtain a certain period of scattered light. After the weather suddenly clears, carry out foliar topdressing to quickly supplement nutrients and increase humidity inside the greenhouse. If leaves wilt severely, temporary re-covering with straw mats can be carried out appropriately.
5. Harvesting
Cucumber is suitable for early harvesting. The single fruit weight is 100-150 g in the early stage and 150-250 g in the middle and late stages. In particular, the root fruit must be harvested early so that the upper fruits and vines grow at the same time. During continuous cloudy days in the early stage, harvest early in time to prevent premature senescence or disease in the plants.
Cucumber Physiological Disorders
1. Fruit Stunting
After flowering, when the fruit grows to about 8-10 cm, the fruit stops elongating and expanding, and the front end gradually wilts and turns yellow, after which the entire fruit gradually dries up. The main causes are improper cultivation and management measures, insufficient water and fertilizer supply, too many fruits set, delayed harvesting, poor plant vigor, insufficient light, and too low or too high temperature.
2. Bitter Cucumber and Its Causes
It is mainly caused by cucurbitacin, the bitter substance in the fruit. The main causes of bitter cucumber are excessive nitrogen fertilizer, insufficient watering, etc. Unsuitable environmental conditions can also cause bitter cucumber formation, such as continuous low temperature, too weak light, and poor soil texture.
3. Deformed Cucumber
The main symptoms include waist-stem cucumber, pointed-mouth cucumber, big-belly cucumber, curved cucumber, and stiff cucumber. The causes are improper cultivation and management measures, such as improper water and fertilizer management causing weak plant vigor; improper ethephon treatment, etc.; too high or too low temperature causing poor pollination and fertilization; high temperature, drought and dry air can also form deformed cucumbers. In addition, deficiency of B and K in the soil can form deformed cucumbers.
4. Low-Temperature Disorder
[Symptoms]Cucumber has relatively weak low-temperature tolerance. Continuous low temperature can cause multiple symptoms: if soil temperature is too low during sowing, seed germination and emergence are delayed, resulting in yellow weak seedlings, rotted seeds, or occurrence of damping-off and root rot. Some emerged seedlings show white edges on the cotyledons, leaves turn yellow, and roots stop growing; if soil temperature remains below 12°C for a long time, root tips turn yellow or root rot and rotten roots appear, and the aboveground part begins to turn yellow. After cold damage or freezing damage occurs after transplanting, leaves appear dark green, leaf margins slightly curl outward, and yellow-white spots appear between the main veins of large leaves; as freezing damage worsens, they expand and merge. Or the plant roots slowly or not at all, or flower buds do not differentiate, the whole plant grows thin and weak, flower topping appears, and even leaves wither to the point that the whole plant dies.
[Control Methods]
1) Select low-temperature-tolerant varieties that germinate quickly, emerge rapidly and grow quickly as seedlings.
2) Place soaked seeds that have begun to germinate quickly at 0°C for 24-36 hours before sowing, which can enhance cold resistance.
3) Avoid seedling raising and transplanting during cold periods. Use measures such as lighting stoves in the greenhouse or adding heating wires to raise temperature.
4) Apply compost fermented with effective microorganisms or fully decomposed organic fertilizer.
5) Spray plant cold-resistance agents before cold waves invade: 100-200 mL per mu of 10% Baolifeng cold-resistance solution at 400 times dilution, or 3.4% Bihu wettable powder at 7500 times dilution, or 50 g of brown sugar mixed into one bucket of water plus 0.3% monopotassium phosphate for spraying.
6) If freezing damage has already occurred due to too low temperature, adopt slow temperature-raising measures. For example, after long cloudy days and then clear weather, use straw mats to shade light so that the physiological functions of cucumber recover slowly. Never rush this.
5. Nutrient Deficiency Disorders
1) Potassium Deficiency
Leaf margins show slight yellowing, then the leaf margins die, and as the leaves grow, they curl outward. The control method is to supplement potassium fertilizer in time, and while supplementing potassium fertilizer, it should be done together with iron supplementation.
2) Magnesium Deficiency
The mesophyll between the veins of the lower leaves of cucumber gradually loses green and turns yellow. With further development, all parts turn yellow except for a little green at the leaf margins. In severe cases, the upper leaves also turn yellow from the inner side. The control method is to increase the application of organic fertilizer, use formula fertilization, and avoid excessive nitrogen fertilizer causing soil acidity that affects the absorption of calcium and magnesium. When magnesium is deficient, foliar spray 1%-2% magnesium sulfate, etc. Note that magnesium supplementation should be combined with potassium and zinc supplementation.
3) Boron Deficiency
When boron is deficient, the growing point dies, floral organs develop incompletely, leaves, stems and fruits stop growing, leaf margins turn yellow, and the yellowed area is relatively wide, with cracks on the fruit skin. Control measures: increase the application of barnyard manure, do not apply too much lime, and water reasonably. Supplement boron fertilizer in time. Chelated boron series can be used to avoid soil damage caused by applying borax-type fertilizers alone.
6. Soil Salinization Disorder
[Symptoms]Due to the large amount of chemical fertilizer applied year after year in solar greenhouses or plastic greenhouses, plus the high temperature inside the greenhouse promoting massive evaporation of surface water, soil mineral nutrients rise with water and accumulate on the soil surface. In addition, because the greenhouse film is covered year-round, the soil inside is not leached by rainwater, resulting in secondary salinization of the soil. Long-term accumulation of salts on the surface forms a thick layer of green moss. It not only affects root growth and the absorption of water and nutrients, but also induces deficiency disorders such as magnesium deficiency, calcium deficiency and boron deficiency. Plants are short and grow slowly, roots do not grow downward but gather around the main root, leaves are small, and leaf color is dull dark green; flowering and fruiting are few, fruits are small, deformed fruits are numerous, and yield decreases markedly. In severe cases, vines wilt.
[Control Methods]Increase the application of organic fertilizer, deeply plow the soil, and use as little or no chemical fertilizer that easily forms salts in the soil, such as ammonium sulfate. During slack farming periods, irrigate heavily to leach salts, or remove the film during the summer fallow period to let rainwater leach salts. Use black-seeded pumpkin to graft cucumber to improve salt tolerance and reduce or avoid salt damage; mulching with plastic film inside the greenhouse can significantly inhibit surface evaporation and can play a certain role in suppressing salt.
Main Disease Control Techniques for Cucumber
1. Downy Mildew
It is a fungal disease, and the affected areas are the middle and upper leaves of cucumber. When observing in the field, the following points should be grasped: around 8 a.m. each day, check whether the back of the leaves has water-soaked, polygonal lesions, and whether there is a gray mold layer on the lesions. If these three points are present, it can be diagnosed as downy mildew. The suitable environment for onset is a temperature of 16°C-22°C and relative humidity above 83%. The pathogen of this disease has two fears, namely fear of dryness and fear of high temperature. When dry, the pathogen dies naturally in 3-5 days. Under conditions of relatively high humidity in the greenhouse, the temperature can be controlled at 45°C for 2 hours, and with appropriate chemical control, this disease can be easily controlled.
[Chemical Control]Anke, Previcur, Mieke, cymoxanil mancozeb, Yikuaijing, Jialeiduomier and Amistar can be selected. In addition, when controlling downy mildew, attention should be paid to the simultaneous occurrence of bacterial angular leaf spot. Chemicals for controlling bacterial angular leaf spot can be added to the chemicals for controlling downy mildew.
2. Gray Mold
[Symptoms]It can damage fruits, leaves and stems. When damaging fruits, it often first infects fallen flowers, causing the flowers to rot, grow a light gray-brown mold layer, and then further infect young fruits. The affected small fruits quickly soften, shrink and rot, and are densely covered with a gray-white mold layer. Leaf onset mostly appears as round, nearly round to irregular lesions, 20-50 mm in diameter, with obvious edges, the surface is light reddish-brown, and a small amount of gray mold grows. Stem damage causes local rot, and in severe cases the diseased stem breaks and the whole plant dies. It is a disease caused by fungal infection. In greenhouses, this disease often begins after winter when humidity is high, ventilation is not timely and temperature is low. A temperature of about 20°C, insufficient light on cloudy days, relative humidity above 90%, and long dew duration are important conditions for the occurrence and spread of gray mold. If the temperature is above 30°C and relative humidity is below 90%, the disease stops spreading.
[Chemical Control]In protected cultivation, at the early stage of disease, 10% procymidone smoke agent or 45% chlorothalonil smoke agent can be selected, 250 g per mu each time, fumigated for 3-4 hours. It is also possible to use 50% iprodione wettable powder at 1500 times dilution, or 2.5% cyprodinil wettable powder at 600 times dilution, or 50% Limeikang at 500 times dilution, or 25% Amistar suspension concentrate at 1500 times dilution. Apply once every 6-7 days, for 3-4 consecutive treatments, and the chemical must be sprayed onto flowers and young fruits. When dipping flowers at the initial flowering stage, adding 0.1% of 50% procymidone wettable powder or 25% cyprodinil wettable powder at 200-300 times dilution for flower dipping or flower spraying has an obvious effect.
3. Powdery Mildew
[Symptoms]First, small round powdery mildew spots appear on the front or back of lower leaves, gradually expand, become thick and dense, and soon merge into one piece. In the late stage of the disease, the entire leaf is covered with white powder, then turns gray-white, and finally the leaf becomes yellow-brown and dried up. Similar lesions also appear on stems and petioles, densely covered with white powdery mold spots. In autumn, sometimes yellow-brown small granules appear on the lesions, later turning black. In this disease, the leaves are covered with white powder, and in the early stage of onset the epidermis under the mold layer remains green, making it easy to distinguish from other leaf diseases. The suitable temperature for this disease is 20-25°C, and the suitable relative humidity is 35-45%. Therefore, the requirements of powdery mildew fungi for temperature and humidity are neither cold nor hot, neither dry nor wet. Young, tender and excessively vigorous plants are susceptible to this disease.
[Control Methods]
Powdery mildew fungi are particularly sensitive to “sulfur”. Before transplanting, fumigate with 1.8 kg of sulfur powder per mu plus sawdust or other combustion-supporting agents, ignite and fumigate, keep sealed for one day and night, which can kill powdery mildew fungi. Fumigate again after 3 days, then sow or transplant. During cucumber growth, sulfur powder can be reduced by half, the time reduced to one night, and fumigated again after 5-7 days, with good results. When central diseased plants occur in the field, spray chemicals in time for control. You can choose 20% triadimefon wettable powder at 1000 times dilution, or 75% Daconil wettable powder at 500-600 times dilution, or 10% Shigao at 2500 times dilution, or 2% Jianshoumi at 400 times dilution, etc., spraying once every 5-7 days, and alternate the pesticides. When spraying, do not neglect spraying the ground.
4. Viral Disease
[Symptoms]Cucumber viral disease mainly damages leaves and fruits. It can occur at both the seedling stage and the adult plant stage. At the seedling stage, the cotyledons turn yellow and wither, and young leaves show a mosaic pattern of dark green and light green. At the adult plant stage, plants are short, internodes are short and thick, leaves are obviously wrinkled and thickened, new leaves show yellow-green mosaic, and in severe cases diseased leaves curl backward, and old leaves at the lower part of diseased plants gradually turn yellow and dry. After the fruit is affected, it stops growing, and the surface shows mottling of alternating dark and light green. In severe cases, the fruit surface is uneven or deformed. In severely affected plants, internodes shorten, small leaves cluster, no fruits are set, leading to shrinkage and death. It mainly spreads through aphids, planthoppers and field operations. Under conditions of high temperature, drought and strong sunlight, the disease is severe. When water is lacking, fertilizer is lacking, management is extensive, and aphids are numerous, the disease is severe.
[Control Methods]During seedling raising, use shade nets to lower temperature and shade light, and stay away from diseased crops. Immediately after transplanting, use “Tianda 2116” at 1000 times dilution + Tianda Yufeng at 1000 times dilution for spraying and root drenching to promote seedlings and prevent disease. At the early stage of disease, 20% Dukexing at 500 times dilution or 20% Bingdu A at 500 times dilution can be sprayed, once every 7 days.
5. Bacterial angular leaf spot
[Symptoms]At the seedling stage, round or oval water-soaked spots appear on the cotyledons, slightly sunken, later turning brown and causing the cotyledons to wither. At the mature plant stage, pinhead-sized water-soaked spots first appear on the leaves; the lesions expand and, restricted by the leaf veins, become angular and yellowish-brown. When humidity is high, a milky white slime is produced on the lesions on the underside of the leaves, which dries to form a white film or white powdery substance; in the later stage the lesions become brittle and easily perforated. The lesions on stems, petioles and young fruit are water-soaked, nearly round to oval, later becoming light gray, and the lesions often crack; when moist, bacterial ooze exudes from the diseased areas on the fruit, and the lesions spread into the interior of the fruit, discoloring the flesh along the vascular bundles and extending all the way to the seeds, causing seed-borne infection. Diseased fruit rots in the later stage and has a foul odor; infected young fruit often rots and drops early. The pathogen in the soil spreads and spreads through the field via irrigation water, wind and rain, airflow, insects and farming operations. The pathogen enters the host through stomata, wounds and water pores. The optimum temperature for disease development is 18-26°C, with relative humidity above 75%; the higher the humidity, the more severe the disease, and the disease tends to become epidemic after storms. In low-lying plots with poor drainage, continuous cropping, excessive nitrogen fertilizer, insufficient potassium fertilizer, or overly dense planting, the disease is more severe.
[Control methods]At the early stage of disease, spray with 5,000-fold diluted Xinzhiromycin solution, or 30% copper fatty acid (DT fungicide) wettable powder at 500-fold dilution, or 77% Kocide wettable powder at 400-fold dilution, or 47% Jiaruinong wettable powder at 600-800-fold dilution. The above pesticides can be used alternately, spraying once every 7-10 days, for 3-4 consecutive sprays. Excessive use of copper formulations can easily cause phytotoxicity, so generally no more than 3 sprays. Spraying must be done carefully and thoroughly, covering both the upper and lower surfaces of the leaves, to improve control effectiveness.
6. Root-knot nematode
[Symptoms]It mainly damages the roots. After the roots are damaged, they develop poorly, with many lateral roots, and spherical or conical galls of varying sizes form at the root tips, sometimes in clusters; they are initially white and soft, later turning brown to dark brown, and the surface sometimes cracks. The aboveground parts of infected plants develop poorly, with yellow leaves, and wilt and die in dry weather, easily mistaken for plants with Fusarium wilt. The optimum temperature for root-knot nematode development is 25-30°C; at 27°C, one generation takes 25-30 days to reproduce; larvae stop activity at 10°C and die at 55°C after 10 minutes. Nematodes are mostly active in the soil layer within 20 cm depth, and most abundant in the 3-10 cm soil layer. Nematodes spread and spread through soil, diseased seedlings, irrigation water, farming operations, etc. Under conditions of high terrain, loose soil and low salinity, nematodes are more active, which favors disease development; sandy soil and continuously cropped land have more severe disease. In the absence of a host, nematodes can survive in the soil for 1 year.
[Control methods]Soil disinfection: before planting, apply 80 kg of lime nitrogen per mu combined with deep plowing; disinfect the soil with 1.8% abamectin EC at 1-1.5 ml per sq m diluted in 6 L of water, or apply 4-6 kg of 3% Miral granular per mu mixed with 50 kg of dry fine soil and broadcast; during the growing period, drench the roots 1-2 times with 1.8% abamectin EC at 1,000-1,500-fold dilution, at intervals of 10-15 days. After harvest, thoroughly remove diseased and residual plants from the field, burn or bury them deeply in a concentrated manner, and they can be used for composting. In addition, applying two tons of biogas residue per mu can effectively control root-knot nematodes. Where conditions permit, planting one crop of rice after vegetable harvest gives even better results.
7. Whitefly
Whitefly has very diverse feeding habits and can damage many kinds of vegetables. It mainly damages as nymphs, gathering on the underside of cucumber leaves to suck sap, causing leaves to fade, turn yellow and wilt, and in severe cases the plants die. While damaging, it also secretes honeydew, contaminating the leaves and causing mold infection, affecting plant photosynthesis and seriously affecting yield and quality.
[Control methods]
a. Try to avoid mixed planting, especially cucumber, tomato and common bean, which must not be mixed. Adjusting the production sequence is also an effective method, that is, planting celery, sweet pepper and other vegetables less damaged by whitefly in the first crop, then planting cucumber and tomato in the next crop.
b. Older nymphs are mostly distributed on the lower leaves; remove the old leaves and burn them. Setting yellow boards in the greenhouse can effectively control whitefly.
c. Use a knapsack motorized fogger to atomize 1% deltamethrin or 2.5% fenvalerate (sumicidin) oil into droplets suspended in the air, which is very effective at killing adults.
d. Spray with 25% buprofezin (Applaud) wettable powder, or 2.5% deltamethrin or 20% fenvalerate (Sumicidin) EC at 2,000-fold dilution, once every 6-7 days, for 3 consecutive treatments. Fumigation with smoke agents can also be used, for 2-3 consecutive times.