Key Technical Points and Management Methods for High-Yield Cultivation of Goji Berry Trees
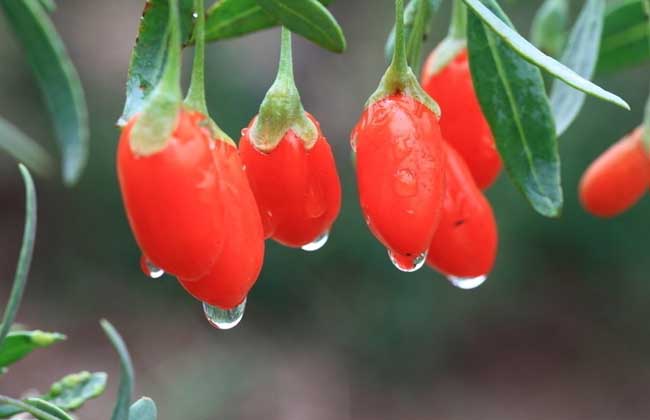
The goji berry tree is a multi-branched shrub plant of the genus Lycium in the Solanaceae family. It often grows on hillsides, wastelands, hilly terrain, saline-alkali land, roadsides, and beside village homes. The famous production areas for goji berries in China are Ningxia and Qinghai. In addition to widespread wild growth, it is also cultivated in various places for medicinal, vegetable, or landscaping purposes. Let us now take a look at high-yield cultivation techniques for goji berry trees!
Growth Habits of Goji Berry Trees
Goji berry is a perennial shrub economic crop that is drought-tolerant, barren-tolerant, and salt-alkali-tolerant. Its economic lifespan reaches 15 years. Goji berry has strong adaptability and can generally be cultivated in areas with an average annual temperature between 5-20°C. Goji berry likes sunlight and requires strong light. It has no strict requirements for soil and can be planted in loam, sandy soil, or poor saline-alkali soil. In terms of varieties, China mainly has Ningqi No. 1, Ningqi No. 2, Ningqi No. 3, Ningqi No. 4, as well as Mengqi No. 1 and other varieties.
Goji Berry Tree Nursery Construction
1. Nursery site selection: The goji berry nursery site should be selected on flat sandy loam soil. A good drainage and irrigation system should be established to facilitate water diversion for irrigation during dry and rain-scarce periods. The groundwater level of the nursery site is required to be below 1.5 m, and the soil salt content below 0.2%.
2. Applying sufficient base fertilizer: Goji berry is a highly fertilizer-tolerant plant. The growth quality of goji berry at the seedling stage is directly related to the base fertilizer applied before raising seedlings. For nursery site fertilization, decomposed farmyard manure is the main component, supplemented by chemical fertilizers. For base application, pig manure, chicken manure, cow manure, or stable manure can all be used. For chemical fertilizers, diammonium phosphate and potassium sulfate are selected. Before plowing, spread the fertilizer in the nursery site. The application rate of farmyard manure is 2500-4000 kg per mu, the amount of diammonium phosphate is 10 kg, and potassium sulfate is 5 kg.
3. Land preparation and deep plowing: After applying sufficient base fertilizer, the first step is deep plowing and leveling. The plowing depth is between 20-25 cm to facilitate future root growth and development of seedlings. After plowing is completed, the soil can be appropriately aired for 2-3 days. Before raising seedlings, use a rake to level and break up the soil 1-2 times. The flatter the better, and the finer the soil the better. Then remove weeds, stones, and other debris.
Goji Berry Tree Seed Propagation
1. Making beds and opening furrows: Seed propagation is generally carried out in spring each year. Make the seedling bed into a flat bed 4 m long and 2 m wide. The bed surface should be flat, and the soil should be thoroughly fine and crumbly. Then on the flat bed surface, stretch a straight line and open furrows along the line. Every 40 cm, open a row of shallow furrows 2 cm deep as sowing holes.
2. Soil pest control: Before sowing, prepare fine sandy soil and disinfectant chemicals. Generally, we choose a chemical that kills viruses, insects, and fungi all at once. If using 80 kg of fine sandy soil per mu, the amount of chemical used is 300 to 400 g. After preparation, pour the chemical into 1 kg of water and stir evenly. Then pour the liquid into the fine sandy soil and mix evenly with an iron shovel. Next, cover with plastic film and seal the soil for 24 hours to allow the liquid to penetrate the soil. After sufficient time, uncover the film and take out the treated fine sandy soil for later use.
3. Seed dressing and sowing: When sowing, add fine river sand equivalent to 6 to 7 times the amount of seeds for seed dressing. Because goji berry seeds are small, using fine river sand for seed dressing can make sowing more uniform. For broadcast sowing, hold the basin in one hand and scatter seeds with the other, trying to be meticulous and uniform. After sowing is completed, we also need to spread the treated fine sandy soil into the sowing holes. Do not make it too thick, so as to kill pests such as scarab beetles and cutworms in the nursery site that damage goji berry roots. Finally, press firmly with feet to make the seeds and deep soil closely contact each other. The sowing work is then complete.
4. Raking soil and covering with film: Next, we need to rake away the soil on both sides of the sowing holes. The purpose of raking away these coarse-grained soils is to prevent them from rolling into the holes, pressing down the seeds, and hindering seed germination. Leveling the soil in this way also helps with film covering to increase ground temperature. Film covering is carried out by multiple people. Generally, one to two people secure one end, another person lays the film, and one person shovels soil to press the edges, finally completing the film covering. In places with suitable temperatures, film covering is not needed during sowing.
Goji Berry Tree Cutting Propagation
1. Cutting time: The cutting time for goji berry trees is generally from late March to early April in spring. The first thing before cutting is to determine the mother plant cutting orchard. In the goji berry orchard, select a plot with good varieties, good growth, and no pests or diseases as the mother plant cutting orchard for hardwood cuttings.
2. Collection of cuttings: Cutting collection is also carried out in March to April. Select branches from mother trees in the cutting orchard that are about 0.5-1 cm thick and fully lignified. Cut them off with pruning shears. After collection is completed, prune them into cuttings. When cutting, cut the end that will enter the soil and root at a 45-degree angle, and cut the top part that will grow and sprout flat. The length of the cuttings is about 13 cm. They should not be too long or too short, so as not to affect survival and rooting.
3. Cutting treatment: The cuttings used for propagation should be treated with the rooting hormone naphthaleneacetic acid and alcohol. First, dissolve the rooting hormone naphthaleneacetic acid in alcohol and dilute to 15-20 ppm. Place the soil-entering rooting portion of the cuttings into the rooting solution, with a soaking depth of about 3-4 cm. The soaking time is 24 hours.
4. Land preparation and ridging: Level the soil of the nursery site and break up the soil with a rake. On the seedling bed, build cutting ridges according to the standard of 4 m long, 90 cm wide, and 60 cm high. After building, use an iron shovel to open small furrows in the soil on both sides of the ridges, to facilitate pressing insulation film after cutting.
5. Cutting method: When cutting, place the soaked rooting portion downward and insert it into the furrow. The plant spacing between cuttings should preferably be maintained at about 15 cm. The exposed height of the cuttings above the soil is 1-2 cm. After inserting a row, immediately fill soil by hand, then press the soil firmly with feet. To increase ground temperature and enable the cuttings to survive early, in northern regions after cutting, cover the ridge surface with degradable plastic film. In places with suitable temperatures, film covering is not needed. The greatest advantage of hardwood cutting propagation is that the seedlings can maintain the excellent traits of the mother plant, bear fruit early, and have high yield.
Goji Berry Tree Seedling Stage Management
1. Film breaking treatment: After the seedlings survive, the first step is to break the film. For cutting seedlings, simply use hands to puncture the film at the cutting position. For seed seedlings, use a hard branch to puncture the film at the place where buds are about to emerge, so as to prevent high temperatures from scalding the young seedlings. Afterward, there is no need to uncover the plastic film. Let it continue to play the role of increasing ground temperature. When the high-temperature season arrives, the plastic film will degrade and rot into the soil.
2. Weeding and loosening soil: When the seedling height reaches about 30 cm, carry out the first soil loosening and weeding to prevent grass from growing taller than the seedlings. Weeding work should grasp the principle of weeding early and weeding thoroughly. Soil loosening should be combined with weeding work. During this period, weeding and soil loosening should be carried out 2-3 times.
3. Timely bud removal: When lateral branches grow from the root area of the seedlings, these lateral branches should be removed in time to prevent them from competing for soil and fertilizer and hindering the growth of the main branch. Young buds can be removed by hand. For slightly older young branches, it is best to cut them off with pruning shears.
4. Reasonable fertilization: For better growth of seedlings, apply fertilizer once in mid-to-late May to promote root growth. It is best to mainly use phosphate fertilizer, supplemented by nitrogen fertilizer. Apply 10 kg of diammonium phosphate and 5 kg of urea per mu. Mix the fertilizers evenly and broadcast them around the plants.
5. Timely irrigation: Irrigate after fertilization. Both flood irrigation and pouring irrigation are acceptable. Thorough irrigation is best, to meet the growth needs during the high-temperature season. Use good water and fertilizer conditions to promote seedling growth. From summer to before winter, irrigation should be carried out 4-5 times.
6. Pruning and trimming: Too many branches will hinder the growth of the main trunk branch, so pruning should be carried out. When pruning, select one robust branch as the main trunk and cut off all the rest. This ensures the main trunk is thick and strong, and uniform from top to bottom. For seedlings reaching 60 cm in height, the main trunk branch should be cut off. This is also called pinching, to control the seedling growth height and cultivate large seedlings and special-grade seedlings with a first layer of lateral branches. After pruning, apply fertilizer once to ensure nutrient supply for the seedlings.
7. Pest and disease control: Pest and disease control at the goji berry seedling stage focuses on prevention. Mainly use 2000-2500 times dilution of Jiaman and 1000-1500 times dilution of 10% imidacloprid. Around mid-October, spray once every seven days, continuously spraying 3 times, to control aphids, gall mites, and rust mites.
8. Seedling overwintering: Goji berry seedlings in the nursery site have leaves turn yellow in late autumn, and leaves fall off after frost. However, no special management is needed, and they can overwinter naturally in the nursery, waiting for emergence and field planting the following spring.
Goji Berry Tree Field Planting Techniques
1. Orchard site selection: When establishing an orchard, it is best to choose light loam, sandy loam, and loam with deep soil and good aeration to establish the plantation. The soil organic matter content should preferably be above 1%. The groundwater level should be maintained below 1 m.
2. Orchard planning: After the goji berry orchard site is selected, the primary task is planning. The goji berry orchard must have a sound irrigation and drainage system. It should have main canals, branch canals, and field canals for water diversion and irrigation, as well as drainage ditches. It should be possible to irrigate in the dry season and drain in the rainy season. Secondly, roads extending in all directions should be set up around the planting area to facilitate transportation. Shelterbelt networks should also be set up between plots to play a role in preventing wind and sand. Once the goji berry orchard is prepared, seedlings can be lifted and field planted.
3. Seedling lifting and temporary planting: The field planting time is generally after the soil thaws in spring, approximately from late March to mid-March. When lifting seedlings, keep the main root intact and minimize damage to lateral roots. After lifting, immediately place them in a cool place, complete pre-planting treatment, and then plant. For seedlings that cannot be planted in time after lifting, dig temporary planting trenches 15-20 cm deep. The length and width of the temporary planting trenches depend on the number of seedlings to be temporarily planted.
4. Pruning and soaking: Before field planting, the seedlings should be pruned once. Shorten the branches on the crown part to promote new branch growth after survival. Trim smooth the roots damaged during digging to prevent rot after planting and affect survival. Cut off branches that dried up during overwintering. After pruning, prepare alcohol and rooting powder naphthaleneacetic acid, or other rooting agents. Dissolve naphthaleneacetic acid in alcohol, then dilute to 15-20 ppm. Place the seedlings in it to soak for 12-24 hours, then transplant.
5. Field planting method: Before planting, dig planting holes at fixed points according to plant spacing of 1.5 m and row spacing of 2 m. Dig planting holes 40 cm long, 40 cm wide, and 40 cm deep. Place the excavated topsoil and subsoil separately. Then in each planting hole, first apply 100-150 g of compound fertilizer, then fill in subsoil, mix the subsoil and fertilizer evenly, then fill in topsoil, about 5 cm thick, then place the goji berry seedling. During operation, one person holds the seedling and one person fills soil, finally pressing firmly with feet. The planting depth requirement should be consistent with the depth at which the seedlings grew in the original nursery. After planting, irrigate once in time.
Goji Berry Tree Pest and Disease Control
1. Goji berry gall mite
[Symptoms] Gall mite is also a type of mite. Gall mites burrow into leaf tissue to suck sap. They damage young stems and leaves. Damaged leaves form yellow-green, round raised galls. Leaves become distorted and cannot grow. Fruit yield and quality decrease. Generally, June is the peak period of damage.
[Control] To control gall mites, mainly use 2000-2500 times dilution of Yingxiumanjing, spray on leaf surfaces. It is best to use ultra-low-volume spraying to protect leaves from gall mite damage during leaf expansion and growth. If symptoms are found, spray once every seven days, continuously spraying 2-3 times.
2. Goji berry rust mite
[Symptoms] Goji berry rust mites mainly damage leaves and cause great harm to goji berry production. Rust mite is a type of mite invisible to the naked eye, mainly distributed on the back of leaves and on both sides of the main leaf vein. The mites suck leaf sap. Damaged leaves become hard and thick. In severe cases, the entire tree turns rust-colored. The leaves lose their photosynthetic capacity. This causes leaf drop. This causes reduced yield.
[Control] In mid-to-late June each year, spray leaf surfaces with pyridaben emulsifiable concentrate or 2000-2500 times dilution of Yingxiumanjing. Spray once every 7 days, continuously spraying 3-4 times for effective control.
3. Goji berry root rot
[Symptoms] Goji berry root rot mainly damages the roots and stem base of the plant. Above ground, diseased plants show yellowing and wilting leaves. When diseased plants are dug up, the underground root and stem parts show that infected root fibers turn dark brown, and the plant dies. It usually occurs more severely in low-lying fields with poor drainage.
[Control] After onset in mid-to-late August, use 30 times dilution of 70% mancozeb to drench the roots of diseased plants. When applying, scrape away the surface soil and drench directly onto the diseased roots for the best effect. However, when scraping soil, do not damage the root fibers. Drench once every 5-7 days, for a total of 3-4 drenches to effectively control root rot. In fields where the disease commonly occurs, crop rotation is recommended, which can fundamentally and effectively eliminate root rot.
4. Goji berry powdery mildew
[Symptoms] Goji berry powdery mildew occurs on goji berry leaves and damages the leaf tips and young fruit of goji berry. The onset time is August and September each year. In severe cases, the upper surface of the leaves is covered with a layer of white powder, and the plant looks entirely white from the outside. Eventually, the leaves gradually turn yellow, become thinner, and fall off.
[Control] In plots prone to the disease, spray chemicals early for prevention. After onset, choose 1000-1200 times dilution of triadimefon for spraying control. When spraying, it must be sufficient and uniform. Generally, spray again after 7-10 days, which can effectively control powdery mildew.