What are the propagation methods for Cornus officinalis? A detailed explanation
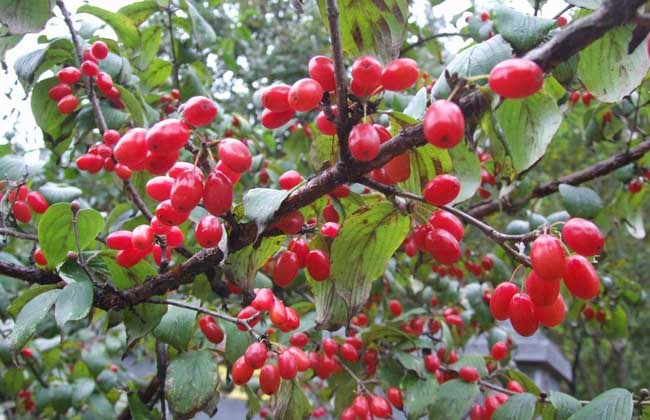
Cornus officinalis is a sun-loving tree species of the warm temperate zone, mainly produced in China's Shanxi, Shaanxi, Gansu, Shandong, Jiangsu, Zhejiang, Anhui, Jiangxi, Henan, Hunan and other provinces. Its propagation methods include layering, cuttings, grafting and seed propagation. Let's take a look below!
Layering propagation
After harvesting the fruit in autumn or before the ground thaws and the buds sprout, bend two- or three-year-old branches close to the ground down to the ground. Near the ground, cut the branch to 1/3 of the xylem and bury it in soil already treated with rotted manure, cover with 15 cm of sandy loam, and leave the tip of the branch exposed above the ground. Water frequently. In the second winter or third spring, cut the rooted layer away from the part connected to the mother plant, and plant the rooted seedling elsewhere.
Cutting propagation
Usually in mid to late May, cut branches from superior mother plants, cut the lignified branches into cuttings 15-20 cm long, keep 2-4 leaves on the upper part of the branch, and insert them into a seedbed made of a uniform mix of humus soil and fine sand, with row spacing of 20 cm × 8 cm and depth of 12-16 cm, cover with 12-16 cm of soil, and firm it. Water thoroughly, cover with agricultural film, maintain an air temperature of 26-30°C and relative humidity of 60%-80%, and set up a shade shed above with 25% light transmittance; in mid-June adjust the light transmittance to 10% to avoid strong light. Remove the shade shed before overwintering and water thoroughly. The following year, loosen the soil and pull weeds as appropriate, and strengthen water and fertilizer management. Lift the seedlings and plant them in late autumn and early winter or in early spring of the next year.
Grafting propagation
Seedling propagation of Cornus officinalis is difficult, and seedlings produced this way can only bear fruit more than 10 years after planting, whereas grafted seedlings can bloom and bear fruit in 2-3 years. Using grafted seedlings allows Cornus officinalis to bear fruit early and benefit early.
1. Rootstock selection: The rootstock should preferably use seedlings of its own improved variety.
2. Scion selection: Select scions from high-yielding, robustly growing, pest- and disease-free superior mother trees. When collecting scions, take well-developed, plump-budded one-year-old branches from the outer canopy.
3. Grafting time: In early spring the rootstock begins to sprout. When the scion buds have just begun to swell (around mid to late March), use bark grafting; from mid-July to mid-August, when the rootstock bark peels easily and the scion buds are plump, carry out bud grafting.
4. Grafting methods
① Bark grafting: First choose a smooth, flat part of the bark 5-10 cm above the ground and cut off the upper part of the rootstock, smooth the cut surface, make a cut with a grafting knife from top to bottom on the windward side, about 3 cm long, reaching the xylem, then use the knife to pry open a crack in the bark at the cut, then cut the scion to 15 cm long. On the lower side of the back of the main bud, cut a slanted surface 3-5 cm long, passing through the pith, and gently scrape 2 cuts on both sides of the cut surface to expose the cambium; hold the prepared scion in your mouth to keep it moist for later use. Next, place the slanted surface of the scion facing inward, with the tip pointing toward the cut slit, press the rootstock cut firmly with your hand and slowly insert the scion, then gently tap the cut with the grafting knife to make it tight, with the cut surface slightly exposed at the cut, and finally tie the cut firmly with plastic film. After grafting, promptly remove the tender shoots sprouting on the rootstock. When the scion seedling grows to 50 cm tall, use a small knife to slit open the binding plastic film.
② Bud grafting: First select a mature, robust scion and take a bud 2 cm long and 1.5 cm wide from it. Cut off the top of the rootstock, and at a smooth part 5-10 cm above the ground use a knife to carve out bark the same size as the bud piece. Insert the bud piece to be grafted into the bark-removed part of the rootstock, then tie it tightly with plastic film, but leave the grafted bud exposed. After 7-10 days, once the cut has healed, untie the binding and cut off the trunk 5 cm above the bud. After grafting, promptly remove the sprouts on the rootstock to promote seedling growth.
Seed propagation
1. Nursery site selection: The nursery site should be chosen in a place with fertile, deep soil, relatively flat terrain, loose soil, shelter from the wind and facing the sun, and with irrigation conditions, to ensure water can be supplied at any time. Before sowing, the nursery site must be deeply plowed and finely harrowed, leveled and refined, ensuring it is loose, fine, level, free of tree roots, and free of stones and tiles; the plowing depth should be more than 20 cm. Importantly, apply well-decomposed farmyard manure in combination with deep plowing.
2. Seed preparation
① Seed collection: Choose superior mother trees that grow robustly, are in full fruiting stage, and have no alternate bearing. In September-October, pick fully mature, large and plump, pest- and disease-free, undamaged, dark red fruits. Remove the flesh from the picked fruits.
② Seed treatment: The quality of seed treatment directly affects the germination rate and is very critical. First put the seeds into 5% alkaline water, rub with hands for 5 minutes, then add boiling water to scald them, stirring while pouring the boiling water, until the seeds are submerged in the boiling water. Wait until the water cools slightly, then rub with hands for 5 minutes, soak in cold water for 24 h, then scoop out the seeds and spread them on a cement floor to sun-dry for 8 h. Repeat this at least 3 days, until 90% of the seed coats have cracks. Mix wet sand with the seeds at 4:1 and store them in sand. Spray water frequently to keep them moist, and check often to prevent the seeds from molding. In the second spring, open the pit and take out the seeds to sow. This treatment method is suitable for spring sowing. If autumn sowing is chosen, simply soak the seeds in warm water no lower than 70°C for 3 days and then sow (note that after the water has cooled completely, replace it with hot water promptly); after sowing, cover with film to promote germination.
3. Sowing method: Spring sowing for seedling raising is carried out around the Spring Equinox. Dig out the seeds stored in sand the previous autumn and sow them. Before sowing, open shallow furrows about 5 cm deep on the seedbed at a row spacing of 30 cm, evenly scatter the seeds into the furrows, cover with 3-4 cm of soil, and keep the soil moist; seedlings can emerge in 40-50 days. Seed rate: 90-150 kg per hectare.