A Complete Analysis of Key Broiler Farming Techniques and Methods
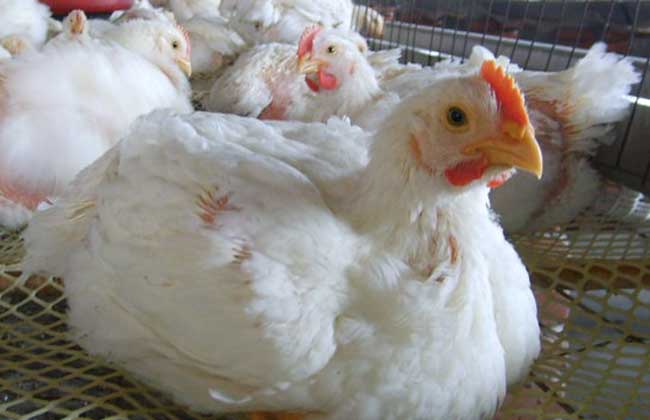
Broilers have one of the highest feed conversion rates in the farming industry, with a general feed-to-weight ratio of about 2:1. Broiler production and marketing should be arranged reasonably according to the laws of feed conversion while comprehensively considering factors such as current market conditions and feed prices, so as to maximize economic benefits. Let's take a look at broiler farming techniques together below!
Site Selection
1. Choose a location with high, dry terrain that is sheltered from the wind and faces the sun.
2. The site should have a certain slope to facilitate drainage.
3. It should be far from villages and towns, at least 1000 m away from other livestock farms, in a location convenient for epidemic prevention.
4. Convenient transportation.
5. Sufficient water supply of good quality, meeting drinking water standards.
6. Stable and reliable power supply, preferably with self-provided power generation equipment.
7. Comply with national laws and regulations; it is prohibited to build farms within water source protection zones, tourist areas, nature reserves, and other areas stipulated by national and local laws.
Chicken House Construction
1. Broiler farming requires all-in, all-out operation for each batch, so only one chicken house needs to be built.
2. Build the chicken house using a “double-slope” design, about 3 m high, with an insulation layer added on top, and ventilation skylights installed at the ridge, one every 6 m, with rain caps added on the skylights.
3. Fixed walls are built on both sides of the chicken house, with windows (about 1.35 m high, area about 0.9×0.8 m), one window every 3 m.
4. To maintain ventilation and dryness, wing windows should also be installed, located between the net bed and the ground, measuring 0.40×0.4 m, with the sill 5-10 cm from the ground, one every 3 m. Underground ventilation ducts can also be installed to assist ventilation.
5. The floor of the chicken house must be a cement floor, and a foot disinfection pool as wide as the door should be set up at the entrance of the chicken house.
6. A layer of plastic sheeting should be laid on the inner side of the top to facilitate insulation and washing and disinfection.
7. Fans should be installed at both ends of the chicken house to assist air exchange.
Rearing Facilities
1. The net frame should be sturdy and durable, and the mesh should be smooth and flat. The net bed should be 0.9 m high and 3.5 m wide per section, with the length determined by the length of the chicken house. The net bed should be equipped with 0.4 m high guardrails.
2. During the chick stage, the entire net bed does not need to be used. Plastic sheeting can be used to partition the entire net bed into several separate chicken compartments, using only part of the net bed, and later gradually expanding the used area as the chickens grow, to meet density requirements.
3. Heating equipment in the chicken house generally uses a stove for heating, but a chimney must be installed to prevent gas poisoning. The chimney can be appropriately extended as conditions permit to facilitate full heat dissipation and save energy.
4. Light duration has a great influence on the growth rate of chickens. In addition to natural light each day, artificial lighting equipment must also be provided. Therefore, 2 lighting circuits should be installed in the chicken house, with one lamp holder every 3 m, achieving one light bulb per 20 sq m of area, with a height of preferably 2 m from the ground, generally using incandescent lighting.
5. Drinking and feeding equipment should be sufficient to ensure the chickens' drinking and feeding. Generally, during the brooding stage, one drinker and one feeder are required for every 50 chicks, and after 20 days of age, one for every 30.
6. Equip necessary cleaning and disinfection equipment, such as high-pressure washers and disinfection sprayers.
Preparation Before Chick Arrival
1. From 15 to 12 days before chick arrival, clean out chicken manure, wash drinkers and feeders, use a high-pressure water gun to rinse the chicken house walls, roof, net bed, floor, etc., and inspect and repair the chicken house equipment.
2. From 11 to 9 days before chick arrival, carry out the first chemical disinfection of the chicken house (including the net bed, floor, drinkers, feeders, etc.). During disinfection, doors, windows, and vents should be closed. After 10 hours, open windows for ventilation, and after 3-4 hours of ventilation, close the doors and windows. Drinkers and feeders should be soaked and disinfected with disinfectant solution.
3. From 6 to 4 days before chick arrival, carry out the second disinfection. A 300-fold liquid of 40% formaldehyde aqueous solution can be used for spray disinfection. Before disinfection, check the temperature so that the chicken house temperature reaches above 26°C and the humidity reaches above 80%. Disinfection should be thorough, leaving no dead corners. After disinfection, keep doors and windows closed for more than 36 hours, then open for ventilation for no less than 24 hours.
4. From 3 to 1 days before chick arrival, prepare feed, partition the net bed with plastic sheeting, and divide it according to a rearing density of 30-40 per sq m in the first week of the brooding period. Carry out preheating (to warm the walls and floor) and pre-moistening. In winter, preheating should be carried out 3 days before chick arrival, and the preheating temperature should be above 35°C. In summer, preheat to 34°C 1 day in advance, while continuously humidifying the brooding room to ensure the humidity of the brooding room. Lay a layer of cardboard on the net bed to prevent chicks from getting cold. After preheating and pre-moistening are completed, the chicks can be brought in.
Brooding Management
1. Chicks 1-2 days old: After the chicks are transported, they should be sent into the chicken house as soon as possible. After being sent into the chicken house, do not immediately place the chicks on the net bed. The chicks should first be immunized, using a Newcastle disease-bronchitis combined inactivated vaccine with 1 drop in the right eye of each chick. After immunization, the chicks can be placed on the net bed. After immunization is completed, the chicks can begin their first drinking. In the first week, chicks should be given warm water at about 20°C, with multivitamins added to the water. Keep the water supply sufficient to ensure every chick drinks water. Three hours after the first drinking, feeding can begin. The feed should be chick-specific feed. During 1-7 days of brooding, let the chicks feed freely. On the first day, feed once every 2 hours (note: feed less and add frequently). Always observe changes in house temperature and chick activity (if evenly distributed and moving freely, the temperature is suitable; if huddling together, the temperature is too low). For insulation, ventilation during the brooding period should not be too large. However, when gas or disinfectant odors are too strong, ventilation should be strengthened, which can be done at noon each day when the outside temperature is high. During 1-2 days of brooding, the house temperature should be kept above 33°C, with relative humidity at 70%. For the first 2 days, 24-hour lighting should be used, with 40W incandescent bulbs for lighting.
2. Chicks 3-4 days old: Starting from the 3rd day, lower the house temperature to 32°C, and keep relative humidity between 65-70%. During this period, observe the chicks' droppings, clean out accumulated manure, replace the bedding paper, and pay attention to the coal stove, chimney, and ventilation conditions to prevent gas poisoning. Feed once every 3 hours, and on the 3rd day reduce lighting by 1 hour, maintaining 23 hours of light.
3. Chicks 5-7 days old: On the 5th day, adjust the house temperature to 32-30°C, and keep relative humidity at 65%. On day 5, immunize the chickens using Newcastle disease oil vaccine by subcutaneous injection in the neck. Starting on the 6th day, switch to adult chicken feed trays when feeding, replacing them by changing 1/3 of the starter feed trays each day. Feed 6 times per day, and turn off lights for 2 hours at night, maintaining 22 hours of light. Starting from the 7th day, expand the net bed area to keep chick density at 35 per sq m.
4. Chicks 8-14 days old: Starting on the 8th day, lower the chicken house temperature to 29°C. On the 9th day, add multivitamins to the chicks' drinking water, and immunize the chickens using Newcastle disease TV strain vaccine by eye drop or nasal drop, 1 drop per chicken. Also on the 9th day, replace the drinkers, remove the chick drinkers and replace them with adult chicken drinkers, and adjust the drinkers to an appropriate height. During this period, pay attention to observing temperature and humidity, and ventilate appropriately, especially at night, watching for any abnormal respiratory sounds. Starting from the 8th day, feed on a fixed schedule and in fixed amounts. The amount of feed should be flexibly controlled according to the chickens' body weight. Generally, do not restrict feed; feed until they finish without leftovers. Feed 4-6 times per day. On the 13th and 14th days, add multivitamins to the drinking water. On the 14th day, immunize the chickens using Faxinling by oral drop immunization. After immunization, wash the drinkers and add multivitamins to the drinking water. By this time, gradually expand the net bed area as the chickens grow, keeping the chicken house temperature at 28°C and humidity at 55%.
5. 15-22 days of age: On the 15th day, continue drinking vitamin water for one more day, and strengthen ventilation in the house. On the 17th and 18th days, use 0.2% peracetic acid liquid for live-chicken disinfection. Starting on the 19th day, switch to adult chicken feed (do not replace it all at once; the change should be completed over 4 days, that is, replace the chick feed with 1/4 adult chicken feed each day, mix together and feed, until all is replaced with adult chicken feed on the 4th day). During this period, the chicken house temperature should gradually drop from 28°C on the 15th day to 26°C by 22 days of age, decreasing 1°C every two days, with humidity controlled at 50-55%. At the same time, expand the net bed area as the chickens grow, keeping the rearing density at 10 per sq m. Adjust the height of the drinkers to meet the chickens' needs. At 22 days of age, immunize the chickens using Newcastle disease strain IV by eye drop immunization. Keep light duration at 22 hours. After 15 days of age, replace the 40W lighting lamps with 15W for lighting.
6. 23-26 days of age: After immunization, pay attention to temperature and humidity control. At 25 days of age, carry out live-chicken disinfection once, and add super multivitamins to the drinking water. At 26 days of age, lower the house temperature to 25°C and control humidity at 45-50%.
7. 27-34 days of age: Strengthen daily management and ventilation. If the temperature inside the chicken house is too high, use cooling pads and exhaust fans to lower the temperature. During this period, the room temperature should drop from 25°C to 23°C, and humidity should be kept at 40-45%.
8. 35 days of age to market: When chickens reach 35 days of age, the use of any drugs is prohibited. Strengthen ventilation and air exchange in the house. Starting from 36 days of age, lower the chicken house temperature to 22°C. From 35 days of age to market, maintain 24-hour light each day, with the aim of increasing the chickens' feed intake, especially in hot summer seasons when daytime temperatures are high, the chickens' appetite is poor, and feed intake is low, while nights are cool, so the chickens should be allowed to eat fully to increase weight gain speed and bring them to market earlier. At 37 days of age, carry out live-chicken disinfection once. At 40 days of age, lower the chicken house temperature to 21°C and keep it there until market. At 43 days of age, carry out the last live-chicken disinfection. Generally, they are marketed at 45-52 days of age, with a body weight of about 2.5-3 kg.
Feeding Management
1. Feeding standards: From 11 g per chicken per day at 1 day of age to about 248 g per chicken per day at 52 days of age, increasing by about 4-6 g per day. Feed on time every day, and determine the daily amount according to the differences among chickens and their growth rate. Ventilate appropriately to expel polluted air from the house and bring in fresh air. Pay attention to regulating temperature and humidity. Clean out accumulated manure in the house on time, generally once every 2 days.
2. Ventilation principles: From 1-25 days of age, focus on insulation, and as age increases, appropriately increase ventilation. After 25 days of age, increase ventilation and air exchange. In winter, 24-hour ventilation and air exchange are also required, but it should be appropriately reduced at night.
3. Sanitation and epidemic prevention: Do a good job in immunization at each stage. Staff entering the chicken house should change into special clothing. The disinfectant solution in the disinfection pool should be changed frequently, generally once every 4-5 days. Outsiders are prohibited from entering or leaving the chicken house. Use drugs and drug additives in accordance with national laws and regulations.