How to rapidly breed loach fry and fingerlings? Detailed explanation of key technical points
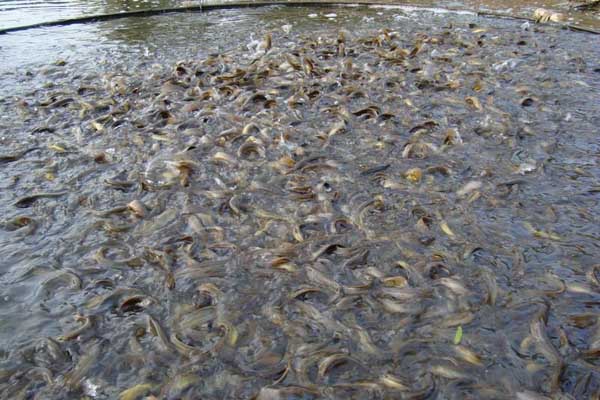
Loach has the characteristics of wide distribution, strong stress resistance, and being easy to breed, and it also has high medicinal value. It has long been known as the “ginseng of the water.” The rapid breeding technology for loach fry and fingerlings is introduced below.
Site selection
The breeding site should have sufficient water sources, convenient drainage, and the ability to irrigate and drain naturally, with fresh and pollution-free water quality, neutral or slightly acidic soil, sufficient sunlight, a quiet environment, convenient transportation, and a normal power supply.
Pond construction
1. Pond specifications: area 50 sq m to 100 sq m, the pond perimeter 40 cm above the water surface, the pond bank slope 60°C to 70°C, and the pond depth 80 cm to 100 cm. After the pond is dug, the pond walls should be tamped solid, with 50 cm × 50 cm cement slabs used for slope protection, about 20 cm of humus soil laid on the pond bottom, and the water depth maintained at 30 cm to 50 cm.
2. Anti-escape facilities: Use mesh, plastic boards, or porcelain boards around the breeding pond as an enclosure to prevent snakes, rats, and other enemies from entering the breeding area. The inlet and outlet should be wrapped with 120-mesh mesh cloth to prevent loach from escaping and to prevent harmful organisms and wild fish eggs and fry from entering the pond.
3. Inlet and drainage facilities: The inlet and outlet should be arranged diagonally. The inlet should be 20 cm above the water surface, and the outlet should be set at the bottom of the fish gathering pit and connected with a PVC pipe extending 30 cm above the water surface. During drainage, the water level can be adjusted at will by adjusting the height of the PVC pipe.
4. Fish gathering pit (mud collecting pit): To facilitate harvesting, a fish gathering pit connected to the bottom drainage outlet should be set in the pond, with an area of about 5% of the pond bottom area and 30 cm to 50 cm deeper than the pond bottom. The four walls of the fish gathering pit should be enclosed with wooden boards or built with cement bricks and stones.
Preparation before stocking
1. Pond clearing and preparation: 10 days before stocking loach, clear and prepare the pond, inspect holes and plug leaks, dredge the inlet and drainage pipes, and plow the sludge at the pond bottom. After adding water to a depth of 10 cm, use 1 kg of quicklime per 10 sq m, slake it into slurry, and splash it over the whole pond for disinfection.
2. Water storage and fertilization: 3 days after pond clearing, add water to a depth of 30 cm and apply base fertilizer. For every 10 cubic m of water, apply 3 kg of fermented chicken manure or 5 kg of pig, cattle, or human manure. Alternatively, for every cubic m of water, apply 7 g of nitrogen fertilizer and 1 g of phosphate fertilizer.
Fry and fingerling stocking
The time for stocking loach fry into the pond is May each year, with a stocking density of 1500 fish per sq m to 2000 fish per sq m. When the loach grows to a body length of 3 cm, screening and pond division should be carried out, with a loach fry and fingerling density of 60 fish per sq m to 80 fish per sq m. During the process of stocking fry and fingerlings, attention should be paid to first testing the water before stocking to check whether the toxicity of the water body has been eliminated. When releasing the fry, the difference between the water temperature in the container holding the fry and the pond water temperature must not exceed 2°C. If the loach fry and fingerlings are transported in oxygen-filled nylon bags, then before releasing the fry into the pond, a “acclimation” treatment should be carried out by placing the oxygen-filled nylon bags in the pond for 20 minutes so that the water temperature inside and outside the oxygen-filled nylon bags is consistent, and then slowly release the fry and fingerlings.
Feeding management
1. Early breeding stage (loach fry with body length less than 2 cm): According to the water color, apply additional fertilizer in an appropriate amount. For additional fertilization, fermented farmyard manure such as pig, cattle, chicken, and human manure can be used, or chemical fertilizers such as calcium superphosphate, urea, and ammonium bicarbonate can be used, adopting the method of applying small amounts more frequently. The water color is best when yellow-green, the water depth should be controlled within 30 cm, and the transparency should be controlled at about 20 cm. At the same time, for every 200,000 loach fry, use 1 kg of soybeans ground into 15 kg of soybean milk, and splash it once in the morning and once in the evening each day for feeding.
2. Later breeding stage: After the loach fry and fingerlings reach a size of 2 cm, gradually deepen the water level to 50 cm. In addition to continuing to fertilize the water quality, compound feed should also be fed, once in the morning and once in the afternoon each day, with a daily feeding amount of 4% to 10% of the loach's body weight. The feeding amount should be flexibly controlled according to water quality, weather, and feeding conditions. When the water temperature is above 15°C, the loach's appetite increases as the water temperature rises; at 25°C to 27°C, the appetite is especially strong; above 28°C, the appetite gradually decreases; when it exceeds 30°C or is below 12°C, feed should be reduced or even stopped.
Daily management
1. Regulating water quality: Add fresh water, change the water 1 to 2 times per week, fertilize frequently, and maintain the pond water color as “fertile, lively, tender, and refreshing.” A yellow-green water color is best.
2. Pond inspection: Inspect the pond once in the morning, at noon, and in the evening, observe loach activity and changes in water color, and deal with problems promptly when found.
3. Regular disease prevention: Frequently clean and wash the feeding platform, do a good job of disinfecting the feeding platform, tools, and other items, and regularly feed drugs to prevent fish diseases.
4. Preventing harm and escape: Pay attention to preventing the invasion of natural enemies and the escape of loach, and frequently check the inlet and outlet and the pond banks.
Disease control
1. Gas bubble disease: Caused by insufficient dissolved oxygen in the water, supersaturation of dissolved oxygen, or excessive content of other gases. Symptoms: Loach floats on the water surface, and the belly bulges like a bubble. Control method: Strengthen daily management to prevent water quality deterioration. When the disease occurs, immediately add fresh water, and for each mu use 4 kg to 6 kg of table salt, dissolve it in water, and splash it over the whole pond.
2. Trichodiniasis: Symptoms: Sick loach is thin and weak, often floating on the water surface, restless and uneasy, or spinning at the water surface, with increased mucus on the body surface, and Trichodina is found under microscopic examination. Control method: Splash the whole pond with a mixed agent of copper sulfate and ferrous sulfate (5:2) at a solution concentration of 0.7×10⁻⁶.
3. Red fin disease: Caused by Brevibacterium infection. In diseased loach, the fins, abdomen, skin, and around the anus become congested and ulcerated, and the caudal fin and pectoral fins become red and rotten. Control method: Splash the whole pond with bleaching powder at a solution concentration of 1×10⁻⁶. When the loach grows to a body length of 5 cm, the loach fry and fingerling breeding stage is completed, and it enters the adult loach breeding stage.