What to do when a clivia (Kaffir lily) has root rot? Learn 2 tricks and save it with wood shavings in 1 week
It is summer now, and I wonder whether you clivia owners have ever run into root rot? This little gardener got hit the other day, and after all that fuss, I finally managed to save the clivia with root rot. I am caring for it well, hoping it will push out leaves in autumn and get through winter healthily. Take a look at my rescue "method" and keep it for saving lives.
1. Treating clivia root rot
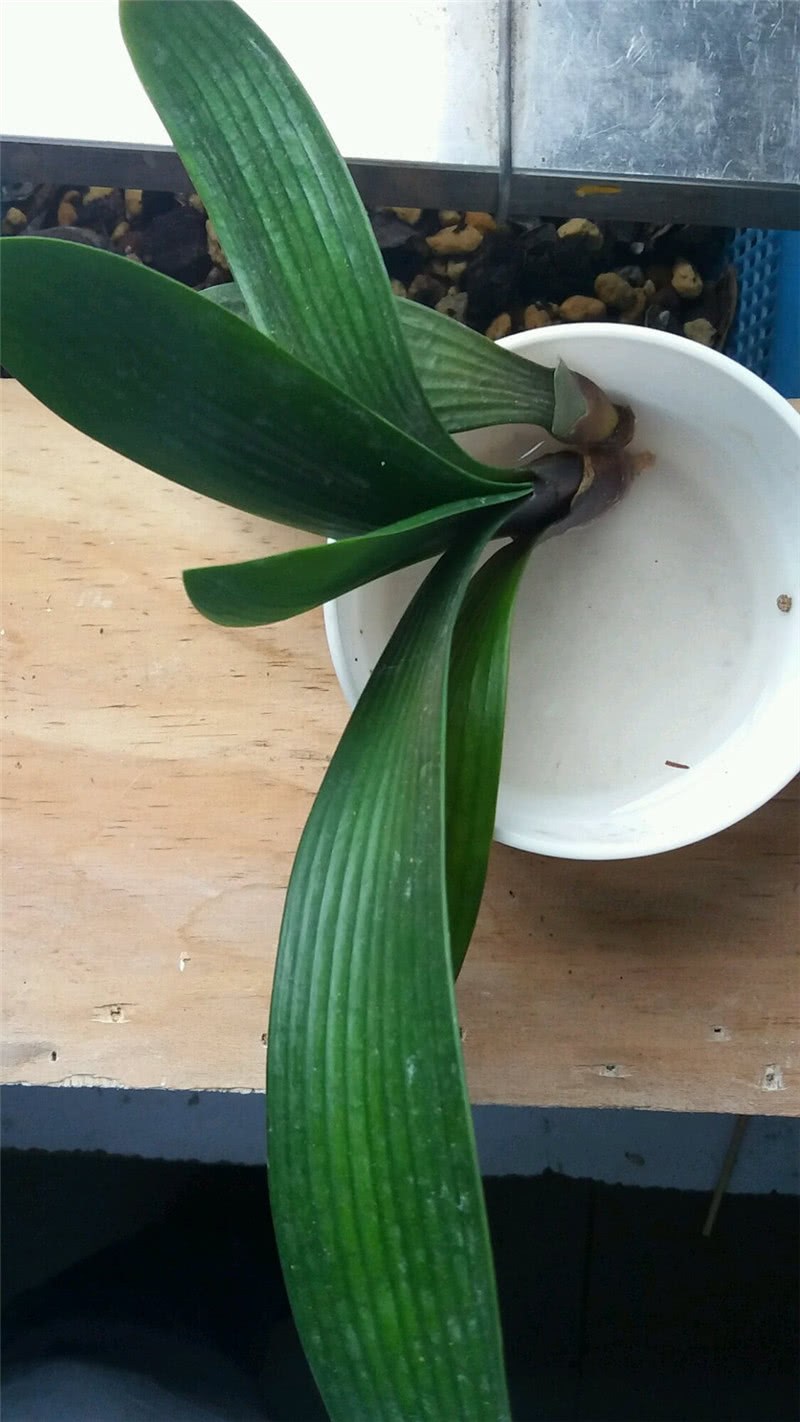
These are the two clivias. A few days ago I put them on the windowsill to get some air, but then a rainstorm hit. After the rain, the sun came out blazing right away, and that is when the clivias ran into trouble. After the rain came high temperatures, the potting soil was too wet, and the water warmed up very quickly. The clivia roots were as if sitting in a "hot pot", and from the growing medium downward, basically all of them had rotted. I could only cut off the roots and sterilize with carbendazim.
Fellow clivia owners, if your clivia also runs into root rot during summer care, you might as well learn from this little gardener's method, which is to prune it and then let it re-root. Among these steps, the sterilization after pruning must be done, otherwise when it re-roots, the wounds rot very easily. This is all experience from the old-timers.
2. Cleverly use "wood shavings" to make clivia grow new roots
This is how it looks after the clivia successfully grew roots. Here is a little trick I can share with fellow owners, which is to use wood shavings for rooting, with a very high success rate. Two other good things for rooting are moss and river sand, but in this little gardener's view, the success rate of rooting with wood shavings is greater than the latter two, because rooting care with wood shavings is simpler.
Wood shavings are very loose and have good air permeability. Put the sterilized clivia in, press it down slightly so it stands steady, but do not press too tightly; if it is too loose, it cannot be fixed in place. As for watering, it is also very simple: feel the wood shavings on top with your hand, and when they are dry, spray water with a small spray bottle. But there is one thing fellow owners must do well: the pot used for rooting must be breathable, and you can drill one or two more holes in the pot to increase air permeability.
3. When clivia grows new roots, strengthening the seedlings is key
Wait until the clivia's new roots grow to 10 cm long, then transplant it, and the success rate is very good. At this point fellow owners must do a good job of protecting the roots and strengthening the seedlings. After it goes into a new pot, we can use a root-strengthening organic nutrient solution to strengthen the seedlings, applied as a root drench. It can strengthen roots and seedlings and improve the survival rate of transplanting.
If your clivia has root rot in summer because of a lapse in care, you can imitate this little gardener's method and save them. Fellow clivia owners, do not think this trick is very cool. It is only done as a last resort. If you can avoid beheading it to grow roots, then try not to behead it. This is also what the old clivia hands warned me about.