Detailed Explanation of Olive Tree Planting Techniques and Management Methods
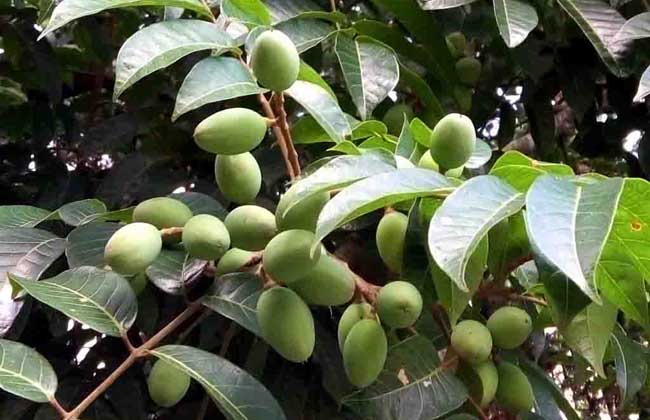
The olive tree is a subtropical evergreen tree of the genus Olea in the family Oleaceae, native to the Mediterranean coastal region of southern Europe. In China it has been widely introduced and planted across 15 provinces and regions from the south of the Yangtze River basin to Guangdong and Guangxi, with the highest concentrations in Hubei, Sichuan, Yunnan, Guizhou and Shaanxi provinces. It has extremely high planting value. Let us take a look at olive tree planting techniques below!
Olive Tree Growth Habits
The olive tree prefers warmth. During the growing season it requires moderately high temperatures to grow vigorously and bear fruit well. It grows best in areas with an annual average temperature above 20°C and no severe frost damage in winter. In winter it can tolerate short periods of low temperatures down to minus 3°C, but when the temperature drops below 4°C, severe frost damage occurs. It can grow normally in areas with rainfall of 1200-1400 mm. It has a wide adaptability to soil. It can be cultivated along riverbanks, on hills and mountains, and in red-yellow soils and gravelly soils. As long as the soil layer is deep and drainage is good, it will grow well.
Olive Tree Grafting Propagation
1. Advantages of grafting: Olive trees grown from seed take 6-8 years to enter the fruiting stage, and the plants are tall, inconvenient to manage, and have a relatively large coefficient of variation. Grafting can advance fruiting by 3-4 years and has the effect of dwarfing the plant and accelerating the improvement and renewal of superior varieties.
2. Grafting time: For young seedlings, the best time is from February to the end of March, on sunny days when the temperature is stable above 15-16°C, that is, when the tree's sap begins to flow. For mature large trees, the root system is deep and the soil temperature rises relatively slowly, so the high grafting time can be postponed accordingly, extended to April-May.
3. Scion treatment: The scion is cut when the spring shoots begin to sprout. From vigorous, high-yielding and stable-yielding middle-aged trees, select autumn scion branches with short internodes, plump buds, thickness comparable to the rootstock, and growing on the outer part of the canopy. After cutting, immediately remove the leaves, wrap and bundle with a damp cloth, and put a plastic bag over the outside to prevent the scion branches from losing water. If it needs to be stored for a longer time, pay attention to the humidity inside the bag and the nutrient supply to prevent mildew and rot. During transport, take care to protect the buds and cortex from damage.
4. Grafting methods: Select scion branches with 2-5 buds, mainly using tongue grafting and cut grafting. In order to reduce the oxidation of tannins in the wound and the problem of bleeding, the grafting must be done quickly. Align the cambium of the rootstock and scion, insert tightly, seal and wrap, and pull the single layer tight at the bud. For mature trees, mainly use inlay grafting and cut grafting, while keeping part of the canopy as water-drawing branches to protect the normal growth of the tree.
5. Removing the film and wiping off buds: The olive tree's wound healing ability is relatively slower than other fruit trees. With degradable film, removal is normally not needed; in individual cases where it is tied too tightly and needs to be removed, the film should only be removed after the meristem at the graft union has completely healed and become firm, so as to ensure the smooth growth of the scion buds. The rootstock easily sprouts adventitious buds, which must be wiped off in time to reduce negative effects such as competing with the scion branches for nutrients and occupying space.
Olive Tree Seed Propagation
1. Seed treatment: For olives kept as seeds, the fruit must be allowed to fully develop and mature, and is harvested when the outer shell of the seed pit turns a pale red-charcoal color, around late October to November. Mix fresh olives with table salt at a weight ratio of 10:1, pour into a vat, tread with the feet until the flesh and pit separate, then soak in clean water for 7-8 hours, and afterward tap lightly with a wooden hammer to extract the seeds, separating the flesh from the pits.
2. Stratification and sand storage: Olive seeds need stratification treatment to complete the after-ripening stage. Choose a wind-sheltered, cool indoor location and use clean river sand for stratification. The humidity should be such that when squeezed in the hand it forms a ball without water dripping out, and when released it can scatter into small clumps. The ratio of seeds to river sand is 1:3, one layer of river sand and one layer of seeds, stacked alternately in 4-5 layers. During stratification, check regularly, control temperature and humidity well, and prevent mildew and excessive drying.
3. Sowing method: Sow in February-March of the following year. Before sowing, soak the seeds in warm water for 5-6 hours, which helps uniform sprouting and facilitates management such as fertilizing, spraying and watering. If preparing to graft and propagate in the original garden seedbed, the plant and row spacing is about 12 cm × 15 cm. Too wide wastes soil and encourages vigorous weed growth. Too narrow makes grafting inconvenient, and at the same time the seedlings grow excessively, which is not conducive to strong seedlings. For seedlings intended for sale or transplanting, sowing can be dense. After evenly broadcasting 300-400 seeds per sq m, press the seeds into the soil with a wooden board, cover with 2-3 cm of fine soil, cover with rice straw, and do a good job of heat preservation and moisture retention.
4. Seedling cultivation: Direct sowing and seedling raising in the garden has a high survival rate and is convenient to manage. Seedlings emerge 40-50 days after sowing. Generally, frequently applying decomposed human and animal manure is the main practice, maintaining suitable temperature and humidity in the seedbed and paying attention to pest and disease control. Management requirements for transplanting into nutritional bags for cultivation are very strict, but the survival rate of seedlings planted after leaving the nursery reaches 97%-100%, which is deeply recognized by the majority of fruit farmers. Several main steps should be noted in breeding. The nutritional bag size is 25 cm long and 15 cm wide, to prevent or reduce the main root growing too fast during the seedling stage and penetrating out of the nutritional bag.
5. Seedling transplanting: Apply sufficient basal fertilizer in the culture soil at the bottom of the bag. When the small seedling has 2 leaves and 1 heart, transplant it into the bag for cultivation. Those with long main roots can be coiled and planted appropriately shallow. Arrange 8-10 bags as one row, with every two rows as a small line, separated by 10-15 cm in the middle, placed into beds. Finally, fill the gaps in the middle and around the sides with crushed soil, to prevent water loss from watering and aging of the plastic bags from the sun.
6. Seedling management: Sprinkle a thin layer of sawdust, peanut shell powder, etc. on top of the bagged seedling soil. This has effects such as moisture retention, heat preservation and reducing weed growth, and is very beneficial to the survival and growth of the seedlings. In summer with high temperature and drought, set up shade. When pulling weeds or loosening the soil, take care to prevent root damage.