Detailed Explanation of Key Techniques for Cultivating Plum Saplings
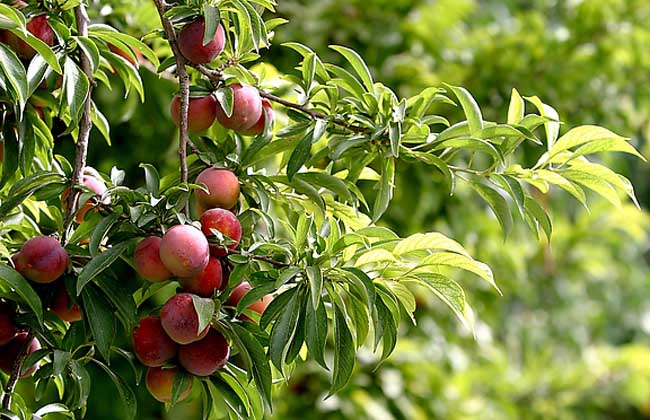
The plum is a deciduous tree of the genus Prunus in the rose family (Rosaceae), and is one of people's favorite fruits. It is cultivated in every province of China and throughout the world, and is one of the important temperate fruit trees, with very strong adaptability to climate. In production, division propagation, cutting propagation and grafting propagation are often used. Let us take a look at plum sapling cultivation techniques together below!
Plum Division Propagation
The root suckers at the base of the plum tree can be used for division propagation. Usually soil is mounded around the base of the tree to promote the formation of adventitious buds on the horizontal roots. After the buds sprout and send out shoots, the root-sucker saplings are separated from the mother tree the following year to become independent small saplings for transplanting.
Plum Cutting Propagation
1. Build the seedbed well: Set up a plastic shed (bamboo strips, wooden boards or straw curtain materials are all acceptable) in a shady place, tidy up the ground inside the shed, and use fine river sand to make the cutting bed. Use a 0.5% potassium permanganate solution or a 500-part solution of 50% carbendazim or 70% thiophanate-methyl or 58% mancozeb to strictly sterilize and disinfect the cutting bed, with the amount of spray applied just enough to moisten the surface of the sand bed. Keep the temperature inside the shed at 20°C to 28°C, and the relative humidity not lower than 70%. Since this is softwood cutting with leaves, natural scattered light must be allowed to shine into the shed to facilitate photosynthesis of the cuttings. The size of the shed depends on the number of seedlings to be raised. Generally, about 250 seedlings can be raised per sq m.
2. Collect the cuttings: From disease-free areas, cut current-year leafy softwood shoots from robust mother trees in full fruit stage (for early spring cuttings, shoots that did not sprout the previous year can be collected, with a thickness of about 0.7 cm being preferable) as cuttings, with a length of 10 cm to 20 cm, retaining 2 to 3 leaves or 3 to 5 half-leaves at the upper part. The varieties of the cut cuttings must not be mixed, and labels should be attached promptly. The cuttings are required to be semi-lignified and free of pests and diseases. Bundle the collected cuttings into bundles of 50 to 100, and soak the base portion about 2 cm long in a 0.005% to 0.01% ABT rooting powder No. 1 solution or a 0.025% naphthaleneacetic acid solution for half an hour to 1 hour.
3. Cut in time: Sharpen the base of the cuttings with a knife. Before cutting, first make holes in the cutting bed with a small wooden stick, then insert the cuttings into the holes, with a cutting depth of 5 to 8 cm and a plant spacing of 6 to 8 cm. Water immediately after cutting and promptly close the shed to retain moisture.
4. Management after cutting: After cutting, pay attention to the temperature inside the shed, the moisture of the bed surface, and ventilation and light transmission. If the temperature is high at noon, spray more cool water. Under the condition of ensuring the temperature and humidity required by the cuttings, the water content of the cutting bed should be reduced as much as possible to prevent rot of the seedlings from excessive moisture. Seven days after cutting, callus tissue begins to form; after 15 days, the cuttings begin to root. When the number of roots reaches more than 10 and the average root length reaches more than 5 cm, they can be transplanted.
Plum Grafting Propagation
1. Rootstock selection: After transplanting wild peach, plum, cherry and other tree stumps and getting them to survive, cut or saw them off at 6-10 cm above the ground (also according to tree shape) as the rootstock.
2. Scion selection: Select well-developed 1-year-old, thick, plump-budded, pest-free semi-lignified branches as scion wood, take segments about 7 cm long, and keep 5-7 buds as the scion. Wrap the collected scions in a damp cloth and use them as they are collected.
3. Method selection: This is generally carried out before the rootstock buds sprout, or when they begin to sprout but have not yet unfolded leaves. The commonly used cleft grafting method is mainly suitable for thicker rootstocks. This method is easy to master, and the graft union heals quickly and firmly, with a high survival rate.
4. Grafting method: Water the rootstock once the day before grafting. When grafting, pare the cut surface of the rootstock flat with a knife, then use a grafting knife or blade to split straight down a cleft about 3 cm long. Pare the lower end of the collected scion into a wedge-shaped cut surface about 3 cm long, with one side slightly thicker and the other thinner, keeping only 2-3 buds. Then insert the scion into the cleft with the slightly thicker side facing outward and the thin side facing inward, aligning the cambium, and bind tightly and wrap completely with a wide plastic strip. Bind the cut at the upper end of the scion firmly with plastic film to prevent water evaporation and pest damage. In dry and windy weather, a transparent plastic bag must be used, with a small cotton ball fully soaked in water placed inside, then cover the part above the graft union and tie the bag opening tightly.
5. Management after grafting: Generally, cutting the rootstock promotes sprouting earlier than bending the rootstock. But in summer, when cutting the rootstock, it must be cut 3-5 cm away from the grafted bud, leaving a few leaves on the rootstock, and after the grafted bud sprouts, cut the rootstock 1 cm above the grafted bud. After cutting the rootstock, remove sprouts in time, removing all the buds sent out on the rootstock and keeping only the grafted bud. In the later stage, the saplings should be watered at the proper time. When the grafted bud grows to 70-100 cm by the end of September, pinch off all growing tips and stop watering, to promote thickening growth of the sapling and make it mature, thereby improving the sapling's overwintering ability.