Detailed Guide to Growing Pitaya (Dragon Fruit) in Pots: Even Beginners Can Easily Learn
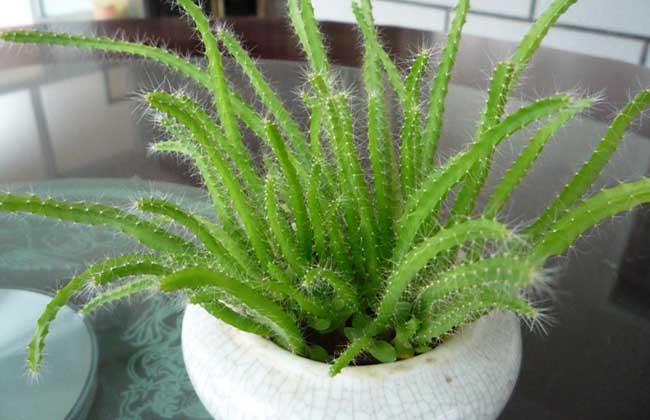
Pitaya (dragon fruit) originates from the tropical and subtropical regions of Central America. It is a cactus-family plant that has settled in mainland China in recent years and offers both ornamental flowers and edible fruit. It can not only be grown commercially in open fields or protected greenhouses, but can equally be grown in pots on balconies and rooftops.
Growth Habits of Pitaya (Dragon Fruit)
Pitaya (dragon fruit) is highly adaptable and not particular about soil type. It can be planted as long as the temperature does not stay below 8°C for extended periods. In northern regions where winter temperatures are low, it can be kept indoors to overwinter. For small-scale cultivation, you can buy seedlings or ask a friend for some pruned stem segments (10-15 cm long is sufficient); generally, they will root if inserted into plain sand. With good management, flowers can be seen 70-plus days after planting.
Pitaya (dragon fruit) can bloom continuously from April to November each year. Ripe fruit weighs over 500 grams, with large ones reaching 1500 grams. The peel is bright red, dazzling and eye-catching, adorned with golden-yellow scales. The flesh comes in both red and white varieties; the fruit is sweet without being cloying, mild and fragrant, even better than Hami melon, with an excellent taste.
Preparation of Pots and Growing Medium
Pitaya (dragon fruit) is a shallow-rooted plant and does not need repotting during cultivation. Containers with good drainage and aeration, such as clay pots or wooden boxes with a diameter of 25-35 cm, can be used. It is best not to use plastic pots, porcelain pots, or other containers with poor aeration. Before planting, the containers must be sterilized; new clay pots do not need sterilization, but must be soaked in clean water for several hours to allow the foul gases in the pores of the pot walls to escape, otherwise normal root growth will be affected.
Pitaya (dragon fruit) is not demanding about the growing medium, but the soil must be loose, aerated, and well-draining. Neutral or slightly acidic soil is acceptable; it does not like alkaline soil. For home potting, you can mix your own growing medium. Use 6 parts leaf mold, 2 parts manure soil, and 2 parts coarse river sand, mixing them evenly together. Let it sit for more than half a month before use.
Potting and Seedling-Stage Management
For potted pitaya (dragon fruit), it is best to use cuttings. As long as the seedling has roots and has sprouted new branches, it can be transplanted into a pot. First, place two overlapping broken clay pot pieces over the drainage hole at the bottom of the pot, then place a 3-5 cm layer of small stones or large coarse sand at the bottom as a drainage layer. Then add the prepared growing medium to fill most of the pot. In the center of the pot soil, pile up two mound-shaped soil heaps side by side, place two seedlings on the mounds with a spacing of no more than 5 cm, and spread the seedling roots around the mounds. Then insert a stick between the two seedlings and tie the seedlings to the stick. At this point, adjust the orientation of the seedlings so that the sunny side of each seedling faces south (the triangular stem of pitaya has a sunny side and a shady side; of the three ridges, the two widest ones with the largest angle and slightly lighter color are the shady side, and the opposite ridged side is the sunny side). Then add soil up to 3 cm below the rim of the pot, gently press the soil around the plants with your hand, and water thoroughly once. After 1 week of acclimatization, move to the balcony for normal management, and when placing, also make sure the sunny side faces south.
Pitaya (dragon fruit) is a drought-tolerant plant; it is better to keep it dry than wet, and do not water unless the soil is dry. Water once a week with an organic fertilizer solution mainly based on nitrogen, but not too concentrated. Although pitaya (dragon fruit) is a sun-loving plant, it should be appropriately shaded during the midday hours when summer sunlight is too intense. Also, remove any new lateral buds that appear on the stems at any time, keeping only the terminal bud, and encourage upward growth. When the plant reaches about 1 m in height, cut off about 3 cm of the stem tip at the top to encourage lateral branches to grow from the top. When the top lateral branches reach about 50 cm, insert 4 bamboo poles of about 1 m or more around the edge of the pot, tie a crossbar to the top of the bamboo poles, and tie the lateral branches to the crossbar, letting them extend horizontally or hang naturally. When lateral branches exceed 80 cm, cut off about 3 cm of the stem tip to reduce nutrient consumption, promote flower bud differentiation, and encourage earlier flowering and fruiting. With good management, flowers can appear in 7-8 months.
Flowering-Stage Management of Pitaya (Dragon Fruit)
Pitaya (dragon fruit) has a long flowering period, with many and large flowers, and a high demand for nutrients. Therefore, in addition to strengthening fertilizer and water management during the seedling stage, half a month before flowering, apply 1 supplemental organic liquid fertilizer containing phosphorus and potassium, and continue applying it every 5-7 days. For potted pitaya (dragon fruit) on balconies and rooftops, due to the limited amount of potting soil and nutrient supply, the lateral branches should not be left too long, with no more than 3 flowers per branch; in the end, also pick two to eat, leaving only 1 to set fruit.
Pitaya (dragon fruit) can set fruit through self-pollination, but cross-pollination gives a higher fruit-setting rate, with larger and better-tasting fruit, so hand pollination should be done when conditions allow. In the evening when the flowers are fully open, use a new Chinese brush to pick up some pollen from the anthers of one flower's stamens and dab it onto the stigma of another flower.
Post-Harvest Management and Overwintering
After November each year, the fruit is basically all harvested. At this time, apply a base fertilizer: use a small hand trowel to dig up the soil about 10 cm deep along the inner edge around the pot, temporarily pile the soil at the base of the plant, then apply organic fertilizer mixed with barnyard manure and chicken manure, put the soil back, and water thoroughly once to prepare for winter.
In most places in the north, cold protection is needed; simply move it indoors. It is best placed on a south-facing windowsill. Note that no fertilizer should be applied during the winter. Control watering appropriately. After spring begins, do not move it outdoors too early; generally, after mid-May it is safe to move it outdoors. After moving outdoors, first cut off the lateral branches that bore fruit the previous year from near the base, in order to encourage new lateral branches to grow and lay the foundation for earlier flowering and fruiting that year; otherwise, the original lateral branches will not be able to flower and fruit again.