How to Graft a Cherry Tree? Detailed Grafting Methods and Steps
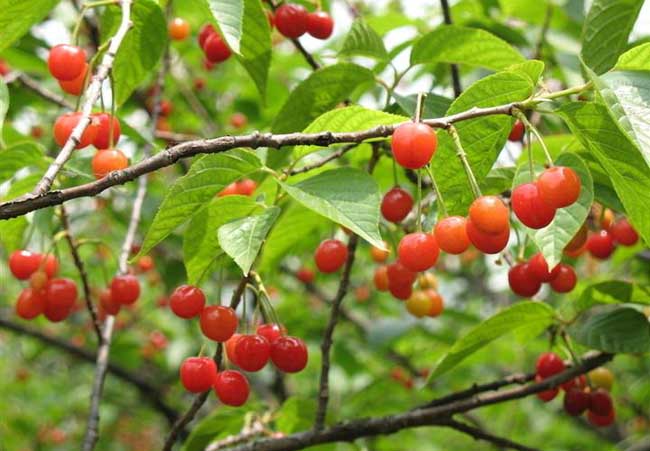
Cherry is a tree fruit that comes to market relatively early, known as the “first branch of a hundred fruits.” The fruit can be eaten as a fruit, is very rich in nutrition, and is also much loved by everyone. So how do you graft a cherry tree? Below, the editor brings you the grafting methods for cherry trees:
Cultivation of Grafted Seedlings
1. Collecting scions: Scion collection can be done 1 month before bud break. Select fruiting branches and vegetative branches that are robust, high-quality and high-yielding, highly adaptable, and free of pests and diseases, with stout branches from the outer canopy being best. After collection, seal with wax and bundle by variety. Store at a low temperature of 5--8 degrees C, taking them out as needed.
2. Grafting at the right time: Spring branch grafting is carried out from when the rootstock begins to grow until buds break and leaves unfold. The specific timing varies by region and climate; for example, Shandong in late March to early April, Henan in late March, Hebei in mid-to-late April, and Liaoning in early May.
Grafting Methods
Cherry tree grafting techniques usually adopt the bud grafting method and the plate bud grafting method.
1. Bud grafting
(1) Bud grafting at the right time: The suitable time for bud grafting is divided into an early period and a late period. The early period is within the 15-24 days of mid-to-late March, and the late period is from the end of mid-July to August, sometimes extending to mid-September, lasting 50 days. If grafted too early, the scion is tender, the cortex is thin, and the grafted buds develop insufficiently; if grafted too late, the branches have mostly stopped growing and the grafted buds are not easy to peel off.
(2) Selecting scions and buds: When bud grafting at different times, scions and grafted buds must be selected differently. For early-period bud grafting of sweet cherry seedlings and post-grafting care, select 5-6 plump buds from the middle of robust branches as grafted buds. For late-period bud grafting, all buds on robust scions except basal buds and autumn shoot buds can be used as grafted buds. For bud grafting in September, select plump buds from vigorous water shoots inside the canopy as grafted buds.
(3) Cutting the grafted bud: When bud grafting, first cut the grafted bud from the scion. The bud plate of the grafted bud should be large, about 25 cm long and about 1 cm wide, to increase the contact surface between the cambium of the rootstock and the bud and raise the survival rate. If the bud plate is too small, it is not easy to survive; even if the rootstock and bud heal and survive, the grafted bud is prone to bursting and lifting, or poor growth and even death.
(4) Grafting and tying: After the grafted bud is cut, make a horizontal cut near the ground on the rootstock seedling, about 1 cm long, reaching the xylem. Then from the center of the horizontal cut, make a vertical cut downward, 2.5 cm long, reaching the xylem. When inserting the bud plate, use the tip of the knife to gently peel open the left and right cortex layers from top to bottom. Then gently insert the grafted bud into the cortex of the rootstock. Never push it in forcibly, to avoid bruising the grafted bud or rootstock cortex, causing gummosis and affecting survival. Finally, tie tightly with a polyethylene film strip about 1 cm wide. After bud grafting, healing takes about half a month, and the binding can be removed after 20 days. The survival rate is above 80%.
2. Plate bud grafting
Plate bud grafting can be carried out throughout the year, as follows.
(1) Collecting scions: The rootstock used for grafting should be more than 1 cm thick, and the scion should preferably be 1-year-old branches, with plump buds selected as grafted buds.
(2) Cutting the grafted bud: When cutting the grafted bud, make the cut 1.5 cm below the grafted bud, and gently cut the bud plate off the scion, forming an oval bud plate 2.5 cm long and --2 mm thick.
(3) Careful grafting: When grafting, at the base of the rootstock 1 cm from the ground, choose a smooth part and gently shave off a layer of bark along the vertical direction, forming a long oval cut surface about 25 cm long and 1-2 mm deep (just enough to expose the yellow-green cortex). Then press the bud plate tightly against the cut surface of the rootstock and tie it firmly with a plastic film strip.
Post-Grafting Management
1. Cutting the rootstock: Before the grafted seedling that has survived begins to sprout, cut off the rootstock seedling stem 0.2 cm above the grafted bud. Then transplant at a plant spacing of 15--20 cm and a row spacing of 50--60 cm.
2. Removing sprouts: For bud-grafted seedlings after cutting the rootstock and transplanting, the rootstock buds sprout first, and the grafted buds sprout later. Therefore, when the rootstock buds sprout, promptly remove the sprouts on the rootstock to promote the sprouting and growth of the grafted buds. After that, continue removing sprouts 3-4 times. After the grafted bud sprouts, choose to keep 1 robust new shoot.
3. Tying: When the new shoot grows to 10 cm, insert a support post near the seedling. Tie the new shoot to the support post with hemp rope or a plastic film strip to prevent the new shoot from breaking in the wind. After that, as the new shoot grows, tie it once every 24 cm.
4. Fertilizer and water: After sprouting, apply quick-acting nitrogen fertilizer 3 times consecutively every 20 days. Each time apply 120--150 kg of urea per hectare with irrigation water. After May, no more topdressing, to prevent excessive vegetative growth of the seedlings.
5. Pest and disease prevention: During seedling growth, do a good job of pest and disease control. After sprouting, strictly guard against the small gray weevil; it can be caught by hand, or poisoned bait made with 80% trichlorfon crystal can be used to trap and kill it. In June-July, 50% fenitrothion emulsifiable concentrate at 1000 times dilution or 2.5% deltamethrin emulsifiable concentrate at 2500 times dilution can be used to control the peach fruit moth. In July-August, spray 1-2 times with 65% zineb wettable powder at 500 times dilution, or 40% mancozeb at 600-800 times dilution, or zinc sulfate lime solution (zinc sulfate 1 part, slaked lime 4 parts, water 240 parts, fully mixed) to prevent bacterial shot hole disease and prevent early defoliation. For pests such as tortricid moths and slug caterpillars, spray 25% chlorbenzuron No. 3 at 2000 times dilution or 50% dichlorvos emulsifiable concentrate at 1000-1500 times dilution for control.
A good variety is extremely important for cherries. Only cherries with good quality can fetch a high price on the market, so you might as well try the editor's method and improve your cherry varieties.