Durian Cultivation Techniques Explained: Growing Methods and Management Essentials
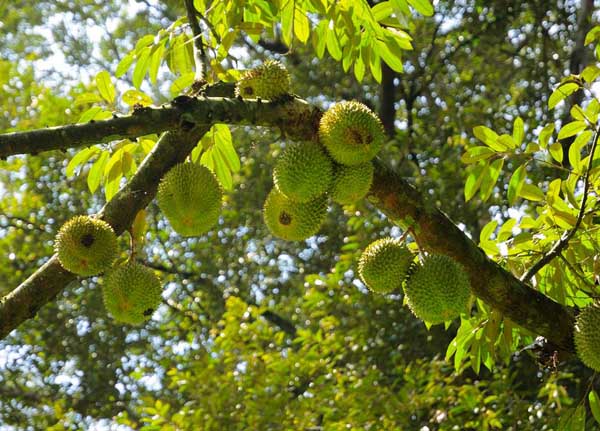
Durian is one of the famous tropical fruits, a fruit with extremely high economic value. Several countries in Southeast Asia grow it in relatively large quantities, with Thailand growing the most; among Thailand's fresh fruit exports, durian ranks first, with durian exports reaching 10 million USD in 1987. There are a small number of durian trees in Hainan, China, and some durian varieties have also been introduced from abroad. With the opening to the outside world, foreign durian has entered the Chinese market and is well received. Due to a lack of understanding of durian's appeal, China has not attached great importance to durian cultivation, and there has been very little research on durian. According to the phenological characteristics of durian, it can be grown in areas with an average daily temperature above 22°C and no frost, and parts of Hainan Province and Yunnan Province in China can develop it.
Durian needs a year-round high-temperature climate to grow and bear fruit. Even in equatorial regions, at highlands above 600 m in elevation, durian cannot be grown or cannot bear fruit due to the drop in temperature. The marketing season is from September to December each year, and it is also produced in other months.
For a long time, people commonly used seeds to propagate durian, but durian has great genetic variability. If one durian has ten seeds, each seed may grow into ten fruits of different quality, and the good and the poor are uneven; inferior durian can produce very excellent varieties. Likewise, good durian can also produce inferior varieties, and some seed-grown durians never bear fruit in their lifetime. In order to cultivate excellent varieties, ensure variety purity, and achieve early fruiting and high yield, people today increasingly use grafting propagation to cultivate durian. The six propagation methods for durian (excluding seed propagation) are briefly described below:
1. Bud grafting
Except for monocotyledons and some plants with irregular cambium, almost all dicotyledonous woody plants can be propagated by bud grafting. The rootstock should be pencil-sized; at the point on the rootstock stem 10 cm above the soil, cut two slits from top to bottom, 0.7 cm wide and 3-4 cm long, make a horizontal cut at the top of the two slits, and lift the bark, with the length matching the bud patch. Leave a little of the already lifted bark at the lower end of the cut to support the bud patch. The process of obtaining the bud patch is the same as the method of cutting slits and lifting bark on the rootstock; after fitting them together, bind tightly with a 1 cm wide plastic film strip. The graft union should preferably not come into contact with rainwater within two days.
Note that unlike bud grafting methods for other fruit trees, where the bud body can be completely wrapped, durian is an exception, because the bud body on the bud patch easily falls off. After two weeks, it will be known whether it has survived. After survival, cut off the upper part of the rootstock about 30 cm from the grafted bud to stimulate rapid growth of the bud eye. Later, the rootstock will sprout many rootstock branches; these rootstock branches must not be completely removed, and one or two branches must be turned down to help the grafted bud absorb nutrients, but the retained rootstock branches must not be allowed to grow too vigorously and need frequent pruning so as not to hinder the growth of the grafted bud.
2. Cleft grafting
Seedlings whose seeds have germinated but have not yet opened leaves or have not yet become woody are most suitable as rootstock. Cut flat at 6-7 cm above the rootstock, and make a straight downward cut about 1 cm deep in the middle of the flat rootstock stump to form a "V" shape; obtain a shoot with two or three buds and a diameter comparable to the rootstock stump as the scion, about 8-10 cm long, cut off 3/4 of the leaves, whittle the lower end of the scion into a wedge shape, insert it into the slit of the rootstock stump, and bind tightly with a film strip. Afterwards, cover the entire seedling with a transparent plastic bag to prevent the scion from losing water through evaporation, and place it in a cool place. After about two to three weeks, if the scion's leaves do not fall off, it is considered successful.
3. Approach grafting
Suitable only for small-scale propagation. Seedlings planted in plastic bags about six or seven months old can be used as rootstock. The size of the scion shoot should be equal to that of the rootstock, and an upright vegetative shoot is ideal.
4. Cuttage
Use a shoot about 15 cm long, with a diameter like a chopstick, with several leaves and buds; each leaf needs two-thirds cut off to prevent water loss through evaporation. Cut the lower end of the shoot at a slant or make a 1 cm cross cut from bottom to top, apply a layer of hormone rooting agent, insert it into a cup of moist sand, place it in a greenhouse with weak light, and water it. After seven or eight weeks, if the leaves do not fall off and young roots grow, it can be transplanted into a plastic bag.
5. Shoot side grafting
The rootstock can be of any size, as long as it has become woody and the bark is easy to peel open; the height of the insertion point can be chosen freely, and the cutting process is similar to bud grafting. Select a strong, tender shoot 10 cm long that has not yet opened leaves and has not become woody as the scion; the slanted cut on the scion should be slightly shorter than the rootstock cut, insert it into the rootstock cut, bind it with plastic tape, then wrap it tightly with transparent plastic film, and place it in a cool place. After two weeks, cut open the plastic film, but the plastic tape must not be removed until the shoot has grown.
6. Air layering
Air layering can be done without seasonal restrictions. Choose a branch a little larger than a pencil, and about 40 cm from the tip, make a ring cut about 3 cm long; after peeling the bark, use the back of a knife to scrape away the cambium at the cut, otherwise the bark at the cut will regenerate and no roots will form. Wrap a ball of moist soil, about the size of a duck egg, around the cut. Wrap it with three layers of plastic film, tie both ends tightly, and after about three months, once new roots have grown, it can be cut off from the parent plant. Cut open the plastic film, plant it in a black fruit seedling plastic bag, place it in a cool place, and after about one or two months it can be transplanted. Because the survival rate is low, it is rarely used when propagating durian.