Detailed guide to kiwi cultivation techniques, from planting to management throughout the whole process
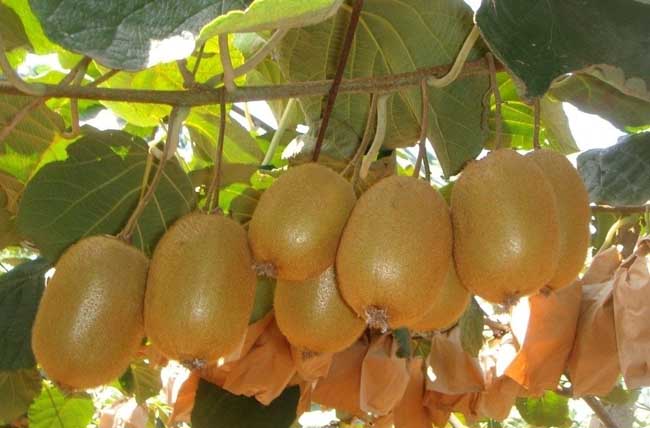
Kiwi belongs to the genus Actinidia in the family Actinidiaceae. It is a deciduous vine fruit tree, rich in various vitamins and nutrients, and is known as the “king of fruits”. It has high economic value and cultivation value. It is suitable for planting in places with a mild climate, abundant rainfall, fertile soil, and lush vegetation, where the soil is deep, well-drained, moderately moist black humus soil or sandy loam, with a pH value of 5.5-7 slightly acidic soil.
Select suitable varieties
Mainly Hongyang (red-fleshed fruit), Hayward, Bruno, Qingcheng No. 1, Qinmei, Miliang No. 1, Chuanmi No. 2, Chuanmi No. 3, Chuanmi No. 4, etc.
Seedling raising
1. Rootstock seedling cultivation
1.1. Seed collection. Collect fully mature fruit from early September to mid-October. After the fruit softens through after-ripening, squeeze the fruit out together with the seeds, put them into a gauze bag and rub them so that the seeds separate from the pulp, then repeatedly wash them with clean water, spread the washed seeds indoors and dry them in the shade.
1.2. Seeds. Sand storage treatment: soak the seeds in warm water at 40-50°C for 2 hours, then soak them in cold water for a day and a night, then store them in sand for 50-60 days before sowing. Kiwi seeds are afraid of drying and moisture during sand storage, so check frequently and turn frequently to prevent mildew.
1.3. Sowing. ① Sowing time: generally, raising seedlings in areas above 800 m altitude is more ideal, sow from mid-March to early April. ② Sowing method: First, choose the nursery land in a place with deep and fertile soil and good drainage, irrigation, and transportation conditions; second, prepare the land and make beds, apply enough base fertilizer, remove debris, make the bed width about 1 m, press the seedbed slightly, water thoroughly, and sow the sand-stored seeds together with the sand. After sowing, spread a layer of fine river sand about 2-3 mm thick, and cover with rice straw, spray water on the straw or build a small plastic shed. Third, strengthen seedbed management to ensure the cultivation of robust rootstock seedlings.
2. Grafted seedling cultivation
2.1. Grafting period. About 20 days before bud break is suitable, that is, from mid-February to late March.
2.2. Grafting method. Mainly adopt methods such as single-bud cut grafting. Specifically: select a scion that is full of growth and has a relatively small pith, cut a branch segment with one bud, 3-4 cm long. Choose a flat side and peel off the bark layer; the cut surface should preferably be 2-3 cm long, and the depth should preferably expose the xylem or slightly cut into the xylem, then cut a short slanted surface of about 50 degrees on the opposite side of the cut surface. Cut the rootstock at 10-15 cm above the ground, choose a smooth side and cut downward, making the cut surface slightly longer than the scion cut surface, with the same depth as the scion, and peel 2/3 of the rootstock bark; then insert the scion, requiring the scion size to be basically the same as the rootstock; pay attention to aligning the cambium of the rootstock and scion, then wrap it with plastic grafting film, exposing the scion bud eye.
2.3. Management of grafted seedlings. First, 3-4 weeks after grafting, the grafted bud begins to sprout, and after the new shoot grows and basically matures, the binding film can be removed. Second, for side-grafted seedlings in spring and autumn, after they survive, the rootstock should be cut immediately, with the cut about 4 cm from the graft union. After the summer grafted bud survives, the rootstock can first be bent and then cut. Third, promptly removing sprouts on the rootstock is the key to survival and shoot growth. Fourth, the nursery land should be frequently cultivated and weeded, and be careful not to touch the newly sprouted grafted buds when weeding. Fifth, after the grafted bud sprouts and grows shoots, a support should be set up beside the grafted bud, and the new shoot should be tied and protected on the support. Sixth, when the seedling is 60 cm tall, it should be appropriately pinched. Seventh, in combination with irrigation, human excrement and urine, pig manure, etc. can be applied, or 1% urea can be added to the water and applied; when fertilizing in July, an appropriate amount of superphosphate can be added to promote the aging of young seedling branches and plump bud eyes. Eighth, from July to August, kiwi seedlings should be shaded, and direct strong light should be avoided.
Orchard construction
1. Orchard selection
The kiwi root system is fleshy and especially fragile. It fears both waterlogging and high-temperature drought. New shoots fear both being broken by strong winds and late spring cold or low-temperature freezing damage. It is suitable for planting in sub-alpine areas (800-1400 m altitude). Choose a place with deep soil, fertile soil, loose texture, good drainage, and convenient transportation to build the orchard. If cultivating kiwi in low mountains, hills, or plains, appropriate drainage and irrigation facilities must be provided to ensure no waterlogging in the rainy season and timely irrigation in the dry season. It is best to build a windbreak forest around the orchard.
2. Planting period
The best planting period in southern production areas is after kiwi leaf fall and before kiwi bud break in early spring of the following year, that is, from early December to mid-February, and the earlier the better.
3. Arrangement of pollinator trees
Kiwi is a dioecious fruit tree. The selection and arrangement of pollinating male plants is one of the conditions for ensuring normal fruiting. When selecting male plants, attention should be paid to the same flowering period as the main cultivar or slightly earlier, a large amount of pollen, and a long flowering period. The ratio of female to male plants is 6:1 or 5:1, giving high yield and good quality.
4. Planting density
Generally, planting density is closely related to the training system. The density for a free-standing system is 2 m×4 m, the planting density for a T-shaped trellis is 3 m×4 m, about 56 plants per mu, and the planting density for a flat-roof trellis is 3 m×5 m.
5. Support installation
Generally, supports are set up in the winter of the same year after planting, divided into posts (cement posts, wooden posts, stone posts, bamboo posts, and companion trees, etc.), crossbeams (cement posts, wooden posts, bamboo, and metal, etc.), and the trellis surface is wire, etc. According to local conditions, choose wooden trellises, steel trellises, concrete trellises, and companion tree trellises, etc. The main trellis types are the “Y” trellis and the “T” trellis.
6. Planting trellis type