How to grow potted morning glories and things to note
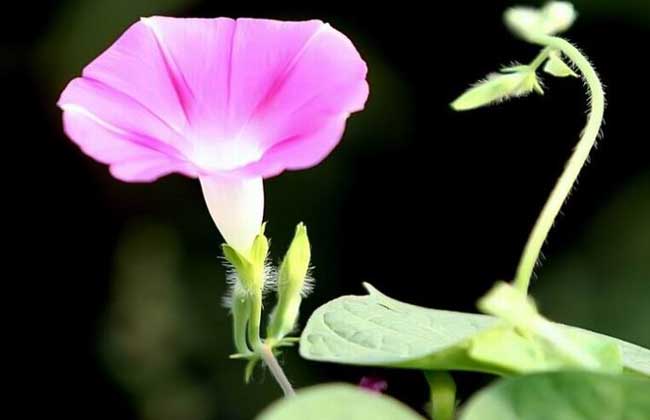
Morning glory is a common ornamental plant, also known as bowl flower, trumpet flower, etc. It is an annual twining herbaceous plant of the genus Ipomoea in the Convolvulaceae family. Morning glories are usually sown in spring and bloom in summer and autumn. There are many varieties, with flower colors including blue, scarlet, peach pink, purple, etc., as well as mixed colors, and the petal edges vary a great deal. Let us take a look below at how to grow potted morning glories!
The growing environment of morning glory
Morning glory is native to tropical America and is now widely planted in tropical and subtropical regions. In China, apart from some provinces in the northwest and northeast, it is distributed in most areas. It has strong adaptability and likes sufficient sunlight, and can also tolerate partial shade. It likes warmth and coolness, and can also tolerate summer heat and high temperatures, but it is not cold-resistant and fears frost. It likes fertile, loose soil, can tolerate waterlogging and drought, and is relatively tolerant of saline-alkali conditions. The suitable temperature for seed germination is 18-23°C, and seedlings can grow at temperatures above 10°C.
Growing environment Propagation methods
1. Sowing: For autumn sowing of morning glory, October to November is best. A temperature of around 20°C is more favorable for germination, and seedlings can be seen after about 10 days. In winter, they need to be moved indoors to ensure they survive the winter smoothly. If spring sowing is chosen in late April, they can bloom in summer. If sowing is done earlier, it must be carried out indoors to prevent root rot and other problems caused by rainy weather. When broadcasting, seedling trays are often used, and sufficient watering should be ensured. A thin layer of fine sand can be spread on the surface. If moisture retention is needed, glass or white paper can be covered on top. The seedling-raising time is about 60 days.
2. Cuttings: For morning glory rooting, a temperature of 20-25°C is suitable. The survival rate of cuttings in May to June and August to September is relatively high. The cuttings should be robust branches free of pests and diseases. They can be cut from below the node base, with a length of about 10 cm. The cut should be flat. The upper part of the cutting can retain 2-3 leaves. If the leaves are too large, half a leaf can be cut off. When taking cuttings, pay attention to disinfecting the potting soil to prevent the cuttings from being prone to infection and rot. The cutting depth is about 1.5 cm. Placing them in low light is sufficient. Pay attention to spraying water to keep them moist. When the soil temperature is maintained at around 20°C, they will root in about two weeks, and after about 30 days they can be transplanted.
How do you grow potted morning glories?
1. Planting: When morning glory seedlings grow 6 to 7 leaves and are about to send out vines, take the whole root ball out and repot it into a larger pot (inner diameter 24 cm) for final planting. The potting soil should be fertilized culture soil, and 50 g of hoof pieces should be applied as base fertilizer. After planting, water thoroughly. Morning glory is not afraid of heavy fertilizer; horse hooves, cooked sesame residue, etc. can be used as base fertilizer. The root system of morning glory needs temperature to develop. Using a black pot absorbs heat better than using a red pot. The pot should be turned frequently so that sunlight exposure is even and the root system develops fully.
2. Soil: Potted morning glory is best done in early April, using half ordinary culture soil and half plain sandy soil. When potting, remove 1 cm from the lower end of the main root accordingly, and plant it in a No. 2 tube pot with ordinary culture soil, one plant per pot. Note that when transplanting morning glory in the open ground, the main root must never be bruised. Seedlings should be moved when small and early, and the larger the soil ball, the better.
3. Water and fertilizer: For growing morning glory, choose culture soil with good drainage and provide sufficient sunlight and a well-ventilated environment. During the growth period, when the surface of the potting soil is slightly dry, water it. Apply dilute liquid fertilizer once every half month. Nitrogen fertilizer should not be too much, so as not to make the stems and leaves too lush. Potted plants need supports to hold them up.
4. Pinching: After the potting soil has settled, insert a 1 m long thin bamboo pole straight into the center of the pot. Then use about 3 m of galvanized wire, wrap one end around the bamboo pole level with the soil surface, then coil upward from the pot rim to form an even tower-shaped spiral frame that is wide at the bottom and narrow at the top. Fix the upper end of the wire at the top of the bamboo pole. Morning glory is a left-twining plant, so the coiling direction of the galvanized wire must match the habit of morning glory twining to the left. When the main vine climbs to the top of the pole along the wire, remove the growing tip. When each side vine grows to 6 to 7 leaves, pinch off the tip. In this way, the flowers can be large and the plant will keep sending out vines and blooming.
5. Pests and diseases: Morning glory is mainly prone to white rust. The affected parts are mainly leaves, petioles and tender stems. On affected leaves, light green small spots first appear on the leaves. If this occurs, the diseased plants can be promptly pulled up and destroyed to reduce infection of the seeds. Select and keep disease-free seeds as propagation seeds. Before sowing, the seeds should be disinfected, and crop rotation with Convolvulaceae plants should be avoided. In the early stage of the disease, spray 1% Bordeaux mixture or 50% metalaxyl 500-fold solution. Spraying once every 10-15 days has a relatively good control effect.
6. Shaping
① Dwarf cultivation: When the cotyledons of morning glory seedlings or the 1st-2nd true leaves have unfolded, promptly remove the terminal bud and force the plant to become dwarfed and upright. In this way, the leaf axils of the cotyledons and true leaves can form buds and bloom.
② Making supports: When the plant grows to a certain height, use thin bamboo poles to make a support so that it can climb and grow, and according to personal preference, supports can be made into various shapes for artistic shaping. When shaping, note that the coiling direction of the galvanized wire and the support should match the stem vine twining from right to left.