How to Graft a Kiwi Tree? A Detailed Guide to Practical Grafting Techniques
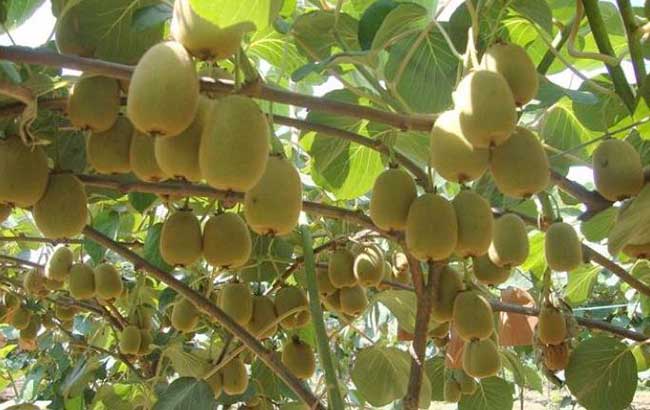
The kiwi tree, also known as yangtao, maotao, shanyangtao, maolitao and so on, is an ancient wild vine fruit tree native to China. Records of the kiwi appeared as early as the Classic of Poetry in the pre-Qin period, and artificial cultivation in China has a history of over a thousand years, giving it extremely high cultivation value. Let us take a look at kiwi tree grafting techniques below!
Grafting Time for Kiwi Trees
The suitable time for grafting kiwi trees is from early May to early July for green-branch grafting, and the most suitable period is from mid-May to early June. At this time the temperature is suitable, with an average temperature of 19.4-23.3°C, the grafting survival rate is high, the grafted buds sprout early, the growth period is long, the growth amount is large, the number of mature nodes is high, and the seedling quality is good. Any grafts that fail to survive can be re-grafted in time.
Rootstock Selection for Kiwi Trees
Select robustly growing seedlings as rootstock, and during the dormant period cut them flat, leaving 2-3 buds. If top-grafting improved varieties onto large trees, heavily renew and cut back the perennial branches, shorten the 1-year-old branches leaving 2-3 buds, and thin out overly dense and overly weak perennial branches and 1-year-old branches to reduce the number of branches and buds and promote growth. After the rootstock sprouts in spring, carry out bud rubbing and shoot thinning. Rootstock used for propagating grafted seedlings generally keeps one new shoot. For trees to be top-grafted with improved varieties, a certain number of new shoots should be selected and retained according to tree size, and the retained new shoots should be evenly and compactly distributed. To promote thickening growth and maturity of the new shoots, when the new shoot has 7-8 leaves, pinch it leaving 5-6 leaves, and grafting can be carried out when the new shoot is mature and semi-lignified.
Scion Preparation for Kiwi Trees
Use improved-variety plants adapted to the local environment as mother trees for collecting scions. The new shoots used as scions should be strong fruiting branches or vegetative branches with short internodes, thick petioles and thick leaves. To promote new shoot maturity and lateral bud differentiation, adopt the same pinching measures as for rootstock new shoots, and collect when semi-lignified. Using semi-lignified new shoots as scions gives a high survival rate and early sprouting. Note that the maturity of the scion should be basically consistent with the maturity of the rootstock new shoot to facilitate graft survival. Immediately after collecting the scion new shoot, cut off the leaves, leaving petioles no longer than 0.5 cm; it is best to collect and graft at the same time. If not used for a short time or to be shipped out, soak the lower part of the scion in water or wrap it with a wet cloth, etc., to keep it moist.
Kiwi Tree Grafting Techniques
1. Cleft grafting: This method is used when the rootstock is relatively thick. The new shoot used as rootstock keeps 3-4 leaves and is cut off 4-5 cm above the leaves. The rootstock new shoot should retain an appropriate number of leaves. If too few leaves are retained, the nutrient area is small and growth after grafting is poor; if too many leaves are retained, the rootstock is too long and the fruiting part of the top-grafted tree shifts outward and is not compact. At the same time, make sure to cut the new shoot at the semi-lignified part to serve as the rootstock. After cutting off the rootstock new shoot, split a cleft about 3 cm long vertically in the middle of the cut surface. For a single-bud scion, cut it off leaving 4-5 cm below the bud, cut a cut surface of equal length on each of the two sides below the bud, about 3 cm long, with the cut surfaces smooth and straight, then cut it off 2 cm above the bud. Slowly insert the prepared scion into the rootstock cleft, leaving 0.1-0.2 cm of the scion cut surface exposed at the top, and align the cambium on one side of the cut surface with the cambium on one side of the rootstock graft cleft. Use agricultural film about 1 cm wide to tie the cleft and scion tightly and securely, exposing only the scion petiole and bud eye, and finally use 1-2 leaves at the lower part of the rootstock to wrap the cleft and scion to retain moisture and protect from the sun.
2. Cut grafting: This method is used when the rootstock is relatively thin. The new shoot used as rootstock keeps 3-4 leaves and is cut off 4-5 cm above the bud. When making the cleft, proceed according to the thickness of the scion. Make a vertical downward cut at 1/3-1/4 of the cut surface, with the cleft about 3 cm long. For a single-bud scion, cut it off 4-5 cm below the bud, and according to the size of the rootstock cleft, cut a cut surface about 3 cm long on the side opposite the bud, the cut surface being the same width as the cleft and slightly longer than the cleft. On the opposite side of this cut surface, cut a short cut surface about 1 cm long, and finally cut it off 2 cm above the bud. After joining the rootstock and scion, leave 0.1-0.2 cm of the upper part of the large cut surface of the scion exposed; other handling is the same as for cleft grafting.
3. Tongue grafting: This method is used when the rootstock is relatively thin and roughly the same thickness as the scion. The rootstock new shoot keeps 3-4 leaves and is cut off 4-5 cm above the bud, then cut into a horse-ear-shaped cut surface about 2 cm long, and at 1/3 from the top of the cut surface make a vertical downward cut about 1 cm long. For a single-bud scion, cut it off 4-5 cm below the bud, and on the side opposite the bud cut a cut surface of the same size and shape as the rootstock cut surface, so that the lower edges of the vertical cuts on the rootstock and scion cut surfaces form a tongue shape. Insert the tongue-shaped parts of the rootstock and scion into each other's cuts; other handling is the same as for cleft grafting.
4. Chip budding: When cutting the scion bud, hold the scion upside down, make a slanted cut from about 1.5 cm above the bud down to about 1 cm below the bud, then make a slanted cut at about 0.6 cm below the bud, deep enough to reach the previous cut, and remove the bud chip with wood, the bud chip being about 2 cm long and 0.2-0.3 cm thick with wood. Make a cleft on the 4th-5th node of the rootstock new shoot in the same way as cutting the scion bud, with a size the same as the scion bud. Insert the scion bud into the graft cleft, align the cambium, and if the scion bud and cleft are not the same size, most of the cambium can be aligned. Use agricultural film to tie the cleft and scion bud tightly and securely, exposing only the scion bud petiole and bud eye, keep 1 leaf above the cleft and cut off the rootstock tip.
5. T-shaped budding: This method is used when the rootstock and scion are relatively highly lignified. When cutting the scion bud, first make a horizontal cut about 0.6 cm above the bud deep to the xylem, then make a slanted upward cut from about 1 cm below the bud deep into the xylem up to the horizontal cut above the bud, hold the scion bud with your hand and gently rub it to remove the bud chip; the removed bud chip must carry the young shoot, otherwise it greatly affects the graft survival rate. Make a T-shaped graft cleft on the 4th-5th node of the rootstock new shoot, gently peel open the cleft, insert the scion bud so that the upper edge of the scion bud closely meets the upper edge of the cleft, then use a strip of agricultural film to first tie two tight turns below the petiole so that the bud chip spreads out flat and clings tightly to the rootstock, and then tie the entire scion bud tightly and securely, exposing only the petiole and bud eye.