How to Plant Orchids? Eight Steps to Teach You to Plant Orchids Well
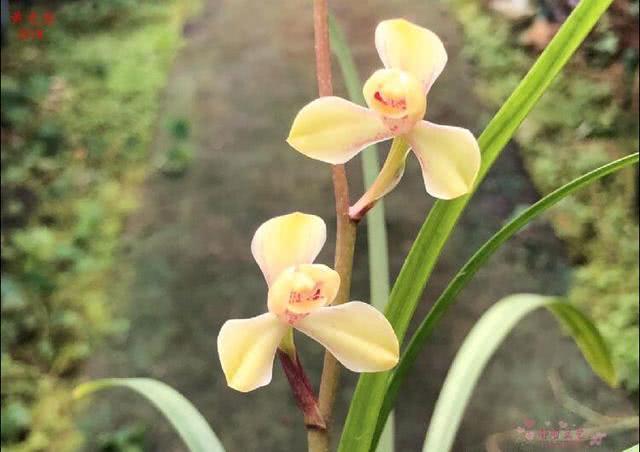
As the saying goes: orchids are three parts planting and seven parts care. Year after year of care accounts for seven parts, while a single day of planting accounts for three parts. This shows the importance of orchid planting, and it can also be said that planting orchids well is the key step to growing orchids well, laying a solid foundation for future care. Otherwise, various pests and diseases will occur frequently, making trouble endlessly. In order to make things convenient for everyone, the methods for planting orchids are now summarized into 8 steps for everyone's reference. When you carefully and meticulously plant a pot of orchids, the sense of achievement in growing orchids has only just begun. As long as you manage them properly, the thriving orchids will surely bring you surprises continuously, letting you fully enjoy the pleasure of cultivating orchids.
Step 1: Prepare the growing medium
The growing medium for planting orchids must be airy, breathable, well-draining, moisture-retentive, and sufficiently fertile. There are many orchid growing media to choose from. To meet the above requirements, it is best to choose orchid growing media with stable granular properties. Commonly used commercial orchid growing media include Songliwang, Xiantu, Zhijinshi, Tangjishi, Lanjuntuo, and so on. Materials you can source locally include fired soil, volcanic rock, weathered stone, coal cinders (screened into coarse and medium particles, with dust particles removed), broken bricks, broken tile pieces, small stones, coarse sand, charcoal, willow bark, pine needles, pine bark, wood shavings, and so on. All are very good orchid growing media. Generally speaking, they can be divided into hard media and soft media, or inorganic media and organic media. Hard media and soft media can be mixed and then used for planting, and the effect is also very good. There is no need to use them separately. There is no universal orchid growing medium formula; you can only learn from others' experience and practice on your own, adjusting through experimentation and selecting the best scheme. It can be said that the day you formulate a suitable orchid growing medium suited to your own environment is the beginning of your success in growing orchids. The growing medium used by the author is Songliwang and Zhijinshi mixed at 1:1, and the effect is very good. Songliwang is an organic growing medium, also called a soft medium, moisture-retentive and sufficiently fertile. Zhijinshi is an inorganic growing medium, a hard medium, airy, breathable, and well-draining. The combination of the two perfectly meets the environment required for orchid root growth, and management is also simple and convenient, with no pests or diseases!
Step 2: Choosing orchid pots
There are many kinds of pots that can be used to plant orchids, but we still need to be careful when choosing. Although pots differ in size, shape, material, color, and so on, they can generally be divided into 4 types: porcelain pots, purple clay pots, clay tile pots, and plastic pots. Porcelain pots are exquisitely made but have poor breathability, and generally are not chosen by anyone who is not an expert orchid grower; purple clay pots are attractive and have a certain breathability and water-absorbing function, but they are expensive and high in cost, suitable for planting good orchid varieties and for placing in good settings and spaces to elevate one's personal taste and the variety, very imposing and elegant. Clay pots have good breathability and strong water-absorbing function. With loose growing medium, there is no worry about water accumulation, but they are slightly less attractive; the advantages of plastic pots are light weight, low price, and practicality, but the pot walls do not have the water absorbency of clay pots. If the growing medium is not mixed carefully, water accumulation easily occurs; one thing worth noting about the above 4 kinds of orchid pots is that newly purchased purple clay and clay pots are recommended to be soaked to remove "fire toxin" before use.
Step 3: Clean the orchid plant
First clean the orchid's roots, using sterilized scissors to cut off diseased roots and rotten roots, but for orchid plants with few roots, the remaining roots need to be treated differently: if there are fewer than two roots, then find a way to keep the broken remaining roots, and retain the root core (central column) that is not wrapped by outer skin; if there are more than four good roots, then the other rotten roots can be cut off. If a wild-collected plant is growing too vigorously, consider cutting off some excess orchid roots. Next, clean the orchid's leaf sheaths. Withered and rotten leaf sheaths often become places where fungi and insects parasitize, so they must be carefully cleaned and trimmed to make the leaf clusters neat and clean. Dry and shriveled pseudobulbs should also be removed together, but operate carefully and by no means bruise the leaf buds, flower buds, or bud points; third, trim the orchid's leaves, cutting off leaves with diseased spots and dry, withered leaves. For diseased spots on the leaf center, you can use a toothpick to pierce and remove them, or use a cigarette to burn the diseased spot area. For diseased leaves with few leaves, cutting can be temporarily postponed, and medicine can be applied to treat the disease, leaving them to maintain transpiration pull and sustain growth. After the new shoots grow strong, then cut them off.
Step 4: Sterilize and disinfect the orchid plant
Orchid seedlings, orchid pots, and growing media all need to be disinfected. A commonly used method for growing media and pots is exposure to sunlight for more than 3 days. Or use a pressure cooker or steam boiler for thorough high-temperature disinfection. For chemical disinfection, you can choose fungicides such as thiophanate-methyl, carbendazim, chlorothalonil, potassium permanganate, and so on, using an 800-1000 times solution. It is best to disinfect the growing medium and then seal it for more than 1 week before use. Some orchid enthusiasts use a microwave oven to disinfect a small amount of growing medium, which is also very practical. To sterilize and disinfect orchid seedlings, you can use fungicides such as potassium permanganate, thiophanate-methyl, carbendazim, chlorothalonil, and so on at 1000 times solution and soak for half an hour, then take out the orchid seedlings, rinse them with clean water, and dry them. After the orchid roots become soft, they can be potted.
Step 5: Place a drainage layer in the orchid pot
For the drainage layer, you can use a special conical drainage cover or selected coarse growing medium placed at the bottom of the pot, with a thickness of 15%-30% of the pot height as appropriate. If you cannot buy a conical drainage cover, you can make one yourself from a mineral water bottle or beverage bottle. Cut the upper or lower end to a length of about 10 cm, and use a red-hot electric soldering iron or steel rod tip to burn small holes in the cover wall. It can similarly play a role in drainage and breathability.
Step 6: Plant the orchid
Place the orchid seedling into a suitable orchid pot, arrange the root mass so that it is smooth and natural, and be careful to prevent breaking the orchid roots. Slowly fill the pre-mixed middle-layer growing medium into the pot, shaking the orchid pot gently from time to time, and repeatedly patting the pot wall, so that the orchid roots and growing medium are in close contact. You can first place the orchid's pseudobulb lower, and then as the growing medium is continuously filled in, slowly raise the orchid plant. Note that orchids should be planted shallowly, and by no means deeply. Large pseudobulbs can be exposed. For those under the pseudobulb, covering half of the pseudobulb or being within 2 cm above the pseudobulb is appropriate. Otherwise, it will hinder the sprouting of orchid buds.
Step 7: Top-dress the orchid pot surface
After the orchid plant has taken shape, you can use stones, Zhijinshi, ceramsite, and other high-quality growing media to cover the pot surface. This can prevent the growing medium in the pot from being splashed out of the pot when watering the orchid and exposing the orchid roots, and can also keep the orchid plant moist and warm. Beautiful pot-surface stones can also improve the overall appearance of the orchid.
Step 8: Water the orchid
The first watering after planting an orchid is called watering to settle the roots. As for when to water to settle the roots, it depends on whether the root system is intact, the weather conditions, and the moisture level of the growing medium. If the root system is good and the weather is clear and warm, you can water thoroughly to settle the roots immediately after planting. If the roots are damaged, then wait two days until the root wounds heal before watering thoroughly to settle the roots. Especially when the weather is cold, watering to settle the roots must be done with even more caution, because newly planted orchid roots absorb less water, and once water accumulates, the trouble is great. Author: Mei Fei. I publish orchid knowledge and pictures every day, taking you to understand orchids in depth and teaching you to grow orchids easily. If you have questions about orchids, you can ask me at any time or leave a message below. If you like it, you can click the top right corner to save or forward it to help others!