A Detailed Guide to Acanthopanax senticosus Cultivation: Every Part Can Be Used as Medicine
Acanthopanax senticosus is the dried root, rhizome, or stem of the Araliaceae plant Acanthopanax senticosus (Rupr. et Maxim.) Harms. It is harvested in spring and autumn, washed clean, and dried. Acanthopanax senticosus is relatively shade-tolerant and often grows in mixed coniferous-broadleaf forests or under broadleaf forests; it also commonly grows at forest edges, on mountain slopes in thickets, and near streams. In China it is mainly distributed in Liaoning, Jilin, Heilongjiang, Hebei and other provinces.
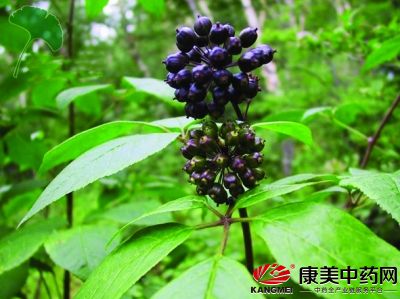
Acanthopanax senticosus is a precious plant used both as medicine and as food; its roots, stems and bark can all be used medicinally, and it is a valuable variety of Chinese medicinal herb in our province. It has effects such as dispelling wind-dampness, strengthening tendons and bones, and regulating nervous function and blood pressure. The tender leaves of Acanthopanax senticosus can be processed into Acanthopanax senticosus tea, and its tender stems can be eaten; they are not only delicious but also have certain health benefits, and are deeply loved by consumers. Since Acanthopanax senticosus has such wide uses, what are its cultivation methods? Here we introduce the cultivation techniques, from seed collection and treatment to seedling raising, planting, field management, and harvesting and processing.
(1) Seedling Raising
Propagation Methods
1 Seed Propagation
The fruit of Acanthopanax senticosus generally ripens in mid-to-late September each year. After the fruit is harvested it cannot be sown directly; it needs to go through a winter to complete the physiological ripening process before the seeds can germinate.
(1) Seed collection and treatment. In mid-to-late September, harvest when the fruit changes from yellowish-brown to black and becomes soft. After harvesting, first screen to remove impurities and shriveled seeds, soak the fruit in cold water for 1-2 d, then rub off the peel and pulp, rinse again with clean water, and take the plump seeds that sink to the bottom and dry them.
During treatment, mix the seeds and wet sand evenly at a ratio of 1:3, keep them piled indoors for a period, then dig a trench in a wind-sheltered, sunny spot 40 cm deep and 40 cm wide, with the length depending on the amount of seeds. Spread a 5 cm layer of wet sand on the bottom of the trench, then place the seed-sand mixture into the trench at a thickness of about 30 cm, cover it with another 5 cm of wet sand, and finally cover with 20 cm of soil, piling it into a mound. When covering with soil, place a section of straw bundle at regular intervals to facilitate ventilation. After the ground thaws in spring, take the seeds out and spread them in a sunny place to dry, turning them several times a day. When more than 30% of the seeds have cracked, they can be sown.
(2) Sowing and seedling raising. The time for sowing and seedling raising is generally in early-to-mid April. For the nursery site, it is best to choose mountain land with fertile soil and good drainage, with a slope not exceeding 15°; a farm vegetable garden plot can also be used. Before sowing, prepare the bed, making a seedbed 1.2 m wide, 10 m long and 0.2 m high. The bed soil should be deeply plowed and finely harrowed. In conjunction with land preparation, apply 2000 kg of high-quality farmyard manure per 667 ㎡, then water the seedbed thoroughly. After the water seeps down and the bed surface is slightly dry, evenly scatter the treated seeds on the bed surface, cover with fine soil 0.5-1 cm, then cover with plastic film or rice straw. Seedlings emerge after about 1 month. When the emergence rate reaches 50%, remove the plastic film or rice straw. When the seedlings are 3-5 cm tall, thin them, and while thinning, weed and loosen the soil. When the seedlings reach 10 cm in height, finalize the spacing at 8-10 cm between plants.
2 Cutting Propagation
(1) Hardwood cuttings. Select two-year-old branches with 3-5 buds on them, cut them into 15 cm-long cuttings and insert them obliquely into the soil, keeping the soil at a certain temperature and humidity. For spring cuttings, cover with plastic film and maintain the temperature at about 25 ℃; in summer, set up a shade shed. If cutting inside a forest, a layer of fallen leaves can be spread over the bed surface.
(2) Softwood cuttings. In June-July, select vigorously growing semi-lignified branches, cut them into 10 cm-long cuttings, keep one palmately compound leaf or cut the leaf in half, and insert the cuttings obliquely into the seedbed at a spacing of 8 cm × 15 cm between plants and rows. The insertion depth is 2/3 of the cutting length. After watering thoroughly, cover with plastic film to maintain soil moisture. Roots form in about half a month, then remove the film, and they can be transplanted the following year.
3 Tillering Propagation
Before the soil completely thaws in spring, dig out the young shoots sprouting around the plant together with their roots, or dig out the whole plant including the mother plant and divide it. The divided seedlings must be vigorous, have a good root system and no damaged roots, and should be planted at a spacing of 60 cm × 60 cm between plants and rows.
(2) Transplanting and Field Planting
Site Selection and Land Preparation
1 Site Selection
Choose mixed coniferous-broadleaf forest, broadleaf forest or open woodland, with the canopy density of the upper tree layer between 0.3 and 0.5, and a slope aspect preferably shady or semi-shady. A suitable barren hill or wasteland for afforestation may also be chosen for full-light afforestation. The afforestation site requires moist and fertile soil, good drainage, and a woodland slope not exceeding 25°.
2 Site Clearing and Land Preparation
Completely clear weeds and shrubs, keeping the stubble height no more than 6 cm. Use pit-style land preparation, with a pit size of 50 cm × 50 cm, removing tree roots, weeds and stones, and loosening the soil. The planting spacing is 1 m × 1.5 m, that is, a planting density of 6666 plants/hm2.
3 Planting
Plant carefully; it is best to plant the seedlings as soon as they are lifted. During transport they must be bundled to prevent wind and sun exposure. Seedlings transported to the afforestation plot should be heeled in promptly to prevent them from drying out in the wind and to ensure the survival rate. When planting, the seedlings should be held upright so the root system spreads out, and after planting the soil should be tamped firm.
(3) Field Management
1 Loosening Soil and Weeding
After the saplings are planted, weed and loosen the soil promptly. First cut down sprouting weeds and shrubs, loosen the soil within the planting pits, and cultivate twice in conjunction with weeding to keep the field clean.
2 Topdressing
Apply topdressing once in late June, using decomposed farmyard manure or human excreta and urine, applied in radial furrows around the roots; after topdressing, cover with soil and water once with clean water.
3 Pruning and Shaping
At any time prune away overly dense branches as well as dead, aged, diseased and deformed branches to maintain the tree's sanitary condition and vigorous growth.
(4) Harvesting and Processing
1 Harvesting Tender Leaves
Tender leaves can be picked from late April to the end of August. When picking, accurately grasp the timing, and pick when the tender leaves are fully spread and still in a fresh and tender state. When picking, use the method of “pick one, leave one” to ensure there are enough leaves for the tree to grow normally.