Clivia always gets root rot and won't survive? Use moss with a 4-step care routine and it will grow 10 roots like crazy
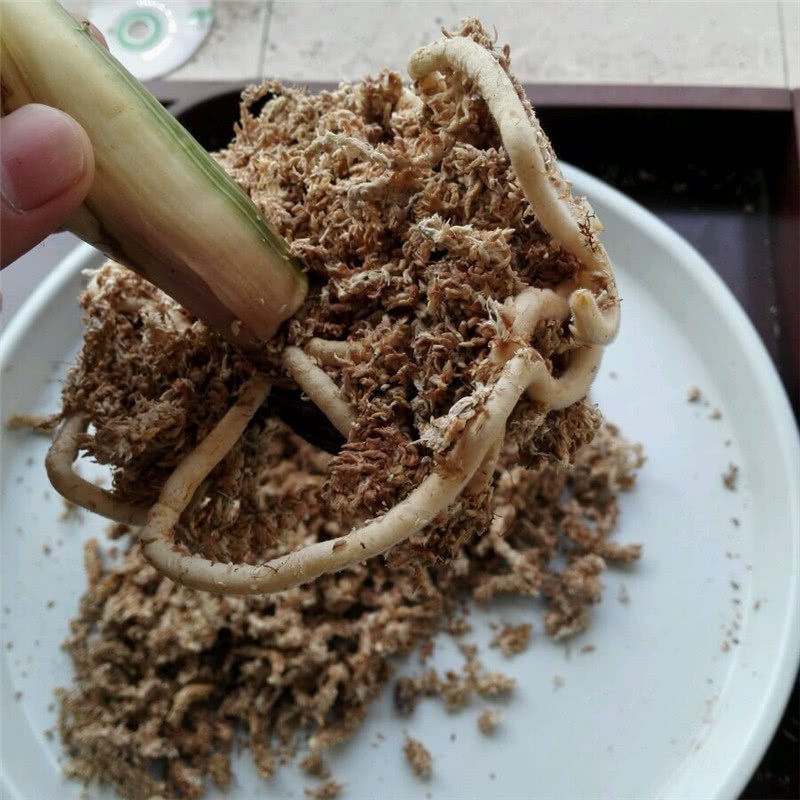
There are many expert gardeners among the people. Recently, another Clivia owner shared photos with the little gardener. It turned out that his Clivia, whose rotten roots had been cut off at the middle, had grown roots again. Others use sand for cuttings to make Clivia re-root, but he doesn't like sand. He used moss, and the rooting effect was excellent. Let's learn about it!
1. The moss rooting method brings a rotten-root Clivia back from the dead
These are the new roots sent out by the Clivia, strong and dense enough. This is all thanks to the moss. Look at the picture below to see what it looked like before rooting, and you will know how difficult it is to grow roots this strong. Moss is a great thing for rooting, but there are also many details to pay attention to when using it. This owner studied on and off for 4 months before getting the rotten-root plant to grow.
This is what the Clivia looked like before rooting. Doesn't it feel completely transformed? The owner tried for 4 months, going through many setbacks such as new roots growing and roots rotting. Let's see how to use this sphagnum moss to help this kind of Clivia grow roots.
2. Moss promotes rooting, and four steps are key
Step one, treat the cut on the Clivia. Soak the wound in potassium permanganate solution to sterilize and disinfect. If there is no potassium permanganate, carbendazim is the second choice. Once the wound has been sterilized and disinfected, it will not rot. Even during the rooting process, if new roots grow and then rot, at this point you need to trim the rotten roots, soak them in this water, and then let it root again.
Step two, treat the moss a little. Do not use living moss. This is for rooting, not for covering the pot surface. First scald the moss once with hot water. After scalding it once, let it cool naturally. Then find a flower pot and put the moss in. No need to put anything else in; just fill it all with moss. There is one more detail: the moss must not be too wet. When burying it, you have to squeeze out the water.
Step three, spray water on the moss to keep it moist, keeping it in a moist state, but not too wet. Feel it with your hand; it is enough if it is slightly damp. Using moss to promote Clivia rooting is most taboo with heavy water. Once there is too much water, the roots rot. This is what this owner encountered along the way, so water control is crucial. You can prepare a dedicated small spray bottle to spray water and increase humidity.
Step four, control watering. Each time you water, just water a little along the edge of the flower pot so the moss is slightly moist. At this time, fertilizer cannot be used. However, if the roots are already as lush and strong as in the picture above, then it can be potted up. After potting up and the plant has adjusted, promptly use a root-strengthening organic nutrient solution to supplement fertilizer, strengthening roots and caring for the seedling, helping the Clivia get through this adaptation period.
Of course, this owner also emphasized one point: rooting must be placed in a well-ventilated environment. In a too stuffy and hot environment, combined with the high temperatures of summer, no matter how many Clivias there are, they won't survive. If your Clivia has rotten roots and is about to die, the owner can try the moss rooting method to rescue it in time, let it re-root, and bring it back from the dead.