Propagate jasmine and camellia by layering branches in soil - 1 pot becomes 10, with an astonishing amount of bloom
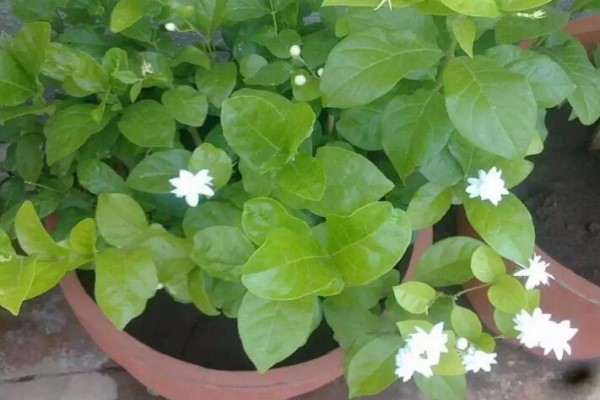
How do you propagate jasmine by layering?
Jasmine is suitable for simple layering: directly bend a branch down into the soil and wait for it to take root. The survival rate is almost 100%!
Steps
1. Select the branch
Choose a 1-2 year old branch and make a wound on the lower part to help retain organic matter and promote rooting.
2. Layering
Press the prepared layer horizontally or bent into the soil where the mother plant is, secure it, bury it firmly, then place it in a cool, ventilated spot for care and keep the soil moist.
3. Cut off and transplant
After the layer has rooted, it will mature within 1-2 months. At this point, cut the layer from the mother plant, then transplant it into a new pot and care for it normally.
Summer care tips for jasmine
1. Watering: water once each morning and evening, keeping the potting soil moist but not waterlogged. When the air is dry, frequently spray water around the pot to maintain humidity.
2. Light: jasmine loves light. During the summer blooming period, give it plenty of sun, but avoid harsh direct sun.
3. Fertilizing: in summer, apply decomposed cake fertilizer water once about every 1 week, using light fertilizer frequently.
4. Pest and disease control: in summer, jasmine is prone to red spider mites and leaf blight. As soon as they are found, immediately cut off diseased branches and leaves, and spray the affected areas with 20% dicofol at 1000-1500 times dilution. Three consecutive applications can reduce the spread of pests and diseases.
How do you propagate camellia by layering?
Camellia has now entered its dormant period. In July-August, old branches can be selected for layering propagation. Because camellia branches are high above the ground and not easy to bend, air layering is generally used.
Steps
1. Select the branch
For camellia layering, generally choose 2-year-old, healthy, pest-free and disease-free branches.
2. Girdling
At 0.5 cm below the node of the layering branch, use a knife to peel off a ring of outer bark 1-2 cm wide, exposing the white wood. After air-drying for 1-2 hours, apply some rooting powder.
3. Mix the soil
Mix red clay, perlite, and vermiculite to make a nutrient soil.
4. Put on the bag
Choose a white transparent plastic bag, cut it open at both top and bottom, disinfect it with fungicide, then put it over the layer. Tie the lower part tightly with string, then fill it with nutrient soil, spray water to moisten it, and tie the top tightly as well.
5. Later management
After completing the air layer, place it in a ventilated spot with scattered light for care. Be sure to replenish water frequently and keep the medium moist. It can root in one to two months, and after half a year of rooting, it can be transplanted.
Summer care tips for camellia
1. Watering: camellia goes dormant in summer, so water should be controlled appropriately and the soil kept slightly dry. You can spray the plant more often.
2. Light: after the temperature exceeds 30 degrees, provide shade, or place it indoors in scattered light for care, and pay attention to ventilation.
3. Fertilizing: camellia loves fertilizer. During the growing period, apply diluted compound fertilizer once every 1 week, using light fertilizer frequently. Stop fertilizing after it becomes dormant.
4. Pest and disease control: when the weather is hot and stuffy, camellia is prone to anthracnose and scale insects. If pests or diseases are found, first remove diseased branches and leaves, and spray the affected areas once a week with a 600 times diluted aqueous solution of thiophanate-methyl.
How do you propagate osmanthus by layering?
The branches of potted osmanthus are relatively thin and the space for operation is narrow, so it is not suitable for the mud-based layering method used for jasmine. Today Huahua will teach everyone a special layering method: paper towel air layering.
Steps
1. Prepare tools
Prepare paper towels, a disposable syringe, cotton swabs, plastic wrap, and old newspaper for later use.
2. Girdling
Choose 1-2 year old, robust, pest-free and disease-free branches and girdle them 1-2 cm wide. Then dip a cotton swab in rooting agent and apply it to the girdled area.
3. Wrap the layer
Fold one sheet of paper towel in half 2 times, wrap it around the girdled area, and tie it firmly. Then wrap a layer of plastic wrap on the outside. The plastic wrap should completely cover the paper towel, tied tightly at the top and slightly loose at the bottom to allow air and water movement and for roots to emerge.
After wrapping, use the syringe to inject water inside, and be sure to keep the paper towel moist.
4. Shade treatment
Wrap a layer of old newspaper outside the paper towel to block light. After one month, it will be able to root.
5. Separate and pot up
One month after rooting, cut off the branch, separate it from the mother plant, and then transplant it into a new pot.
Summer care tips for osmanthus
1. Watering: summer temperatures are high and evaporation is large, so water once before 9 a.m. every day to keep the potting soil moist.
2. Light: osmanthus loves light. June-August is the flower bud differentiation period, so ensure 10 hours of sufficient light every day to promote bud formation.
3. Fertilizing: in summer, apply decomposed cake fertilizer water, fish scale water, or chicken and duck manure fertilizer once about every 10 days to ensure abundant and fragrant blooms.
4. Pruning: to increase ventilation and promote flowering, promptly cut off leggy branches and leaves, weak thin branches, and tangled branches.
How do you propagate Chinese rose by layering?
July-August is the most suitable season for propagating Chinese rose by layering. Not only is the survival rate high, it also makes flowering easier!
Steps
1. Select the branch
Choose 1-year-old branches that are robust and have plump buds.
2. Girdling
At 0.5 cm below the node of the layering branch, use a knife to peel off a ring of outer bark 1-2 cm wide, scrape off the cambium, and after air-drying, apply some rooting powder.
3. Put on the cup
Choose a clean disposable paper cup or plastic container, drill a hole in the bottom, put it over the layer, then fill it with soil and water it. One Chinese rose plant can have several layers done at the same time.
4. Separate and transplant
Place the prepared Chinese rose in a cool, ventilated spot and keep the soil moist. After one month, it will be able to root. Cut off the rooted branch and it can be transplanted into a new pot.
Summer care tips for Chinese rose
1. Watering: spray the plant every morning and evening, water thoroughly once about every 2-3 days, and spray water daily into the air around the pot and onto the ground to lower the temperature.
2. Light: Chinese rose loves light and needs more than half a day's worth of light every day. When it enters the high-temperature semi-dormant period, be sure to provide shade and avoid harsh sun.
3. Fertilizing: stop fertilizing during the high-temperature season, otherwise it is very easy to burn the roots.
4. Ventilation: Chinese rose fears hot and stuffy conditions most. If the potting soil is not breathable, it is very easy for the roots to rot. During summer care, you can place a fan beside the flowerpot to increase ventilation.
Layering is actually very simple,
Flower friends, have you all learned it?
Hurry and give it a try
In 1 month it can become 10 pots~