Detailed Explanation of Key Points on Chinese Honeylocust Seed Seedling Cultivation Techniques
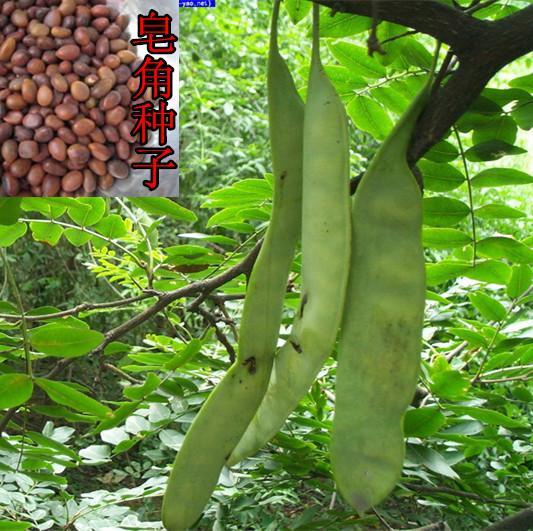
Chinese Honeylocust Seed Seedling Cultivation Techniques
The seed coat of Chinese honeylocust (Gleditsia sinensis) is dense and hard, with poor water permeability, so it is very difficult to obtain satisfactory results using conventional seedling cultivation techniques. Even if the seed quality is very good, the emergence rate is very low, with missing seedlings and broken rows appearing uneven, and some seeds even do not emerge until the second year. To address the difficulty of Chinese honeylocust seedling cultivation, through production practice a seedling cultivation technique using sulfuric acid to treat Chinese honeylocust seeds has been developed, achieving seedling cultivation results of over 90% emergence rate and average seedling height above 120cm.
1 Collecting Seeds
In mid-to-late November in late autumn and early winter, collect air-dried Chinese honeylocust pods from the trees. After manually shelling out the seeds, no further drying is needed. Remove impurities and shriveled seeds, put them in cloth bags, store them indoors, and keep them for spring seedling cultivation.
2 Selection and Preparation of the Seedling Site
For Chinese honeylocust seedling cultivation, choose flat terrain with fertile soil, loose soil texture, and convenient drainage and irrigation, specifically sandy loam soil. Before sowing, water thoroughly to create soil moisture, and broadcast decomposed organic fertilizer evenly over the ground at 2500kg/667 sq m. After the ground dries slightly, plow deeply and rake level, then wait for seedling cultivation.
3 Seedling Cultivation and Sowing
3.1 Seedling Cultivation Time
Mid-to-late April to early May after the spring soil thaws.
3.2 Seed Treatment
3.2.1 Sulfuric Acid Soaking Pour the Chinese honeylocust seeds into a previously prepared porcelain basin, plastic bucket, vat, or other non-metal container, then pour in 98% concentrated sulfuric acid, with the sulfuric acid liquid preferably just covering the seeds. During treatment, stir the seeds soaked in the sulfuric acid with a wooden stick so that the seeds are treated evenly in the sulfuric acid liquid. Be careful not to let the sulfuric acid splash to avoid burns. The treatment time is 40 minutes to 1 hour. If the treatment time is too short, the treatment effect cannot be achieved, but the time should also not be too long to avoid burning the seed kernel.
3.2.2 Washing Seeds with Clean Water After the seeds soaked in sulfuric acid are removed, they must immediately be repeatedly rinsed with clean water, and the sulfuric acid adhering to the seeds must be washed clean.
3.2.3 Soaking Seeds in Warm Water Pour the cleaned seeds into a corresponding container, soak the seeds in 60°C warm water, stirring while pouring the water, then after natural cooling soak for 24 hours. On the second day, change the soaking water and continue soaking. On the third day, after the seeds have absorbed enough water, rinse them with clean water and then they can be germinated.
3.2.4 Germination After the water-saturated Chinese honeylocust seeds are removed, put them in a wet cattail bag or wet hemp sack, place them in a warm and moist place to germinate, rinse once a day with clean water, and once 1/3 of the seeds have sprouted and shown white, they can be sown.
3.2.5 Making Beds and Sowing On the deeply plowed and leveled seedling ground, make beds 80~100cm wide, with bed length depending on circumstances. Along one side of the bed ridge, use a pick to open a ditch 10~15cm deep, spread poisonous soil in the ditch, and lightly cover with soil using a hoe so that the seeds are separated from the poisonous soil to avoid burning the seed embryos. At the same time, this also forms a sowing ditch with a sowing width of 15~20cm. Evenly broadcast the germinated seeds in the ditch, and use your feet to tread the seeds into the soil so that the seeds and soil are tightly combined. Next to the first ditch, plant the second ditch in the same way. When planting the second ditch, part of the soil dug out naturally falls over the first ditch. Continue in this way to plant the third ditch, fourth ditch, until the bed surface is fully planted. After the last ditch in the bed is planted, use a flat rake to gather soil and cover it, with a soil covering thickness of 2~3cm, and suppress after covering. If drought occurs after sowing, water with a watering can in the morning and evening. Do not flood-irrigate with a large amount of water to water the covering soil. After sowing, plastic film mulching can also be used. On the sown bed surface, insert arched bamboo strips or tree branches at intervals of 60~80cm, then cover with plastic film to form an arched shed for warming and moisture retention, which helps rapid emergence and uniform emergence.
4 Field Management
4.1 Thinning and Final Spacing of Seedlings
After the young seedlings have emerged uniformly, thin and finalize the spacing in time. When seedling height is 3~5cm, carry out thinning. The standard for thinning is to give each seedling space, so that the young seedlings are not crowded and do not form clumps. When seedling height is about 10cm, carry out final spacing. There is no row spacing requirement; within the 15~20cm sowing width, arrange them in a staggered and orderly manner, with a distance of 10~15cm between seedlings.
4.2 Fertilizing and Watering, Pest Control and Pesticide Application
During the seedling stage, watering the bed surface easily causes soil compaction. Combine this with field management such as thinning and final spacing, and use pruning hooks to loosen the soil and remove weeds.
From June to August, carry out fertilizing and watering according to the weather and seedling growth conditions. If diseases and insect pests occur during the growth period, apply targeted pesticides for control. Promptly prune any dominant seedlings appearing in the seedling ground to prevent one plant from affecting the normal growth and development of a large area of seedlings. If large seedlings need to be cultivated, transplanting can be carried out in the spring of the second year. The planting density depends on the demand for seedlings, with different plant and row spacings: dense for small seedlings and sparse for large seedlings.