Full process record and sharing of growing a 1.2 m planted tank
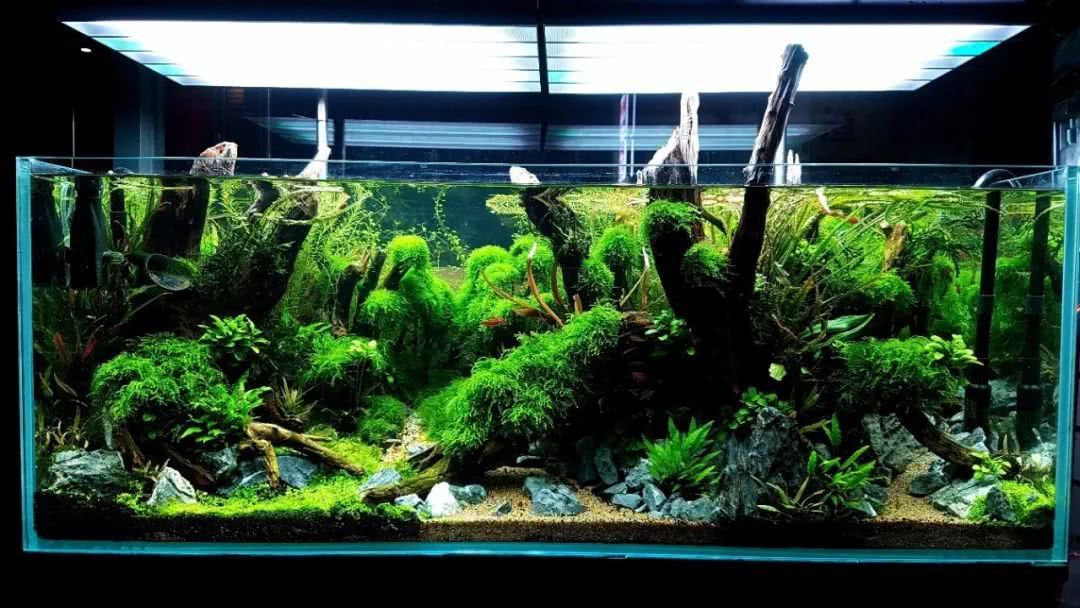
After so many years of making planted tanks, I have always leaned toward clean and simple aquascapes; a simple planted tank is easy to maintain yet still beautiful. But occasionally, when materials are abundant and various other conditions are just right (for example, when I am in a lovely mood and have some free time), I will also put all my effort into making a tank with a complex hardscape layout.
The state of the tank on day 50 after setup;
It took 4 days in total to make the tank, 3 days for the hardscape and 1 day for planting the aquatic plants, followed by 5 months of growing. During this period, because business was busy and I had no time to attend to it, I only changed the water in the planted tank and did not trim the aquatic plants, letting them grow freely. From nothing to something, from something to beautiful, how exactly did it evolve? Let us look below.
Determining the general hardscape; I did not photograph some of the finer details at the front. By the time the hardscape reached this stage, I had already been building for more than half a day, because there was no inspiration image beforehand; collecting materials and determining the general hardscape, including placing the materials at reasonable positions and heights, all of this takes a great deal of time to think through, and this is also what I consider the most complex part of making a planted tank. In order to create a more ideal perspective effect, the bottom of the hardscape was raised with crushed volcanic stone.
Added aquasoil to get a feel for it. While keeping the general hardscape unchanged, trying to match materials of various sizes and shapes often leads to unexpectedly discovering a different effect.
Continued by adding a large amount of driftwood; at this point the hardscape was actually already more than 80% complete.
Laid down cosmetic sand, which increased the depth of field.
The hardscape river channel was adjusted, mainly because the previous river channel was made too straight and was not natural enough, and then this fallen tree would block light from an area below. If the hardscape were not changed, this area should have been planted with dwarf hairgrass, and in that case the light would definitely not be enough. So, change it! Honestly, after changing the hardscape, the sense of depth was not as strong, and the river channel was not detailed enough either. This may mainly be because I had a bit more impatience and lost some patience. At this point the hardscape was complete, and I will summarize some shortcomings of the hardscape. 1. The shape and size of the fallen tree do not match the overall hardscape very well, mainly because I did not find more suitable driftwood. 2. The Qinglong stone can be changed to volcanic stone. 3. The depth of field could be made better; this still requires more thought.
Added water and soaked the tank; it was soaked for more than twenty days, with a full water change each time, and the yellow water from the driftwood was basically resolved.
Planting aquatic plants; planting densely when setting up the tank is the most effective way to prevent algae outbreaks in a planted tank.
15 days after setup, the aquatic plants had grown quite a bit.
35 days after setup, the condition had improved quite a bit.
50 days after setup, it had basically reached the state I had envisioned.
3 months after setup, it had basically grown a bit too much, and the moss had grown to the point where it needed trimming. The tank had two lights changed; previously they were metal halide lamps, and they were changed to tube lights + LED. These lights are much more expensive, selling on the market for more than two thousand yuan each.
4 and a half months after setup, the originally sparse weeping moss had become the star of the tank, in unbeatable condition; this was also greatly related to changing to two good lights.
The end
May every aquascaping enthusiast have a tank with an aquascape that they love~