Basic Methods of Bonsai Making and Practical Experience Sharing
When it comes to "gluing," the first question is how to glue and what to use as the adhesive:
The bonding material is actually very ordinary - it is the debris sifted from the stone we carve for rock landscapes, keeping the mung-bean-sized granules and fine powder, plus aluminate cement (note: ordinary cement is "silicate" cement, while aluminate is a special cement). Why use aluminate cement? Because: 1. It has a high grade, sets quickly, and is easy to work with. 2. Aluminate cement is earth-yellow in color, similar to the color of sandstone. 3. Yellow earth powder (used for color adjustment, note this is not floor yellow) (sold in paint and coating shops). 4. The fourth material is the most important - without this material, nothing can be done, and this material is the "water" most closely connected to us.
Once we have mastered the technique of gluing, we will no longer be troubled by "a clever housewife cannot cook a meal without rice," and at the same time we can make our works achieve the desired effect without leaving regrets. However, gluing front-to-back and left-to-right does not affect the rock's water absorption - so how do we solve the problem of water absorption when gluing top-to-bottom?
Use cement around the edges and yellow clay in the middle to connect the upper and lower stones.
Hollow out the middle of the two surfaces to be glued and fill them with water-absorbing materials (such as rock powder, activated carbon powder, etc.).
Experts can create a mortise-and-tenon structure in the middle and use cement only around the edges, and so on.
Christmas cactus (Schlumbergera), but it died quickly after blooming. Later I learned from fellow flower enthusiasts that grafted Christmas cactus grows better and is less likely to die. After successfully grafting one single-layer plant, I couldn't resist grafting multiple layers.
Seeking stumps: Everyone wants good stumps, but with so many people playing with potted plants these years, good stumps are extremely rare. Even when you find a good stump, it's growing in a crack between rocks. Since it's for fun, purely for fun, money doesn't matter. That means you have to travel farther, to mountains no one has been to. Just pay attention to your own safety. Good stumps still exist - if it doesn't look promising, don't dig it. Generally, whatever tree it is, they grow in groups; one spot definitely has more than just that one. My personal preference is deciduous trees, mainly firethorn (Pyracantha) and Davallia, while golden bullet tree (Diospyros cathayensis) is something you can only encounter by luck, not by seeking.
Digging: First use a saw to remove the weeds and tangled branches around the tree to clear a space where you can exert some force. Since the tree hasn't been dug up yet, don't rush to cut the branches to their final length. You can cut them a bit longer first. Dig the hole wider to reduce damage to the roots. Try your best to protect the fibrous roots - this is the biggest factor for survival! Generally the taproot is in the middle; dig it out and cut it with a saw. After the stump is out, first trim the roots, cutting to the final length in one go. Keep the fibrous roots and lateral roots; don't rush to saw the taproot. Then examine the branches from top to bottom and left to right, and plan where the buds will come and how the branches will develop in the future. Determine the final sitting orientation of the stump, then saw the taproot to the right length. If you still need to go elsewhere to search, cover the stump with grass and hide it to keep it moist.
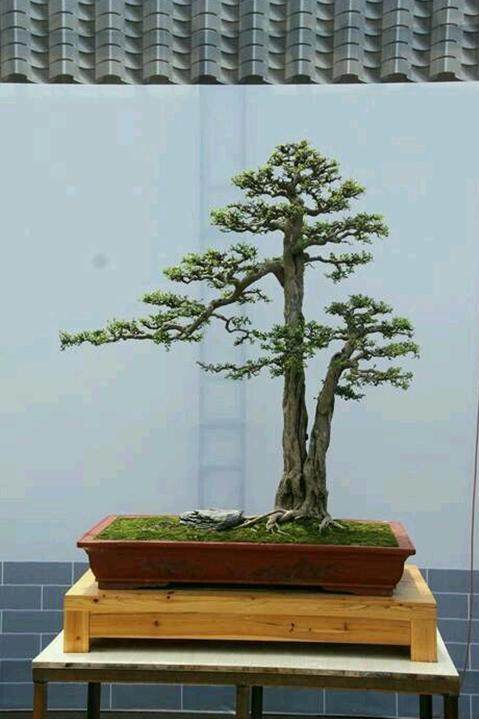
Shaping: Surely by the time you dug the stump you already had in mind what each stump would look like in the future. Buds come at different times - as long as the stump is alive, they will come. Wait until they grow to the semi-lignified stage, then you can shape them. Don't wait until they are fully lignified, as they break easily then. Buy some aluminum wire from a scrap shop. Whichever direction you want a branch to bend, you should start winding the aluminum wire from the opposite direction - just personal experience. Plants all have the ability to quickly heal wounds, so don't worry about knocking off some leaves and branches while wiring. They will grow back. First find the center point of the stump, that is, the stump head. The branches at the stump head look best in an S shape. Clear away unwanted branches, then wire and shape from top to bottom. Generally, the lower the crown, the shorter the branches should be. Branches in the same direction should not repeat - they should alternate and form a radial pattern. Once shaped, give it plenty of water and let it grow wildly. Wait for the secondary branches to emerge, and at the same time rub off unwanted buds to direct nutrients to the branches you need. I like natural cloud-layer pads, not round ones. Perhaps round ones always look artificial no matter how you look at them. You must be willing to remove unwanted branches - only with giving up can you gain. Since bonsai is art, it must have something extraordinary about it. Why is the same character written so elegantly by a calligrapher? That's the principle! Shaping should be unexpected and not follow convention. A bonsai that makes people fall in love with it at first sight is what a bonsai should be! Search for more bonsai images; drawing on the shaping of master-level expert bonsai helps you improve.
Potting: Personal aesthetic - shrubs suit round or oval pots, trees suit square pots, and cascade and semi-cascade styles suit trapezoidal pots. Also choose pots according to the color of the bark and leaves. In short, don't create visual discomfort, so as not to affect the artistry of the whole tree. Since stump digging is in spring - "the whole year's work depends on a good start in spring" - potting is also in spring. After a year or even several years of growth, the fibrous roots must be plentiful and lush. Trim some roots, but don't replace all the original soil around the roots - this helps the tree recover. When potting an established stump, most of the roots must be exposed outside. A good bonsai with beautiful branches but no roots to set it off is imperfect. The place where you put the bonsai must be ventilated and in half shade and half sun. During the tree's dormant period, flowering period, and fruiting period, water less. Repot regularly; two or three years after potting, apply a little fertilizer to the pot soil. There is some sold in flower shops - bury nitrogen, phosphorus, and potassium in several corners of the pot, not too close to the roots. One flower, one world; one tree, one life.
Care and management: There's no need to create such a wonderful environment for the stump! They are all wild - don't spoil it. Comfort breeds idlers; adversity breeds heroes. Just wrap the cut cross-sections of the branches with plastic film - no need to wrap the whole tree, which is time-consuming and laborious. Or just apply some white latex glue. But plastic film is best. Wound-healing agents, rooting powder, and so on - I've never even seen them, don't use them! Stay away from me! After watering to settle the roots, do not water the roots again within a week. Keep the bottom of the pot draining well. When watering the roots, always follow "don't water if not dry; when you water, water thoroughly." Spray the branches with a sprayer once every two to three days. After about a month of this, buds will roughly appear. With this method of planting stumps, the survival rate is 98%.