Kalanchoe not blooming for ages? Prune it like this and it will easily fill the pot with flowers
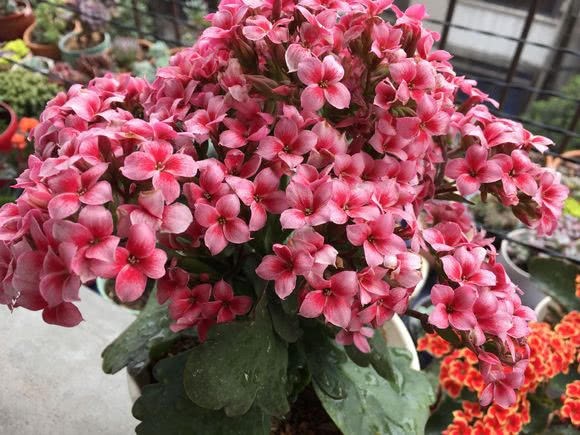
When we buy flowers at the flower market, the most common flower we see is probably the kalanchoe, not only because its flowers are lovely, but its leaves are very appealing too. And with proper care, it can bloom several times in a row in a single year!
As you grow it, some people start to wonder why their plant has glossy, thick green leaves but simply never blooms. In fact, this is very likely because you skipped the pruning step. Never cut just a tiny bit because you cannot bear to; after all, you have to give something up to gain something!
When we prune, we usually decide based on the plant's overall height. The cut should be made about 2 cm above a growth bud, and be sure to cut at an angle, which both helps the wound heal and encourages new flowering shoots to grow. Never cut below a bud or in the middle of a flowering shoot, or that branch may be ruined!
Also, when you prune you can do it however you like, but the result should not be messy; from a distance it should look like a "ball", packed tightly together. That way, once its new leaves and flowers grow out, it will look even better.
Also, after the flowers have finished blooming, especially in hot weather like now, you can cut a little lower and not leave the stems too long. Because it will soon enter its dormant period, this lets it retain nutrients well, so it can bloom smoothly next time.
Actually, if you want your kalanchoe to bloom smoothly, besides pruning, you should also give it a certain amount of light, so it grows more evenly. Also, during this dormant period, be sure to reduce watering, otherwise it will cause root rot and leaf drop.
When we prune the kalanchoe, we can take the cut leaves and branches and use them for cuttings. The steps for both methods are basically the same, but the survival rate of stem cuttings is relatively higher, and rooting is faster, so those of you doing leaf cuttings must not, out of impatience, keep pulling the leaves out to check whether roots have grown.
For cuttings, we need to choose suitable branches and cut them off with scissors. Choose fairly sturdy branches, not the tender new shoots, because those do not have enough nutrients to support growth. You do not need to leave too many leaves on the branch, but it should have 1-2 growth buds.
We can first soak the cut branches in rooting water for two hours, then take them out and let them dry. During the rooting process, we can use a seedling tray, but if the branches are on the large side, we should plant them in a suitably sized pot.
When planting into the soil, be careful to first poke a hole in the pot with a chopstick, then put the branch in. Do not poke with the branch directly, as this easily causes blockage and directly affects its rooting. After everything is planted, use a spray bottle to mist the soil surface; do not water too much, then keep it in a suitably shaded spot for care.
For leaf cuttings, choose some larger leaves, but not ones with spots or scorched edges. The leaves you remove should first be placed in a cool, ventilated spot to dry. Once the wounds have healed a little, put them in the soil; this helps prevent bacteria from getting in.
After planting, we just have to wait. Check after some time: as long as its leaves are intact and undamaged, that means the leaf cutting was a success. Whatever you do, do not pull it out to check on root growth!