Planting Methods and Care Tips for New Potted Orchid Seedlings
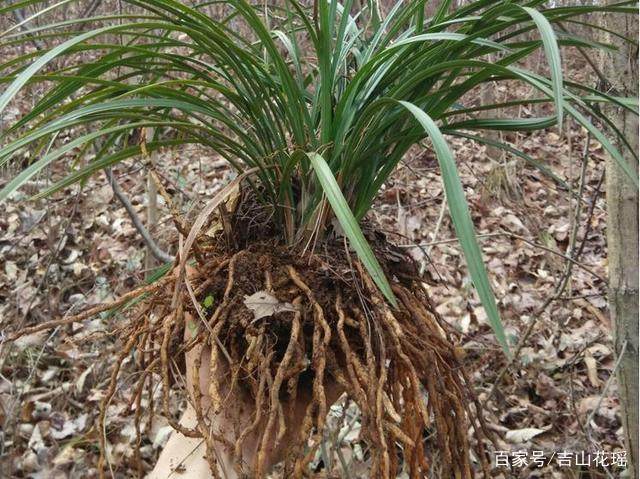
Planting and Care Techniques for New Potted Orchid Seedlings
"Three parts planting, seven parts care" is the ancients' experience in growing orchids. Whether the care is good or bad determines whether the orchids will flourish and whether they will bloom. Orchids originally grew in the mountains and wilds, where the natural environment was suitable, "not becoming fragrant because no one is around." When cultivated in flower pots, root development is restricted, and temperature, humidity, air and sunlight all differ from those of their place of origin. If they are not carefully tended according to their natural growth and development patterns [2], the goal of enjoying their leaves and flowers cannot be achieved. Therefore, the key to orchid care lies in mastering their growth and development patterns.
New orchid seedlings can often be bought on the market. Generally, around the time of Yushui (Rain Water, the 2nd solar term), the Cymbidium goeringii and Cymbidium faberi shipped from the south (mostly Henan, Anhui and Zhejiang) all carry flower buds. In the Shanghai area, most are shipped from Shaoxing, where people are accustomed to using a traditional method to force flowering, that is, making the flower buds emerge in January to cater to the needs of the Spring Festival. Such orchids are difficult to bring into bloom because their roots are sprinkled with water at the time of sale; generally, after potting, the flower buds gradually wilt and even dry up and die. The orchids sold in Anhui, Beijing and other places are mostly dry-rooted and have not been forced to bloom. If they are potted improperly, they are also prone to drying up and dying. The reason new orchid plants die is mostly that the soil is too clayey and heavy, with poor aeration around the roots, causing the root system to rot. If sandy soil is used for planting, the survival rate can be raised, and they can also bloom. Some people grow orchids with very dry potting soil, yet the orchids still bloom as usual. The reason is that orchid roots fear waterlogging most of all; once water accumulates, air cannot pass through, which hinders root respiration and affects growth. Under conditions of high air humidity, appropriately keeping the soil dry and allowing more aeration is an important measure in orchid growing.
1 Repotting
Orchid repotting is generally carried out together with division, usually once every 2 to 3 years of cultivation. First, tip the orchid out of the old pot. If the orchid roots are stuck to the sides of the pot and it is not easy to tip it out, the pot can be broken and the orchid carefully taken out. Remove the old roots (rotten roots). If there are too many old pseudobulbs, cut them off. If division is needed, find a relatively wide gap between the pseudobulbs, cut the plant apart to form new plants. Then wash with water, smear the cut surfaces with charcoal powder or sulfur powder for disinfection, and place in a shaded spot to dry slightly.
Prepare a new pot. First block the small hole at the bottom of the pot with a piece of tile, spread broken tiles or rinsed furnace slag ash on the bottom, and if possible add a layer of small charcoal pieces, then place coarse-grained soil on top, then add potting soil, and shake the pot forcefully so that the soil fills the gaps, until the broken tiles or slag are not exposed on the soil surface, and make the soil in the center of the pot slightly higher than the pot rim. When potting, plant 3 to 5 trimmed orchid seedlings in the pot, with each plant's new shoots facing outward and old pseudobulbs facing inward, to promote the growth of new shoots. With one hand lift the orchid leaves and place the orchid in the middle of the pot so that the roots are evenly distributed, and with the other hand add potting soil, shaking the pot as you fill. When the roots are no longer visible, gently lift the orchid seedling so that the orchid roots spread out naturally and come into close contact with the soil; then continue until the soil is full, slightly higher than the pot rim, and press along the edge of the pot with your hand, but never too hard, so as not to crush and break the roots. Finally, make the soil surface slightly higher in the center, forming a steamed-bun shape.
The best time for repotting is after flowering or during the dormant period, generally after Qingming (Pure Brightness) and before Guyu (Grain Rain), and after Mid-Autumn and before Daxue (Major Snow). When repotting epiphytic orchids, first trim the roots, and cut them apart appropriately when division is needed; then wrap cultivation material (sphagnum moss, fern roots, fallen leaves or sand, etc.) around the root system, and plant them into hollowed-out flower pots or wooden baskets, pressing firmly so that they do not wobble, while taking care never to injure the roots. After potting, place them indoors in a slightly shaded spot, spray lightly with water, and after a few days manage them according to general orchid care.
2 Pruning
During orchid cultivation, pruning must be carried out continuously. Withered and yellow old leaves should be cut off in time to facilitate ventilation. The dried tips of some leaves should also be trimmed off. In particular, leaves with pests or diseases must be removed promptly to avoid contagion. When cutting off diseased or pest-infested leaves, the scissors used must not be used to cut healthy leaves, to prevent the spread of viruses. If the same pair of scissors is used, it must be disinfected.
After the flower buds emerge from the soil, if there are too many flower buds, the strong buds should be kept and the thin, small flower buds removed, leaving 1 flower bud per orchid seedling. This is because too many flower buds will affect one another, which is not conducive to flowering, and will also excessively consume the nutrients of the mother plant and affect flowering the following year. Cymbidium goeringii blooms for about 15 d, after which the flower must be cut off; for Cymbidium faberi flowers, when the last flower on the inflorescence has been open for 7 d, cut off the inflorescence. Precious varieties should not be allowed to pollinate and set seed, otherwise flowering the next year will be affected. If they are used for hybrid breeding, then they need to be cultivated separately so that the fruit becomes plump and ripe.
3 Pest and Disease Control
Orchidaceae plants have many pests and diseases. The main approach is prevention first. To make orchids grow robustly and have sufficient resistance, the environment should be kept clean and hygienic with appropriate ventilation. The causes of orchid diseases are mainly excessive watering or poor drainage, lack of ventilation, or external infection [3]. Rot disease is caused by Pythium and generally harms seedlings; it can be prevented and treated by spraying copper sulfate or other sterilizing agents.
When orchids are infected with black spot disease, black spots appear on the leaf surface and then gradually expand, causing the leaves to wither and turn black. The reason is excessive moisture and lack of ventilation. Therefore, they should be moved to a ventilated place and sprayed with a sterilizing agent for prevention and treatment. Bacterial soft rot mainly harms Cattleya, but it can also harm Cymbidium. There are many orchid viral diseases, mainly mosaic disease and dieback disease. Common viral diseases include Orchid mosaic virus, Orchid ringspot virus, Orchid ringspot dieback virus, Orchid stripe virus, Phalaenopsis mosaic virus, Cymbidium mosaic virus, Cattleya dieback virus, etc. For disease prevention and control, sterilizing agents such as lime-sulfur mixture, copper sulfate, Bordeaux mixture, thiophanate-methyl, amobam and zineb are generally used. Once orchids are found to be diseased, the diseased parts should be removed immediately to prevent contagion. In addition, tools such as used knives and scissors should be disinfected.
The most common orchid pest is scale insects. The generally serious ones are armored scales, mealybugs and orchid scales. Scale insects can be prevented and controlled by spraying pesticides such as DDT, 1605, 1059, dimethoate and dichlorvos. Mites and spiders can also harm orchids. There are many kinds, and common ones include red spider mites and mites, which can be controlled with acaricides such as tetradifon, dicofol, 1605 and malathion. Thrips harm orchid leaves, sucking epidermal tissue and causing small white spots to appear on the leaf surface. The common species can harm citrus and some plants of the Araceae family. They can be controlled with agents such as DDT, lindane, 1605 and BHC. Aphids that harm crops and flowers can also harm orchids. Common ones include green peach aphid, lily aphid and cotton aphid, which can be controlled with agents such as tepp, 1605, malathion, lindane, BHC and crufomate. In addition, there are ants, snails and others, which can be controlled by spraying appropriate agents.