Detailed Explanation of Soilless Tomato Cultivation Methods and Technical Points
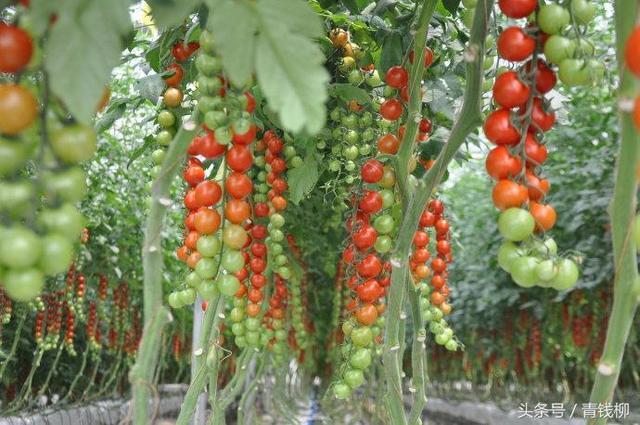
Soilless Tomato Cultivation Methods
Plan 1
I. Facility Conditions
Install a soilless cultivation system in the greenhouse, including cultivation troughs, irrigation facilities, and cultivation substrate.
1 Cultivation troughs: Leave 80 cm on the north side and 30 cm on the south side inside the greenhouse, build cultivation troughs running north-south with bricks, inner diameter width 48 cm, trough frame height 24 cm, bricks laid flat, trough spacing 72 cm, lay a 0.1 mm thick plastic film at the base of the trough, press the film edges tightly with the top layer of bricks, spread 3 cm of clean river sand on the film, lay a woven bag on the sand, and fill cultivation substrate on the bag.
2 Irrigation facilities: Use tap water facilities or build a reservoir with a water level difference of 1.5 m. Build an independent irrigation system for each individual greenhouse. Plastic pipes can be used for both the main pipeline in the greenhouse and the drip irrigation tape in the cultivation troughs. Install 1-2 drip irrigation tapes in the trough and cover them with a 0.1 mm thick narrow plastic film.
3 Cultivation substrate: Organic substrate can use corn stalks, mushroom residue, sawdust, etc. Inorganic substrate can use sand or furnace slag, etc. If using coal gangue, sawdust, and corn stalks, the mixing ratio is 1:2:2. 15 days before use, pile the substrate 25 cm thick, spray wet, cover with film and sterilize. Then add 2 kg of special organic soilless cultivation fertilizer and 10 kg of disinfected chicken manure per square meter of substrate. Mix well and fill the troughs. After each crop harvest, the substrate must be disinfected.
II. Soilless Seedling Raising
Select the tomato variety Maofen 802, which is tolerant to low temperatures, tolerant to weak light, high-yielding, and strongly disease-resistant. Soak and germinate seeds at the end of September. After most seeds have sprouted, use artificial soilless plug tray seedling raising. Prepare the substrate at a ratio of peat moss : vermiculite = 3:1. Add 5 kg of chicken manure and 0.5 kg of vermiculite compound fertilizer per square meter of substrate. Mix well and fill into 72-cell plastic trays. Sow 1 seed per cell, cover with 1 cm of vermiculite, and separate the plug tray from the soil with plastic film underneath. Before emergence, maintain the temperature at 25-30 degrees C. After emergence, maintain the temperature at 20-25 degrees C during the day and 10-15 degrees C at night. Keep the seedling trays moist. When seedlings grow 3-4 true leaves, they can be removed from the trays for planting out. The seedling age is about 30 days.
III. Planting Out
Before planting out, turn and level the substrate, flood-irrigate the cultivation troughs so the substrate fully absorbs water. When water seeps out of the cultivation troughs, plant 2 rows per trough, with the substrate slightly higher than the seedling root ball, plant spacing 30 cm, 3000 plants per mu, and water lightly after planting.
IV. Cultivation Management
1 Fertilizer and water management: Begin topdressing 20 days after planting out, then topdress once every 10 days thereafter, applying 10-15 g of special fertilizer per plant each time. After fruiting, topdress once every 7 days, applying 25 g of special fertilizer per plant each time. Fertilizer should be evenly scattered 5 cm away from the roots and allowed to seep into the substrate with water. In addition, carbon dioxide gas fertilizer can also be applied inside the greenhouse. Generally, water once every 5 days after planting out.
2 Temperature and light management: After planting out, maintain the indoor temperature at 22-25 degrees C during the day and 10-15 degrees C at night. After fruit set, maintain 25-28 degrees C during the day and about 12 degrees C at night.
3 Vine hanging and pruning: When seedlings have 6-7 leaves, hang vines with polypropylene plastic rope. Fix the upper part of the rope to the iron wire of the greenhouse frame and tie the lower part to the stem base. The stems and vines intertwine with the hanging rope and maintain upright growth. When pruning, keep only the main axis for growth and fruiting, and remove all lateral branches in the leaf axils. Remove lateral branches when they are 10-15 cm long.
4 Flower and fruit preservation and fruit thinning: From 7-9 in the morning, dip flowers in a 10-15 mg/kg 2,4-D solution to increase the fruit-setting rate. To ensure large fruit and good quality, keep 3-4 fruits per plant, and promptly thin out all remaining flowers and fruits. (523079 Dongguan Botanical Garden)
Plan 2
1. Variety selection Organic ecological substrate cultivation has no strict requirements for tomato variety selection. It should target local residents' consumption habits and select varieties with high yield, disease resistance, and good quality. At present, large-fruited varieties such as Maofen 802, Zhongza No. 9, Jiafen 15, and Zhongshu No. 4 are mostly used in production.
2. Construction of cultivation beds and substrate filling After land preparation, dig cultivation troughs running north-south, with an inner diameter width of 0.48 m and a depth of 0.15 m. Lay a layer of plastic film at the bottom of the trough to isolate it from the soil. Fill the trough with 2-3 cubic meters of substrate. The substrate ratio is peat moss : furnace slag = 4:6. Before filling the trough, mix an additional 5 kg of solid organic fertilizer and 1.5 kg of ternary compound fertilizer into each cubic meter of substrate.
3. Cultivation season and crop rotation arrangement Organic ecological substrate cultivation of tomatoes can be carried out in solar greenhouses and plastic tunnels, and can be cultivated in early spring, late autumn, and winter. For the early spring crop, sow in late January and plant out in late March; for the autumn delayed crop, sow and raise seedlings in late July and plant out in early September; for the winter-spring crop, sow and raise seedlings in late November and plant out in late December.
4. Drip irrigation system Use natural pressure drip irrigation from a water storage tank. Build an independent water storage tank for a single greenhouse, with a tank length of 4 m, width of 1.5 m, and height of 2 m. The bottom of the tank should be 0.5 m above ground level. To prevent shading and occupying too much planting area, the water tank should be built along the gable wall of the greenhouse or plastic tunnel. Plastic pipes can be used for both the main pipeline in the greenhouse and the drip irrigation tape in the cultivation troughs. Lay two drip lines in the trough and cover the drip lines with a 0.1 mm thick narrow plastic film to prevent drip irrigation water from spraying outward and evaporating.
5. Seedling raising and planting out Use the artificial soilless plug tray seedling raising method. The seedling substrate is mixed with peat moss and vermiculite at a volume ratio of 2:1, then add 10 kg of dried chicken manure per 1 cubic meter of mixed substrate and mix evenly. Water the substrate thoroughly. After the water seeps down, sow, 1 seed per cell, direct sowing of dry seeds, and cover with 0.5 cm of seedling substrate after sowing. Before emergence, maintain the temperature at 25-30 degrees C. After emergence, maintain the temperature at 20-25 degrees C during the day and 10-15 degrees C at night. Keep the seedling trays moist. When 3-4 true leaves have grown, they can be removed from the trays for planting out, about 30 days. Before planting out, turn and level the cultivation substrate and water once so the substrate fully absorbs water. After the water seeps down, dig holes and plant out 2 rows per trough, with the substrate slightly higher than the seedling root ball, plant spacing 30 cm, 3000 plants per mu, and water lightly after planting.
6. Field management after planting out (1) Temperature. During the tomato growth period, maintain the indoor temperature at 21-24 degrees C during the day, and begin ventilation when it exceeds 27 degrees C; at night, 16-18 degrees C. A relatively high temperature can be maintained for 5 hours after sunset, and a relatively low temperature can be maintained in the latter half of the night. (2) Fertilizer and water management. Generally water once every 5 days after planting out to keep the rhizosphere substrate moist. After fruit set, water frequently, generally once a day on sunny days for 30 minutes. Water less or not at all on cloudy days. According to the number of fruit trusses retained and the cultivation density of tomatoes, generally retaining 3-5 trusses of fruit requires 4-6 topdressings. Topdressing is mostly done during the fruit expansion period, once every 10-15 days. For each cubic meter of substrate, each topdressing is 1.5 kg of disinfected chicken manure plus 0.5 kg of compound fertilizer (containing nitrogen 14%, phosphorus 10%, potassium 14%, calcium 4%, magnesium 9%, sulfur 6%, iron 2%, and trace elements such as manganese, copper, molybdenum, and boron). Fertilizer should be evenly scattered 5 cm away from the roots and can seep into the substrate with water. (3) Plant adjustment. After tomatoes flower and fruit, use the plastic rope hanging method to support the plants. Use single-stem pruning to reduce pests and diseases and increase yield. Generally keep 3-4 fruits per truss. Promptly remove old leaves, diseased leaves, and leaves below mature fruit, and take them outside for disposal. Generally, for the autumn delayed crop, retain 6-7 trusses of fruit before pinching the growing tip; for the early spring or winter-spring crop, retain 8-10 trusses of fruit before pinching the growing tip. (4) Pollination. Pollution-free tomato production generally does not use hormone treatment. Instead, artificial vibration pollination or insect-assisted pollination is used. Artificial vibration pollination is carried out every day from 10-11 in the morning after flowering. Insect-assisted pollination mostly uses bee pollination. (5) Fruit bagging. After fruit set, bag the tomatoes after flower and fruit thinning has determined the fruits to be retained. The bag is 220 mm long, 160 mm wide, 0.08 mm thick, and made of colorless transparent polyethylene film. Put the film bag over the fruit, then tie the opening of the film bag at the fruit stalk with string, but not too tightly, to prevent affecting the lateral growth of the fruit stalk while maintaining a certain air permeability. The fruit can be marketed together with the bag. Fruit bagging can prevent pesticides from being sprayed directly onto the fruit and then being adsorbed by the fruit surface and marketed before the safe interval has passed.
7. Pest and disease control Give priority to agricultural control and biological control, with chemical control as a supplement. When using chemical control, choose low-toxicity and low-residue pesticides, and pay attention to the safe use interval to ensure the product is not contaminated by pesticides.
8. Harvest After the fruit enters the mature green stage, it is relatively suitable to harvest when the top begins to turn orange-yellow.