Okra Bonsai Cultivation Techniques and Potted Management Key Points
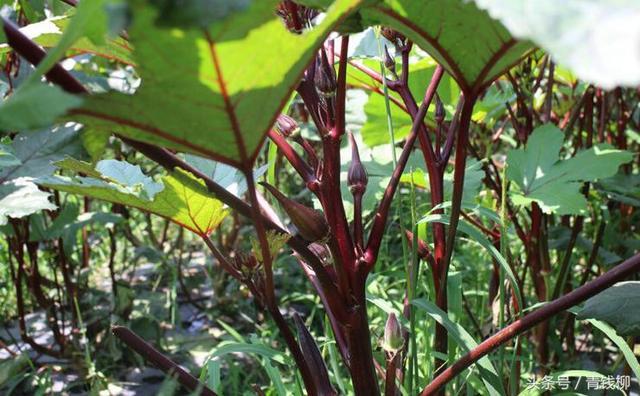
Potted Okra Bonsai Cultivation Techniques
1 Preparation of Flower Pots and Selection of Placement Location
For courtyard cultivation of okra, flower pots with a diameter of 40 cm and a height of 50 cm or more are needed; the wider and larger the pot, the better for the plant's root system to spread. Okra is particularly sensitive to light conditions and requires long hours of sunlight and sufficient light. Therefore, a sunny location should be chosen, ventilation should be enhanced, and the density of flower pot placement should be reasonably arranged to avoid mutual shading that affects ventilation and light penetration.
2 Soil Selection
Choose loam or sandy loam soil with good texture.
3 Preparation of Potting Soil Base Fertilizer
To make the plants grow well, base fertilizer is very important. Before potting, fully compost and decompose chicken manure, silkworm droppings, or other livestock and poultry manure. You can use 200-fold diluted EM Original Liquid (the "Tianyi" brand EM Original Liquid produced by Jiangxi Tianyi Biotechnology Development Co., Ltd.) or VT-1000 bacterial solution sprayed onto the manure, mix well until the moisture content reaches about 50%, so that when squeezed by hand just no water drips out. The composting time should be more than 15 d.
4 Preparation of Potting Substrate
Mix soil and base fertilizer at a ratio of 3:1 and put into the flower pot, filling only 3/4 of the pot with the soil mixture, then spread a layer of soil 5-8 cm thick on top. Then spray 500-fold diluted EM Original Liquid, just enough to moisten the soil, and set aside for later use.
5 Sowing and Seedling Raising
5.1 Sowing Season
South of the Yangtze River, cultivation can be done in both spring and summer, but spring sowing is the main method. Spring sowing time is March to April, and harvest can begin in late May and continue until the end of October.
5.2 Sowing
Okra mostly uses direct seed sowing, placing 2-3 seeds per pot, covering with a layer of fine soil 3-4 cm thick when sowing. Okra seed coats are relatively hard, so seeds must be soaked for 24 h before sowing, cleaning and changing the water once every 5-6 h. If placed in a 25-30°C environment for germination, they will sprout in 3-4 d and can then be sown, and seedlings can emerge in about 10 d after sowing.
6 Thinning and Transplanting
After okra seedlings emerge, they should be thinned in time, removing weak and diseased seedlings. When okra seedlings grow to 3-4 true leaves and a height of 10-15 cm, keep only 1 strong plant per pot, pull out the rest, or transplant them to other pots where seedlings are growing poorly. Apply sufficient rooting water to promote survival.
7 Field Management
7.1 Fertilizer Management
Okra plants are tall and bear many fruits; sufficient fertilizer and water is the key to obtaining high yields. In addition to applying sufficient base fertilizer, okra should also be top-dressed multiple times during the growing period. After okra seedlings emerge, timely apply a full-stand fertilizer, applying 10 g of urea per pot; the second application is a seedling-promoting fertilizer, applied in holes after thinning or transplanting, applying 30 g of compound fertilizer per pot; when plants reach 30 cm in height and enter the fruiting stage, apply heavy top-dressing, applying 40 g of compound fertilizer per pot or a ladle of diluted manure water; in the middle and late growth stages, apply multiple light top-dressings as appropriate, and after each fruit harvest, drench with diluted manure water once every 10 d to prevent premature aging of the plants.
7.2 Weeding and Hilling
After okra seedlings emerge or are transplanted, avoid competition between seedlings and weeds for fertilizer and water, and weed in time. Do this once every 7-10 d. After flowering and fruiting, plant growth accelerates; after each watering and top-dressing, use a small spoon to loosen the soil and hill up evenly to prevent lodging. In areas with heavy summer rainstorms and wind, it is best to insert bamboo poles or branches about 1 m long near the plants, then tie them with rope in a figure "8" shape to prevent lodging.
7.3 Plant Adjustment
In the early growth stage of okra plants, side branches should be removed in time, which helps the main stem bear fruit earlier and increases yield. If vegetative growth is too vigorous in the early stage, you can also twist the petioles into a curved downward position to control vegetative growth; in the middle and late growth stages, promptly remove old leaves on all nodes below the harvested tender fruits, which can improve ventilation and light conditions, reduce nutrient consumption, and prevent the spread of pests and diseases; for seed fruit harvesting, promptly pinch off the growing tip, which can promote ripening of the seed fruit, help the seeds plump up, and improve seed quality.
7.4 Watering and Drenching
Okra is drought-tolerant and moisture-tolerant, but not waterlogging-tolerant. If soil moisture is too high during the germination period, it easily induces seedling damping-off disease. If drought occurs during the fruiting period, plant growth will be poor and quality inferior, so the soil should always be kept moist. Potted okra loses water quickly, so pay attention to observation and water at least once a day (best if watered in both morning and evening) to prevent the potting soil from drying out. The hot summer season is exactly the peak harvest period for okra, and the soil surface temperature is high, so watering should be done before 9 a.m. and after sunset in the afternoon, avoiding watering under high temperatures that can damage the roots.
7.5 Measures to Promote Flowering and Fruit Set
When okra has grown to 10-15 cm tall, begin spraying the leaves with 200-300-fold diluted EM Original Liquid, spray with water once more before flowering, and thereafter spray once every 10-15 d after each fruit harvest, using 200-fold EM Original Liquid plus 0.1% potassium dihydrogen phosphate solution when spraying (the two can be mixed and sprayed together). Through these measures, okra flowers more and sets more fruit, the fruits are robust and plump, the fruit pulp is abundant, the quality is sweet and tender, and the harvest period is extended, with a large increase in yield.
7.6 Pest and Disease Control
Okra has relatively few pests and diseases, occasionally suffering damage from aphids, stem borers, ants, and cutworms. For courtyard okra cultivation, it is best to use frequency-vibration insecticidal lamps and yellow sticky boards to trap and kill adult insects. If stem borer damage is found, use manual capture and killing. You can choose 50% pirimicarb or pirimicarb wettable powder diluted 2,000-2,500 times for spray control. To control cutworms, drench around the root zone with 90% trichlorfon diluted 500 times to poison the larvae. In rainy seasons, if many disease spots appear on branches and leaves, after the weather clears, promptly scatter lime near the base of the plants to prevent the spread of disease.
8 Timely Harvesting
Okra begins flowering and fruiting node by node from the 4th to 8th node. Under suitable temperature conditions, tender fruits can be harvested 2-4 d after the flowers fade; generally, tender fruits can be harvested when they grow to 10-15 cm long and about 25 g. Harvesting too early results in low yield, while harvesting too late easily leads to fibrosis, reduced quality, and unsuitability for eating. In the early harvest period, harvest once every 2-3 d; in the middle and late periods, harvest once every 3-4 d. Harvesting is best done in the morning or evening, cutting at the fruit stalk to avoid damaging the branches. Okra stems, leaves, and fruits all have bristles or spines, so gloves should be worn when harvesting; otherwise, the skin will be prickled and itch unbearably.