DIY Clay Flower Tutorial: Easily Achieve a Super Realistic Effect
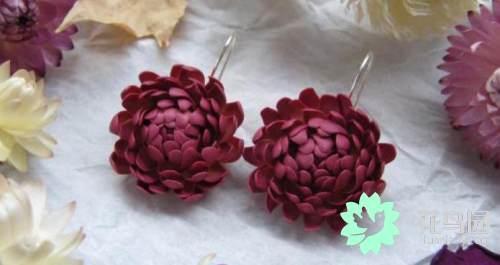
Tutorial summary:
Handmade flower making is truly a huge category with many classifications - paper flowers, leather flowers, fabric flowers, preserved flowers...! Today's share is a different making method: clay flowers. Compared with paper flowers and fabric flowers, although not as delicate, they are simpler and still very beautiful. Materials and tools: - Polymer clay - Craft knife - Clay flower tools - Rubber gloves (to avoid leaving fingerprints) - Pasta machine (rolling pin) - Oven - Flowers (for reference) - Veining tool - Scissors
Detailed making steps:
The tutorial uses polymer clay, not air-dry clay - the kind of clay that needs to be baked. First observe the color of the real flower, then mix the clay colors. In the tutorial, two colors are used: one is a mix of red, purple and white, and the other is a mix of white and yellow.
If you have a pasta machine at home, you can use it to naturally join the two mixed clay colors together and press them flat.
Continue, and shape it into a flat, slender strip. If you do not have a pasta machine, you can also use tools such as a rolling pin.
Use a craft knife to cut the clay into small pieces of equal size, and stack them together.
Then roll it into a round strip, and you can see rainbow-like color transitions.
Look at the details - it should be teardrop-shaped.
Cut it into small slices of equal thickness.
For each small petal, press it with your fingers or a tool until it becomes curved and thinner.
Use a needle or toothpick or similar to pierce through the teardrop-shaped clay to form the flower center.
Attach petals around it one by one.
Continue adding layers of petals...
Continue adding layers of petals...
Add the calyx, then bake in an oven preheated to about 175 degrees for 30 minutes.
Can you tell whether I am male or female? It really looks realistic!