Full Detailed Guide to Spring Chinese Cabbage Cultivation Techniques in the South
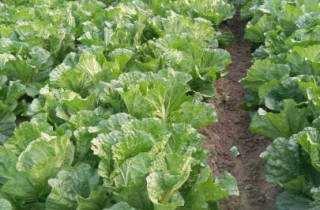
Spring Chinese Cabbage Cultivation Program in the South
Spring Chinese cabbage is sown and raised as seedlings in early spring or late spring and comes to market from April to June, filling the vegetable supply gap of late spring and early summer and adding variety to the vegetable lineup. Spring Chinese cabbage cultivation requires special techniques, mainly to solve problems such as bolting caused by low temperatures and long daylight in early spring, and failure to form heads plus severe pests and diseases caused by high temperatures later on.
1. Selecting varieties
Choose special spring varieties with strong winter hardiness, early maturity, heat tolerance, disease resistance, high yield and good quality, such as Yangchun, Qiangshi, Chundajiang and Chunxiao.
2. Raising strong seedlings
(1) Choosing the sowing date. ① For plastic greenhouse cultivation, the sowing date is early February, with seedlings raised in a heated greenhouse. ② For transplanting into open-field small arch tunnels or direct sowing under film inside small arch tunnels, the sowing date is mid to late February. ③ For direct sowing under plastic film in open fields or open-field seedling raising, the sowing date is mid to late March to early April; in warm weather it can be moved earlier, and in a late cold spell it can be sown a little later.
(2) Preparing nutrition pots (blocks, trays). Use nutrition pots, nutrition blocks or plug trays for seedling raising, and in some cases temporary planting is also needed. First prepare the growing soil: use 60% garden soil, add 25% sieved decomposed fine pig manure and 15% dried human manure, then add 30-50 kg of fully decomposed chicken manure and 1 kg of ternary compound fertilizer per cubic meter of growing soil, and mix thoroughly. Choose plastic nutrition pots 7-8 cm in diameter; first fill the pot to 1/3 of its height, press lightly, round out the bottom of the pot, then fill almost to the top and press firm, until the soil does not crumble when tilted.
(3) Sowing. At sowing, make a hole 0.5-1 cm deep in the center of each pot, sow 3-4 seeds per hole, and cover with 0.5-1 cm of soil; the covering soil can be disinfected with chlorothalonil or carbendazim.
(4) Seedling-stage management. After sowing and before emergence,
spray the bed surface with 50% phoxim emulsifiable concentrate at 1,200-1,500 times dilution to prevent insect damage. At the 3-4 leaf stage, keep 2 plants per hole; at the 5-6 leaf stage, thin to 1 plant. Keep warm at night; usually the night temperature must not fall below 10 °C, to prevent seedlings from passing through vernalization too early and bolting ahead of time. In the early growth stage, focus on keeping warm; in the later growth stage, ventilate to reduce moisture according to temperature changes, to prevent excessive temperature from causing leggy seedlings. Before transplanting, ventilate and harden the seedlings in good time according to their condition.
3. Field planting
(1) Preparing soil and making beds. Choose loose, fertile, sunny, high, dry land with good drainage. Use deep furrows and high beds. Generally the bed is 1 m wide, 10-15 cm high, with furrows 25-30 cm wide, and 2 rows are planted per bed.
(2) Field fertilization. Apply 3,000 kg of organic fertilizer or about 50 kg of compound fertilizer per mu (1 mu = 667 sq m, the same below) as base fertilizer. Along with the organic fertilizer, a small amount of potassium chloride and superphosphate can also be applied. Apply the base fertilizer by broadcasting it during land preparation or by opening holes according to the set spacing; human and livestock manure residue can also be poured into the holes, and after it dries slightly in the sun, hoe the soil loose, then plant.
(3) Planting. ① Planting time: the planting time should be determined by the air temperature of the growing environment and the 5 cm soil temperature. Only when the two stably pass 10 °C and 12 °C respectively can planting be done safely. The suitable seedling age at planting is about 25 days, and the suitable physiological seedling age is 4-5 true leaves. ② Planting spacing: generally (35-40) cm x 50 cm, with 3,500-4,500 plants per mu.
③ Planting method: at planting, choose a windless afternoon. First cover the bed with plastic film and press the edges firm, then punch holes according to the plant spacing and plant, keeping the soil ball around the roots to help the seedlings recover. Water immediately after planting. For direct sowing, thin and set the seedlings early.
4. Cultivation management
(1) Keeping warm. For greenhouse cultivation, uncover the film by day and cover it at night, keep warm in the early spring nights, and ventilate to reduce humidity on clear days.
(2) Removing the skirt film. From mid to late April, the skirt film can be removed, leaving only the top film.
(3) Topdressing seedling fertilizer. This should be done as early as possible. After the seedlings recover, apply 10-15 kg of urea per mu in holes.
(4) Maintaining moisture. After film covering at the seedling stage, generally do not water or cultivate. During the heading stage, water frequently with small amounts, keeping the soil alternately dry and moist; do not water unless the soil surface turns white. Furrow irrigation is preferable; do not flood irrigate or wash with large amounts of water, to reduce the occurrence of soft rot.
(5) Topdressing heading fertilizer together with watering. In the early rosette stage, apply a heavy heading fertilizer together with watering: 30 kg of diammonium phosphate, 20-25 kg of urea and 10 kg of sulfuric acid per mu. At this stage, 0.2% potassium dihydrogen phosphate can also be sprayed on the leaves 2-3 times. No topdressing is needed in the middle and late heading stages.
(6) Grasp the principles of watering and topdressing for spring Chinese cabbage. Pay attention to strengthening drainage, and combine fertilization after rain with disease prevention. Do not practice seedling restraint; instead, push hard with fertilizer and water all the way through, promoting vegetative growth and inhibiting bolting, so that the growth rate of the rosette leaves and heads exceeds that of the flower stalk, and a firm head forms before the flower stalk extends.
5. Harvesting
Spring Chinese cabbage generally matures about 50 days after planting (60 days for direct sowing). At this time it must be harvested promptly to prevent high temperatures and rain later on from causing head splitting, rotting or bolting, which would reduce eating quality and market value. It can be harvested in batches according to market conditions, and harvested appropriately early.
Besides seedling transplanting, spring Chinese cabbage can also be direct sown. On the basis of applying enough base fertilizer, carefully preparing the land, and making flat or high beds, drilling, hole sowing or drill-hole sowing can be used. For drilling, open shallow furrows 2-3 cm deep according to the row spacing, water thoroughly, scatter the seeds evenly into the furrows, then cover with fine soil. For hole sowing, dig holes 2-3 cm deep within the row according to the plant spacing, add water, sow 2-3 seeds, then cover with fine soil. For drill-hole sowing, open shallow furrows 4-5 cm long within the row according to the plant spacing, add water, then sow the seeds evenly into the furrows and cover with soil. After sowing, cover with plastic film; when 2 true leaves appear, break the film in time to expose the seedlings. When breaking the film, make small holes just large enough to pull the seedlings through, and press the openings firmly with soil. Thin the seedlings once each at the 2-leaf and 5-leaf stages. Other management is the same as for seedling transplanting.