How do you make a stone bonsai? Watch me demonstrate the whole process
Uh, today it's not just about stones,
uh, and today it's not just about bonsai either.
Instead... it's about bonsai on stones.
Can you make bonsai on stones?
That's right, it's the stone's stage and I make the rules!
Stone bonsai
The stone's stage The stone's stage
What's the difference between a stone pot and the stone's stage?
Uh, the way the planting groove is dug is different.
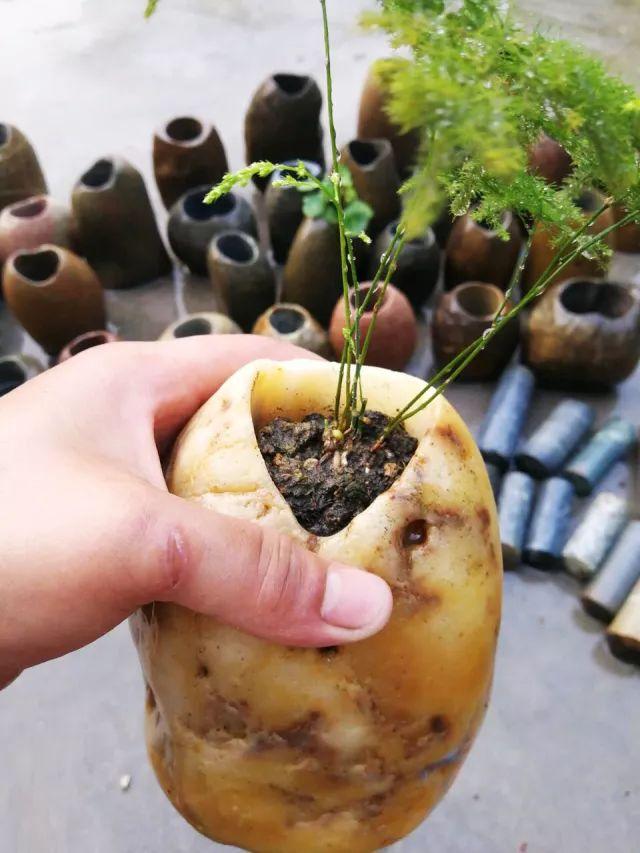
A stone pot is a stone that has been mechanically hollowed out to provide a planting hole for the plant; whereas the stone's stage, aha, is about finding a suitable stone and directly using the stone's natural form to plant and shape the plants.
Both are very distinctive and very beautiful. It's just that the stone's stage is more primitive and natural, and if made into a bonsai, it can better show off your superb bonsai skills and extraordinary artistic taste.
Wahahaha...
In this article, let's try the planting technique of the stone stage ourselves.
Fellow growers must first understand that on a flat stone surface, the first thing to solve is the problem of securing the root system, so that the plant can stand upright.
In time, when the new roots that develop firmly grip the rough stone surface, the plant can use this as its stage and stretch out in wildly different forms.
That's how "the stone's stage" got its name!
Planting technique for the stone's stage
1. Choose a stone slab with a flat surface and drill a small hole in the front.
2. With a short piece of aluminum wire, bend a small loop from the middle section.
3. Adjust this small loop to a size that fits snugly in the hole.
4. First clear the powder from the hole, then use a strong adhesive to fix the aluminum wire in the hole.
5. Beginners should best use ferns as their first subject, because their root systems are supple and easy to handle, and the new roots also attach strongly.
6. A small seedling just collected is not suitable as material; the Holly fern (Cyrtomium falcatum) shown in the picture has been grown in a pot for about 2 years, its roots can already grip the soil ball tightly, and the success rate of transplanting it onto the stone stage is higher.
7. First remove the bottom mesh from the pot, then gently press the soil ball into a cone shape with a flat bottom, trying not to break the soil ball apart.
8. Place it on the stone; the bottom must sit flat against the stone surface.
9. Wrap the aluminum wire around the soil ball starting from about 1/3 of its height; do not tie a knot, so it won't affect root development later.
10. Once fixed properly, it won't loosen or fall off even when hung upside down.
11. Use transparent packing tape to form a low wall around the stone slab like a pot wall, to protect the planting soil from loosening and falling.
12. Fill the gaps directly with fine-grained soil.
13. After filling the soil, wrap it gently; do not wrap too tightly, as long as the shape is fixed and the soil doesn't leak out.
Editor's tip: wrapping too tightly will make drainage difficult and cause root rot.
14. The junction of root and stem must be exposed, so the roots can exchange air and watering is easier.
After finishing, soak it so the planting soil is thoroughly wet; afterward, just water it as usual.
15. After a few months, you can judge from the plant's growth whether it has adapted to this cultivation method.
If there is obvious new leaf growth, you can remove the tape, then brush off part of the surface soil, and properly cover with moss to protect the topsoil and roots.
Usually in about half a year you can grow a finished piece that is anything but ordinary.
To help fellow growers understand how the root system develops after planting, the editor deliberately removed the moss and part of the soil covering the surface of a plant that had spent half a year on the stone.
The editor found that the new roots had already grown past the aluminum wire that originally looped around them, and some new roots were already growing pressed against the stone surface.
Whether it's a thin stone slab, a thick stone brick, or a tall stone pillar, when plants grow on it, the most important thing is that the topsoil must not be lost.
So besides covering with moss to protect the potting soil, each watering should also be done gently in spray form.
Fellow growers, hurry up and give it a try; following the planting techniques above, you too can cultivate healthy plant roots on a stone, make your stone bonsai grow beautifully, and complete a "stone's stage" potted art piece!
Alright, that's all for this article; if fellow growers still have any questions, check in at the comment section below.