Geranium cuttings are easy to take, and beginners can achieve a high survival rate by following the steps.
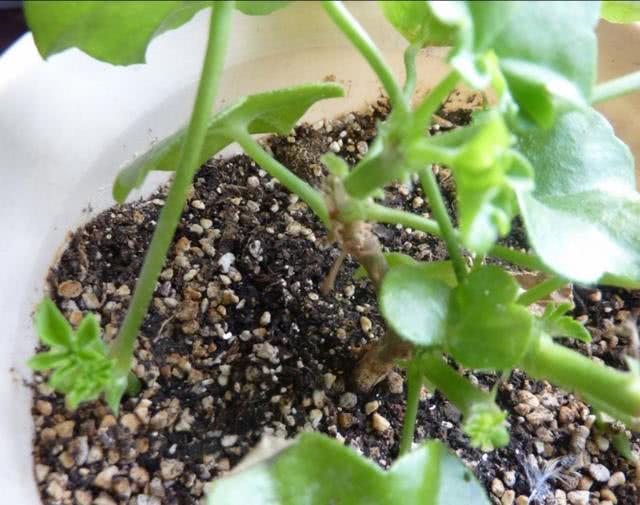
Taking geranium cuttings at the edge of the pot is convenient, gives a high survival rate, and is easy to manage, making it a good cutting method. This article shows you step by step how to take geranium cuttings at the pot edge. Out of love for plants, do not throw away geranium stems, because every stem is alive. A geranium stem only needs one leaf and one bud eye to root. Look at the small stem on the left:
1. Cutting the stem:
1. Stem bud points: the terminal bud grows vigorously, and one bud point is enough. If you take a cutting from the middle section of a stem, a stem with 2 to 3 healthy bud points is most suitable. When stems are limited, make sure it has at least one healthy bud point.
2. Method of taking the stem: make the cut above the bud point you want to keep on the plant; see the illustration for the cutting position. You can snap it off by hand or cut it with scissors; moving quickly causes less damage to the stem. Eyebrow trimming scissors are recommended, as they are thin and sharp.
What are eyebrow trimming scissors? They are shown below. They are sold in ordinary accessory shops; I bought mine for two yuan each, and there are plenty on Taobao.
2. Key points for cuttings:
1. Soil: the premise of taking cuttings at the pot edge is that the soil in the original pot is loose and a healthy plant is growing there. Loose media such as peat and perlite are especially suitable.
Rooted cuttings at the pot edge
2. Inserting the cutting: use a ballpoint pen refill or a toothpick to make a hole in the soil at the edge of the pot, then put in the stem and press it lightly. Pushing it in forcefully will damage the stem.
3. Water: after inserting the cutting, if the potting soil is moist, you do not need to water. If the potting soil is dry, water thoroughly at once. After that, manage it together with the mother plant, watering thoroughly only after the soil has dried out. With the mother plant helping to absorb water, there is no need to worry that the soil is too wet and rots the stem. After inserting the cutting, no humidity retention is needed. Whether you root geraniums in sand, in water, in a small pot, or at the pot edge, the whole process needs no cover to retain humidity. Retaining humidity causes the fleshy stems of geraniums to rot.
Flower buds on the mother plant
4. Light: except in midsummer, the cuttings can be placed in direct sun right after insertion.
3. Points to note:
1. The cut end must be dried. What does dried mean? It is enough when a white film has formed over the wound on the stem. If you find this hard to judge, then cut the stems in the morning and insert them in the afternoon, or cut them in the evening and insert them the next day.
The tender cuttings have also formed flower buds
2. Insert the cutting at the edge of the pot, where water does not accumulate. If you are worried that water accumulation will rot the stem, you can tilt the pot slightly (one windowsill in my home slopes outward just a little, has plenty of sunlight, and is a prime spot for cuttings, where every cutting roots). The side of the pot with less water roots faster and does not rot.
3. After insertion, the cutting must get sunlight. Cuttings in shady places root slowly and the seedlings are weak. Those in sunlight are stocky with a good shape and form flower buds quickly.
4. If you water too much, you can place the pot on a stack of newspapers to absorb the excess water.
5. Make labels as needed. Hanging tags or inserted tags are both fine.
Using the pot-edge cutting method, I have rooted summer chrysanthemums, petunias, rose of Sharon, and bougainvillea. The following pictures show, respectively, a petunia rooted in a petunia pot, a summer chrysanthemum rooted in a summer chrysanthemum pot, and a rose of Sharon rooted in a summer chrysanthemum pot: