Detailed Explanation of Plum Blossom Propagation Methods and Cultivation Techniques
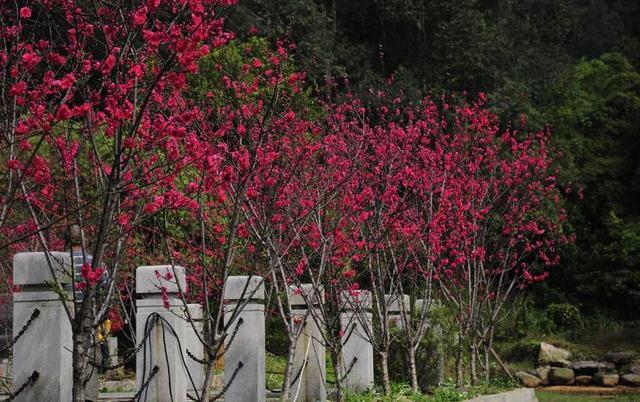
Plum Blossom Propagation and Cultivation Techniques
Plum blossoms are widely cultivated in the Yangtze River basin of China, but in places such as Liaoning and Jilin, open-field cultivation is impossible due to the cold winter climate. After more than ten years of introduction and domestication, a series of plum blossom cultivars have been successfully selected, such as Dan Hong Gongzhu, Gongzhu Mulan, Huahudie, etc., with single-petaled, double-petaled, pink-flowered, white-flowered and yellow-flowered types, colorful and eye-catching. They can tolerate low temperatures of -31.4°C, and are also tolerant of drought and heat. The full blooming period is 3-4 days earlier than that of Beijing peach, and the flowering period is 7-10 days. The introduction of new plum blossom cultivars will add a beautiful and unique scenery to the early spring of the cold northern regions, and their planting application prospects are promising.
I. Rootstock Selection and Preparation
1. Rootstock Types and Characteristics
Siberian apricot rootstock: Siberian apricot or Liaoning apricot has strong affinity with plum blossom, the graft union heals firmly, and the tree body after grafting grows relatively tall, beginning to bloom in the third year.
Wild peach rootstock: Mountain peach also has good affinity with plum blossom; after grafting, the tree height and crown width are greater than those on Siberian apricot rootstock, but the tree lifespan is not as good as on Siberian apricot rootstock, and the age of entering flowering is slightly later than on Siberian apricot rootstock.
Nanking cherry rootstock: The affinity of Nanking cherry with plum blossom is not as good as that of Siberian apricot, but the survival rate is also relatively high; the tree body is dwarfed, enters the flowering period early, and has a slightly shorter lifespan.
2. Sowing and Raising Rootstock Seedlings
The suitable sowing period is from late October to early November in late autumn and early winter, which gives better results. Early spring germination is early, the seedling emergence rate is high, and the current-year seedling growth is large, but if there is extremely little snow and rain in winter and spring, the seedling emergence rate is very low.
Fruit collection and seed treatment are carried out from late June to mid-August. Timely pick the fruits of Siberian apricot, Nanking cherry and mountain peach, remove the flesh, take out the seeds, and dry them in the shade before dry storage. Before sowing in late October, soak the seeds in cold water for 2-3 days and nights, so that the seed kernels fully absorb water and swell.
Choose flat land or gentle slope land, preferably loamy soil. Evenly spread farmyard manure on the surface at a rate of 3000 kg/mu, and plow the soil 20 cm deep. Make beds with width, height and length of 1.1 m × 0.1 m × 20 m, and build a surrounding embankment around the bed edges with a height and width of 5 cm respectively, to facilitate irrigation.
When sowing, along the bed direction, open furrows 4-6 cm deep on the bed surface at a row spacing of 15-20 cm, pour enough bottom water into the furrows, and after the water infiltrates, sow Siberian apricot and mountain peach seeds by dibbling at a seed spacing of 6-8 cm. The soil covering thickness is 4-5 cm for Siberian apricot and mountain peach, and 3.0-3.5 cm for Nanking cherry, and press firm after covering with soil. The sowing rates per mu for Siberian apricot, mountain peach and Nanking cherry are 30 kg, 50 kg and 15 kg respectively. If conditions permit, it is best to cover the bed surface with a 1 cm thick straw curtain or finely crushed straw segments.
In April of the following spring, if dry, spray water on the bed surface in time. Remove the straw curtain in time if covered with one; if covered with finely crushed straw, it need not be removed. From May to August, weed or hoe 4-6 times. From May to July, if there is aphid damage, spray 20% omethoate-cypermethrin 1000-fold solution for control. In early winter, water the bed surface once with overwintering water.
3. Spring Sowing
If preparing for spring sowing the next year, soak the seeds in clean water for 48 hours at the end of December, take them out and mix evenly with 3 times their volume of wet sand, store them in a cellar at -5 to 5°C, and sow in batches in early April of the following spring. The sowing method and management are the same as for autumn sowing.
In late autumn or early spring, purchase large rootstock seedlings with a diameter of 2-5 cm from other places or other nurseries, and transplant them into the nursery field at a plant and row spacing of 0.2-0.6 m × 0.6 m, and grafting can be done in the same year or the next year. [Jishan Huayao]
II. Transplanting, Grafting and Management
1. Transplanting
For those preparing to cultivate 1-2 year old grafted seedlings by grafting after transplanting, transplant at a plant and row spacing of 0.1-0.2 m × 0.6 m; for those preparing to cultivate 5-7 year old large grafted seedlings, transplant at a plant and row spacing of 0.3-0.6 m × 0.6-1.2 m.
Transplanting time and method: transplant in early November or mid-April. Before transplanting, prepare the land, apply fertilizer, cut off part of the root system, leaving roots about 15 cm long, soak in water for 24 hours, then plant the seedlings at the predetermined spacing, and water thoroughly after transplanting.
2. Grafting Operation
For close-distance rootstock planting with preparation for grafting, generally hardwood grafting is the main method, with bud grafting as a supplement. For those transplanted in autumn of the same year, hardwood cleft grafting or shield budding can be carried out in spring of the next year. For those transplanted in spring of the next year, hardwood cleft grafting can be carried out 30-40 days after transplanting. For long-distance rootstock planting, when the diameter at 1 m height of the rootstock reaches 3-4 cm, carry out hardwood bark grafting and cleft grafting in April to May.
(1) Hardwood cleft grafting: In February to March, cut one-year-old plum blossom scion branches and store them in a cool place. The scion length is 6-7 cm, with 2 healthy buds above the cut surface, the cut surface is 2-3 cm long, and the two cut surfaces are in the shape of a wedge. For low grafting, cut off the rootstock at 5-10 cm above the ground, and at the center or one side of the cut surface, cut downward along the wood to make a 2.0-2.5 cm incision, insert the scion cut surface into the rootstock incision, align the cambium on one side, and tightly wrap the interface with a 1.0-1.5 cm wide plastic strip, without leaving gaps. One rootstock is grafted with one scion. For high grafting, at the required height, cut off 3-4 cm of pre-reserved branches, leaving branch length of 10-20 cm, and the operation method is the same as low-position cleft grafting. The rootstock diameter for hardwood cleft grafting is 0.5-1.5 cm, and the scion diameter is 0.5-1.2 cm. Generally, the scion thickness is equal to the rootstock thickness.
(2) Hardwood bark grafting: The scion length is 6-8 cm, and a 2.5-3.0 cm long horse-ear-shaped cut surface is made at the base end of the scion. At a height of 1.0-1.5 m above the ground or 5-10 cm, cut or saw off the rootstock. Pry open the rootstock bark (mid-April to early May), insert the scion cut surface so that the scion cut surface fits tightly against the rootstock xylem, and tightly wrap the interface with a 4-5 cm plastic strip. For low grafting, one rootstock with one scion; for high grafting, insert 2-4 scions into each rootstock cut surface. Bark grafting is suitable for rootstock diameter 1.5-5.0 cm and scion diameter 0.5-1.0 cm, with the scion diameter being 1/2 to 1/3 of the rootstock diameter. The scion interface of hardwood grafting should be sealed.
(3) Bud grafting with wood: This grafting method is divided into two cases, namely new shoot bud grafting with wood and one-year-old branch bud grafting with wood. The former is carried out from June to July when the rootstock bark is not slipping, and the latter is carried out in April. At 1 cm above the bud, cut into the wood at an angle of 10°-15° to 1 cm below the bud, then at 1 cm below the bud cut into the wood at an angle of 30° to intersect with the previous cut, and remove the bud piece. At the required height of the rootstock, cut an insertion notch about 2 cm long and 1-2 mm deep, attach the bud piece to the rootstock notch, align the cambium on one side, and wrap the interface with a plastic strip about 1 cm wide. It is mostly used for low grafting, and can also be used for high grafting. Chip budding and bud grafting save buds, but the new shoots germinating from the grafted buds do not grow as much as those from branch grafting, especially one-year-old branch chip budding.
(4) T-shaped budding: Cut and leave the petiole 0.5 cm long, make a horizontal cut through the bark 1 cm above the scion bud, then at 1 cm below the bud cut into the wood at an angle of 10°-15° to the previous cut, and pry off the bud piece. At the required height of the rootstock, cut a T-shaped incision, insert the grafted bud into the T-shaped incision so that the upper edge of the grafted bud connects with the horizontal cut of the rootstock T-shaped incision, and wrap the interface with a narrow plastic strip, with the bud needing to be exposed. It is mostly used for low-grafted seedlings, and the optimal period is within half a month after the beginning of autumn. It should be pointed out that the two bud grafting methods, compared with branch grafting, are more likely to affect the grafting survival rate due to gum flow, so the application of bud grafting should be reduced in production.
3. Management in the Same Year After Grafting
(1) Cutting the rootstock: For T-shaped budding carried out in August, cut off the rootstock around Qingming at 1.2 cm above the grafted bud. For chip budding from April to June, cut off the rootstock after the grafted bud germinates.
(2) Removing sprouts: When the sprouts and shoots growing from the rootstock reach 5-15 cm in length, wipe them off. You can wipe buds multiple times as early as possible, but it is more labor-intensive. You can also wipe buds 2-3 times, and wipe them again when the rootstock shoots reach about 15 cm. This saves labor time and will not have a major impact on the growth of the grafted buds.
(3) Untying: For bud grafting, it can be done at the same time as cutting the rootstock, using a sharp knife to cut the binding strip. For branch grafting, the binding strip should be cut when the shoots germinating from the buds on the scion grow to 15-20 cm. Untying too early results in little callus tissue, and the scion is prone to falling off or withering; untying too late will cause constriction marks, making the new shoots of the scion prone to wind breakage.