Green Food Cultivation Technology for Early Spring Watermelon in Greenhouses
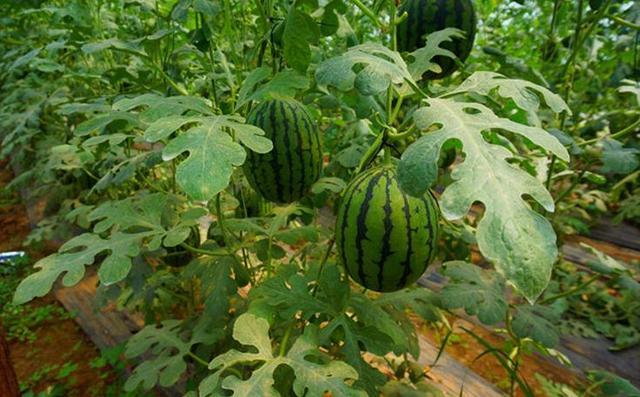
Green Food Cultivation Technology for Early Spring Watermelon in Greenhouses
1 Production Site Selection
The production area should be selected within a 5 km range with no industrial or mining areas, no urban traffic trunk lines, no "three wastes" pollution, a good ecological environment, and clean water sources. Main considerations include terrain, soil quality, and crop rotation, requiring that watermelon has not been planted in the past 3 years to prevent continuous cropping and reduce the impact of soil-borne pathogens. In this locality, attention should be paid to spring floods to prevent waterlogging. The environmental selection should comply with the requirements of "Green Food - Environmental Quality for Production Areas" (NY/T391).
2 Variety Selection and Seed Treatment
Select early-maturing varieties with excellent quality, such as 84-24, Jingxin, Nabit, and Zaochun Hongyu. Sun-dry the seeds before sowing. Sun-drying should be done on a sunny day for 1 d. Then soak the seeds in warm water. The water temperature should be around 55°C, and the soaking time should be controlled between 15 and 30 min, stirring thoroughly during soaking. Then place them in room-temperature water to soak for 2 to 4 h, and then germinate them[1]. After soaking, wash and dry the seeds, wrap them in wet gauze, and place them in an environment of 28 to 32°C for germination. Normally, after 24 to 30 h of germination, the seeds will show white sprouts. Immediately place the seeds in a 15 to 20°C environment for sprout hardening (for 12 h), and then sowing can be carried out[2].
3 Sowing and Seedling Raising
3.1 Preparation of Nutrient Soil
Greenhouse cultivation generally starts seedling raising from late January to early February. When selecting a watermelon seedling site, preference should be given to a plot that is sheltered from wind and sunny, with high and dry terrain, and convenient drainage and irrigation. The nutrient soil needs to be prepared more than 1 month in advance. The soil should be fertile, loose, moist paddy field soil where cucurbits have not been planted for more than 5 years, and an appropriate amount of 0.2% compound fertilizer, 5% decomposed manure and urine, 0.2% superphosphate, and 0.1% potassium sulfate should be added. Cover it with plastic film and compost for more than 15 d before use[3].
3.2 Sowing
The watermelon seedling shed needs to be covered with film for insulation about 7 d before sowing, and sufficient bottom water should be applied 2 d before sowing so that the temperature at sowing is above 25°C. Watermelon sowing is usually carried out on a sunny afternoon, with 1 seed per pot, and the seeds are covered with soil 0.5 cm thick, then an arched shed is built for insulation.
3.3 Seedling Stage Management
To promote watermelon emergence, the temperature can be appropriately higher before emergence. The daytime temperature should not be lower than 22°C, usually 28 to 30°C is more suitable, and the nighttime temperature should preferably be controlled between 18 and 25°C. When the watermelon emergence rate reaches 30% to 40%, the plastic film should be removed in time, and the arched shed should be opened in a timely manner for ventilation, so as to appropriately lower the temperature. At this time, a daytime temperature of around 25°C is sufficient. If the nighttime temperature is below 15°C, appropriate heating measures can be used to increase the temperature[4].
Before watermelon emergence, the water demand is relatively high, so the seedbed soil should be kept moist. After emergence and before the first true leaf unfolds, excessive watering is not suitable. When the soil turns white, watering thoroughly is sufficient. As for topdressing during seedling raising, under normal conditions no topdressing is needed. If the plants grow weakly before transplanting, nutrients can be supplemented by appropriately applying 0.2% urea and potassium dihydrogen phosphate.
Watermelon is a light-loving plant. Therefore, sufficient light should be ensured during the seedling stage. When the weather is clear, the arched shed can be removed to supplement light. If there is continuous rainy weather, artificial lighting can be used to compensate for the light.
Standards for strong seedlings: watermelon seedlings with a well-developed root system, thick and strong plants, 5 to 6 leaves, no pests or diseases, and a seedling age of about 50 d can be regarded as strong seedlings.
4 Land Preparation, Fertilization, and Bed Making
The watermelon field requires deep plowing and sun-drying of the ridges before winter. 15 d before planting, apply 225 kg/hm2 of potassium sulfate compound fertilizer, 2,250 kg/hm2 of rapeseed cake, and 15 t/hm2 of decomposed farmyard manure, applied in furrows in the beds, and cover with soil after application. The watermelon cultivation plot can be deeply plowed and prepared in winter, with deep furrows and high beds for cultivation. The bed surface should preferably be about 3 m, in a turtle-back shape, with a deep furrow opened in the middle and no furrows on both sides. More than 7 d before watermelon planting, cover the shed in advance to increase temperature.
5 Timely Planting
For early spring cultivation, it is usually suitable to plant strong seedlings with a seedling age of about 50 d. Reasonable close planting: plant 1 row per bed, with a plant spacing of 50 to 80 cm for 3-vine pruning, and a density of about 4,500 plants/hm2[5]. Planting method: water thoroughly 1 d in advance, open holes, take out the seedlings from the nutrient pots with soil and plant them, then cover with soil and press firmly after planting, and water thoroughly to settle the roots.
6 Field Management
6.1 Temperature and Humidity Management
To improve the survival rate, ventilation should not be carried out within 3 d after planting; only remove the straw curtains to let in light. Later, when the daytime temperature is in the range of 30 to 35°C, ventilation can be carried out appropriately to reduce humidity. After watermelon enters the expansion stage, the temperature inside the shed should be kept above 30°C to promote rapid expansion of the watermelon. When the watermelon grows to commercial fruit size, the temperature and humidity can be appropriately reduced to improve watermelon quality.
6.2 Fertilizer and Water Management
Watermelon does not require much fertilizer and water during the flowering stage. After entering the fruit-setting stage, the supply of fertilizer and water needs to be increased to promote fruit expansion and achieve the goal of high and abundant yield. Generally, apply 225 kg/hm2 of potassium sulfate compound fertilizer as topdressing, and thereafter apply 75 kg/hm2 of compound fertilizer after each harvest, with a total topdressing of about 375 kg/hm2 for the whole crop. During the fruit expansion period, keep the field moist but not waterlogged, and control water 7 d before harvest[6].
6.3 Pruning and Vine Pressing
When watermelon grows vigorously, pruning should be carried out appropriately. Usually, a 2-vine or 3-vine pruning method is suitable. To ensure sufficient nutrients for the main vine and a few thick-growing side vines, all other side vines should be removed.
6.4 Fruit Setting and Fruit Protection
Use the second and third female flowers on the main vine for fruit setting, generally setting fruit at the 15th to 20th nodes. To improve the fruit-setting rate of watermelon, artificial assisted pollination can be adopted, preferably from 8:00 to 10:00. When the watermelon fruit grows to the size of an egg, fruit thinning can be carried out in a timely manner, removing small fruits, deformed fruits, and pest- or disease-damaged fruits, and keeping young fruits that are large, with straight and thick stalks and fine hairs.
7 Pest, Disease, and Weed Control
For early spring watermelon in greenhouses, pest and disease control should be based mainly on agricultural control, supplemented by biological control and chemical control. Agricultural control may include more than 3 years of paddy-upland rotation or more than 5 years of dryland rotation; timely cleaning of the field, pruning branches, removing diseased leaves and old leaves, timely ventilation and light transmission, reducing air humidity and increasing light, improving ecological conditions, and enhancing plant disease resistance; removing weeds, reducing the base number of pathogen sources, and reducing the occurrence of pests and diseases. Pest and disease control should comply with the requirements of NY/T393 "Green Food - Guidelines for the Use of Pesticides".
For the control of leaf spot and downy mildew, start spraying once with 2,000-fold dilution of 50% carbendazim wettable powder at the early flowering stage. For the control of anthracnose, downy mildew, and powdery mildew, spray once with 1,000-fold dilution of 80% mancozeb wettable powder. For the control of gummy stem blight and fusarium wilt, spray once with 4,000-fold dilution of 99% hymexazol. Pest control should be based mainly on physical control, using measures such as insect-proof nets, aphid sticky boards, and insect-killing lamps. Chemical control should focus mainly on aphids. During the aphid occurrence period in April, spray once with 2,000-fold dilution of 10% imidacloprid wettable powder for control. For weed control, plastic film mulching can be used, and manual weeding can be adopted.
8 Timely Harvest
The harvest of early spring watermelon in greenhouses should depend on the specific variety, sowing time, and transport distance. Watermelon sown around January can be harvested and marketed in early May; if sold locally, it can be harvested when the watermelon reaches 9 to 10 maturity; if transported to other places, it can be appropriately advanced and harvested when the watermelon reaches 8 to 9 maturity.