Detailed Explanation of Container Seedling Cultivation Techniques for Grafted Camellia
Detailed Explanation of Container Seedling Cultivation Techniques for Grafted Camellia
Funded project: Central Financial Forestry Science and Technology Promotion Subsidy Fund Project "Application Demonstration of Fine Camellia Varieties in Hubei Province"; Hubei Ecology Vocational College 2017 university-level
research project "Breeding of New Camellia Varieties and Research on Their Propagation Techniques" (project number 2017KY07). Camellia (Camellia japonica) is a general term for various ornamental camellias in the family Theaceae and the genus Camellia. Camellia is one of China's top ten traditional famous flowers and is also a precious flower worldwide; many cities have adopted camellia as their city flower [Jishan Huayao]. With the rapid development of the social economy and the abundance of material life, people's appreciation tastes are constantly improving, and household demand for flowers is also increasing day by day, especially for woody flowers with long-term ornamental value - precious camellias - which are even more favored by people. Camellia is currently propagated mainly by grafting, though cuttings can also be used; however, the survival rate of cuttings is not high, and cutting-propagated seedlings have weak resistance and a short lifespan. Camellia grafting is now mainly divided into two types. One uses large oil-tea camellia rootstocks for top-grafting camellia to rapidly cultivate large seedlings; however, because grafted camellia seedlings on large oil-tea camellia rootstocks are relatively difficult to transplant and survive, this method is now mainly used for converting low-yield oil-tea camellia forests in place into camellia landscape forests to develop tourism, such as the camellia sightseeing tourism at Wunaoshan in Macheng. The other draws on the bud-seedling rootstock grafting method used for oil-tea camellia, using oil-tea camellia bud seedlings as rootstocks, grafting camellia onto them, and then cultivating container seedlings. This method facilitates large-scale cultivation of camellia seedlings and also makes it easy to begin tree-form training from a young age.
1 Rootstock Cultivation
After "Frost's Descent," harvest mature camellia fruits and place them indoors in a ventilated area for after-ripening. When most of the fruits have split open, open them by hand; select seeds below 560 seeds/kg that are free of mold and damage; after water selection to eliminate plumpness-deficient seeds, place them outdoors. Once the water on the seed surface has dried, move them to a ventilated, shady indoor area for storage with a thickness not exceeding 20 cm; turn them once every 2-3 d until the Beginning of Spring.
Preparation of the germination bed: Choose a plot that is sheltered from the wind and facing the sun, with high terrain, convenient transportation, sufficient water sources, and close to the grafting workspace and nursery to build the germination pool. The pool width is 2 m, and the length is determined according to the shape of the plot and the number of rootstocks to be raised. The germination pool is built with bricks, about 5 bricks high.
Sowing and germination: Around the Beginning of Spring, first spread coarse sand in the pool up to the third brick (coarse sand is more permeable and breathable; fine sand easily causes root rot; coarse sand can only be used once, because after one germination cycle it retains seed shells and pathogens, and screening and disinfection cost more than using new coarse sand). Spread the seeds evenly on the sand surface, with the seeds close together but not overlapping, then cover with coarse sand up to the upper edge of the germination pool. The center of the germination pool should be slightly higher, forming a roof-like ridge along the center of the pool. Because the sand cover is sufficiently thick, no covering and no watering are needed. If in the later stage the bud-seedling rootstocks produce true leaves, continue covering with coarse sand to inhibit lignification and ensure the bud-seedling rootstocks remain semi-lignified, consistent with the semi-lignified scions, thereby facilitating rootstock-scion healing, as shown in Figure 1.
2 Seedbed Preparation
Nursery site selection: Choose a plot that is sunny, convenient for drainage and irrigation, fertile and loose, with a pH value of 5.5-6.5, yellow soil or red-brown soil, convenient transportation, and sufficient labor.
Land preparation and bed making: Prepare the land in winter, deep-plow the soil so that insect eggs and pathogens are killed by freezing and the soil weathers over winter; in February-March, rake level and make beds. Bed width 1 m, bed height 30-40 cm, path 50 cm, bed length 15-20 m, and make the bed surface fine and level.
Container placement: Use special non-woven lightweight substrate containers for oil-tea camellia, generally 4.5-5.0 cm wide. When cutting the containers, ensure they are no less than 10 cm long; if the container is too short, roots easily penetrate into the seedbed, resulting in an incomplete root ball in the container. There are two ways to place the containers. One is to place them directly on the seedbed, with 1.5-1.8 million placed per hectare; the other is to place them on a 25 cm x 50 cm plug tray, with 5 rows per tray and 10 per row, totaling 50. Using plug trays makes transfer and seedling lifting easier, but moisture and humidity rising upward are partially inhibited, resulting in a lower survival rate than direct placement on the seedbed. After the containers are placed, disinfect with 700-fold thiophanate-methyl, carbendazim, or mancozeb and other fungicides. After disinfection, cover with plastic film to retain moisture and leave for 10-15 d.
Shade shed construction: After the containers are placed, build a shade shed 2 m high and use shade netting with 80% shading. When covering with shade netting, pay attention to reducing overlap, because overlap makes the shading too high, causing severe sunlight deficiency inside the shed and affecting the survival rate and growth of seedlings under the overlapped part of the shade netting.
3 Grafting
Grafting time: Early May to early June. Selection and collection of scions: Select well-developed, robust, current-year semi-lignified spring shoots with plump axillary buds, shoot length 5-10 cm, base thickness above 0.25 cm, and at least 1-3 plump buds on the shoot. The mother trees for scion collection should be robust and free of pests and diseases; scions can also be collected from 2-5 a old young camellia plants in combination with pruning. Collect and graft promptly; collected scions should be well labeled and cloned. If long-distance transport is required, collection must be done in the early morning, evening, or cool weather, and temperature control and moisture retention should be noted during transport.
Rootstock lifting and washing: Gently dig the rootstock seedlings out of the sand bed by hand, place them in bamboo baskets or bamboo hampers, rinse the surface sand clean with clear water, then soak and disinfect with a chemical solution (thiophanate-methyl 0.1%), then rinse clean with clear water, and finally cover well with a wet towel and store in a shady, moist place for later use. When lifting rootstocks, be careful not to knock off the embryo seed of the rootstock seedlings or break the roots. The embryo seed is the main source of nutrients for the seedling before survival.
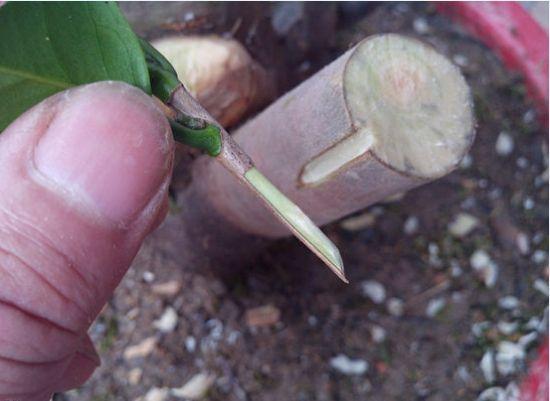
Scion cutting: From the collected one-year-old fresh scions, select well-developed axillary buds or terminal buds. At the lower end on both sides of the leaf bud, make one cut each at 0.5 cm to form a thin wedge shape. The cut surface length is about 1 cm, and both sides should be even and smooth. Then cut off at 0.5 cm above the bud tip to form a scion. When cutting the scion, the knife must be sharp, and do not make repeated cuts on the cut surface. The leaves on the scion may all be retained, one bud with one leaf. Place the cut scions in a basin containing clear water.
Rootstock cutting: Lay the washed bud rootstock flat on the worktable board, cut it off at the upper hypocotyl about 2-3 cm above the cotyledon node, then make a longitudinal cut along the central axis, about 1.0-1.2 cm deep. Keep about 5 cm of the rootstock seedling root; remove the excess part.
Insertion and wrapping: Insert the scion into the cut of the rootstock seedling, then place the prepared aluminum foil strip over the interface and gently pinch tight so that the scion and rootstock seedling are closely combined. Then place the grafted seedling into a container pot, cover well with a wet towel to retain moisture, and place in a cool, shady place for timely planting, as shown in Figure 2.
4 Planting of Grafted Seedlings
After bud-seedling grafting, plant immediately, with 1 plant per container. First use a 1 cm thick bamboo stick to make a small hole in the center of the non-woven container, with a hole depth of about 5 cm. Place the grafted seedling vertically into the small hole, exposing the aluminum strip at the interface and the embryo seed, then use the bamboo stick to press firm so that the grafted seedling and substrate are closely combined, planting it upright and firm. After planting, water thoroughly with a watering can to settle the roots. On the seedbed, use 2.0 m long bamboo strips spaced 1.5 m apart to build an arched shed with an arch height of 0.5 m; cover the arched shed with plastic film (note that the film can only be used for 1 year; old film has low light transmittance and affects seedling survival and growth), and seal and press the surroundings tightly with soil, as shown in Figure 3.
5 Management of Current-Year Seedlings
Moisture retention treatment. About 12 d after grafting, every day from 12:00 to 14:00 noon, gently tap the upper part of the film with a wooden stick so that internal water droplets drip onto the seedling leaves to maintain leaf humidity. Check the film at the bottom and repair any damage.
Timely removal of sprouts, weeding, and removal of flower buds. About 20 d after grafting, begin the first sprout removal and remove weeds, continuing until September. At the same time, promptly remove flower buds, then water thoroughly, cover the film well, and after 50 d, in combination with weeding and sprout removal, spray the seedling leaves with 0.2% urea or Yemiaobao.
Adjusting temperature and humidity. At 40-50 d after grafting, on cloudy days open the film at both ends in the morning and evening for ventilation, air exchange, and hardening of the seedlings. Around August 10, uncover the film at both ends of the seedbed, and one week later, in the morning and evening or on cloudy days, remove all plastic film covers. In early October, remove the shade netting.
Disease control. This mainly involves anthracnose and root rot, carried out in combination with film uncovering and sprout removal; alternatively, in blocks where disease lesions occur, cut an opening in the film, insert the spray nozzle into the shed to spray, and after spraying seal the film with transparent tape. The drug concentrations used include 1,000-fold 70% thiophanate-methyl or 1,000-fold 50% wettable carbendazim solution, etc., used alternately. After discovering disease lesions, promptly remove the diseased plant containers, eliminate the contaminated soil, and then pour 800-fold 50% wettable carbendazim solution or 10% copper sulfate solution into the surrounding containers and seedbed, as shown in Figures 4 and 5.
6 Management of 2-Year-Old Seedlings
Graded bed consolidation: This can be done from October of the grafting year to February of the following spring. Current-year grafted seedlings can be divided into four categories: seedlings with obvious new shoots (about 65%), one-bud-one-leaf seedlings (i.e., both the scion leaf and bud still exist, 20%), one-leaf-no-bud seedlings (i.e., the scion leaf exists but there is no obvious bud, 10%), and dead rootstock seedlings (5%). Remove the one-leaf-no-bud seedling and dead seedling container bags, and cultivate the new-shoot seedlings and one-bud-one-leaf seedlings separately on different seedbeds, adopting corresponding management measures for each. Implementing graded bed consolidation can enable more than 95% of one-bud-one-leaf seedlings to develop well and become strong seedlings.
If not strictly graded, one-bud-one-leaf seedlings are basically suppressed and cannot become strong seedlings. Implementing graded bed consolidation can increase the seedling formation rate by about 20%, while saving 15%-20% of land, as shown in Figure 6. Shading: Replace the shade netting with 50% shade netting, used from June to mid-September.
Weeding: Timely manual weeding of weeds in container bags and on the seedbed. Herbicides may be used for weeds in the paths, but care must be taken to avoid chemical damage to the seedlings. Watering and fertilizing: Water according to precipitation conditions, and when watering, apply 0.5% compound fertilizer 2-3 times.
7 Management of 3-5-Year-Old Seedlings
Repotting. From after October of the second year to spring of the third year, carry out repotting, using non-woven containers 15 cm in diameter and 18 cm high, with a substrate of 40% peat soil and 60% garden soil; they can be cultivated continuously for 3-5 years without replacement, as shown in Figure 7.
Shading. Place the container seedlings under a forest canopy with a canopy density of 0.4-0.5, or use 50% shade netting, with the shade netting used from July to September.
Pruning. Prune every year in May; plump current-year semi-lignified shoots can be used as scions. In September, cut off excessive vigorous shoots to shape a good plant type and crown width.