How to propagate kiwi berry (Actinidia arguta) seedlings? A detailed guide to nursery techniques
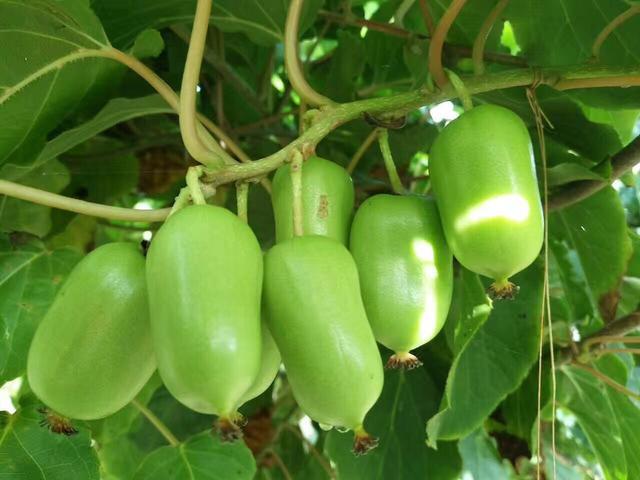
Propagation techniques for kiwi berry seedlings
1 Seed sowing and seedling raising
Collect the fruit of wild kiwi berry, wait until it softens, then extract the seeds by rubbing and washing, and dry them in a shaded, ventilated place for later use. Before sowing, first soak the seeds in clean water for 1-2 d, and mix in fine river sand, with the amount of river sand being 1-2 times that of the seeds. The sand's moisture content should be such that it does not drip when squeezed tightly and the sand ball breaks apart when the hand is released; an absolute moisture content of 5% is favorable for seed imbibition and respiration. Then place them in a wooden box and store at 0°C. 10 d before sowing, take the seeds out of the sand and soak them in clean water for 1-2 d, changing the water once every 1 d. Keep them moist at 20-25°C to promote germination; when most seeds have cracked seed coats and exposed radicles after 5-10 d, they can be sown.
2 Hardwood cuttings
Hardwood cutting is a method of raising seedlings using 1-year-old lignified branches; it is a form of asexual propagation and needs to be carried out in a greenhouse or an unheated plastic tunnel in the open field. In conjunction with winter pruning, retain robust, well-developed branches and tie them into bundles. Pruning is generally carried out during the coldest days of winter (Sanjiu) or 8 weeks before sap flow. For greenhouse cuttings, this can be done in January-February; for cold-frame cuttings, bury the bases in wet sand and store at 0°C until around Qingming, ensuring sufficient chilling requirement to pass through dormancy. Before cutting, place the branches at 5°C for 48 h to break dormancy. Cuttings are generally 10-15 cm long, and each branch should preferably retain more than 2 buds. Make a flat cut 1.5 cm above the upper bud, and a slanted cut 1.5 cm below the lower bud at a 45° angle, with smooth cut surfaces. Soak the basal 2-3 cm in a 100-150 mg/kg indolebutyric acid solution for 24 h. After soaking in the rooting agent, insert into the culture soil. Distinguish the upper and lower ends of the cuttings; they must not be reversed. Insert to a depth of 2/3 of the branch length; after insertion, water thoroughly once, preferably disinfecting with a carbendazim solution. Seal the upper cut with paint or wax to prevent sap bleeding. Promote rooting at a room temperature of about 5°C and a soil temperature of 25°C. Roots generally form in about 15 d.
The culture soil for hardwood cuttings must be loose and breathable to help root growth. Fine river sand, sawdust (except pine sawdust, which has too high an oil content), and soil can be mixed at a ratio of 1:5. Test results have confirmed that mixing furnace ash with soil increases the rooting rate by 13.6% compared with using fine river sand, and the root system is well developed, making it a very good cutting substrate. At the same time, raising the soil temperature is very important for rooting; generally, a heating wire is buried under the culture soil to raise the temperature, which is simple, convenient, labor-saving and effort-saving[1].
3 Softwood cuttings
Softwood cutting is a propagation method that uses new shoots that have reached semi-lignification to raise seedlings. This method can be used for open-field seedling raising, has high propagation efficiency and low production cost, and is a conventional method for rapid seedling production. In mid-to-late June, in conjunction with summer pruning, retain robust, well-developed branches as cuttings, make a flat cut 1.5 cm above the bud, with a smooth cut surface. Make a slanted cut at the lower end at a 45° angle. Keep only 1 leaf, or cut 1/2 of the leaf off to reduce water transpiration and favor rooting. After soaking the cuttings in a 1 000-2 000 mg/kg naphthaleneacetic acid solution for 1.5 min, insert them obliquely into the seedbed, with a depth that exposes the bud by 1.5 cm. Use river sand or fine furnace ash residue as the rooting substrate, about 20 cm thick. Two points need attention: first, the seedbed should be made into high beds to prevent rain from flooding the seedlings and causing the cuttings to rot. Second, because the cuttings have not yet formed roots and water supply cannot keep up, leaf transpiration easily causes wilting, so relatively high air humidity should be ensured. The cutting bed must both have good breathability and suitable humidity, maintaining 60%-80% of the soil's maximum water-holding capacity.
A shade shed must be built over the seedbed. Set up one arch every 1.5 m, with an arch height of 0.6 m, and lay a shade net with a light transmittance of 50%. On sunny days, spray water once every 30 min with a fine watering can, each spray being semi-mist-like; keeping the leaves often moist is sufficient, and there is no need to spray more. On days with excessively high temperatures or strong winds, the number of sprays should be appropriately increased. After 30 d of cutting, reduce the amount of spraying, and at the same time check the rooting situation; when 5-6 roots 2-3 cm long have grown from the base of the cuttings, stop spraying and remove the shade net. Lift the seedlings at the end of October and store them in a cellar in sand. If cutting is done relatively late and the degree of lignification is not high, attention should be paid to cold protection for overwintering [Jishan Huayao].
4 Tissue culture
Tissue culture is a propagation method that uses the regenerative function of isolated plant organs, tissues or cells, through artificial culture, to develop them into complete plants that fully possess the hereditary characteristics and traits of the mother plant[3]. Tissue culture is not limited by season, uses few materials, and has a large and fast propagation volume, making it an important means of large-scale seedling production. However, because it has extremely high requirements for production conditions, it is not suitable for farmers to propagate on their own.
Collect new shoots from May to June, rinse with clean water for 10 min, then disinfect with 75% alcohol for 20 s, rinse with sterile water 4-5 times, then disinfect with 0.1% mercuric chloride for 8 min, rinse with sterile water 4-5 times, blot dry with sterile paper, and inoculate onto sterilized induction medium. Culture on the induction medium, and after 30 d bud clusters form. Divide the induced bud clusters into several small bud clusters, and transfer the bud cluster branches that have grown to more than 2 cm onto rooting medium; roots can form after about 15 d. The rooted plantlets can be transplanted only after hardening off.
5 Layering
Layering propagation is a propagation method that uses part of the branches of the mother plant, pressing them into the ground to promote rooting, thereby breeding new plants. Its advantage is that the seedling has not left the mother plant during the growth period, has sufficient nutrient supply, and grows vigorously. This method is simple, quick and easy to master. After budding in spring, when the new shoots grow to about 15 cm, dig a pit about 15 cm deep beside the mother plant, bend the semi-lignified new shoot without breaking it, press it into the pit, fill with soil and firm it, and water. At the end of October in autumn, separate the layer from the mother plant to form a self-rooted seedling. If layering mature branches, it is best to girdle the branch buried in the soil, cutting through the phloem to promote rooting[4].
6 Hardwood grafting
In spring, cleft grafting is carried out on lignified branches. Because kiwi berry has a large and hollow pith, grafting is not easy to succeed. Grafting in spring has a high survival rate and can produce nursery stock in the same year. The spring grafting time is generally 10 d before Qingming; to prevent bleeding after grafting, root cutting can be adopted on the same side as the graft.
Select 1-year-old branches of the desired excellent variety as scions, cut off 1 cm above the scion bud, and make one symmetrical cut on each side 2 cm below the scion bud, whittling it into a wedge shape. Select a smooth, straight part of the rootstock and cut it off, then make a vertical cleft in the middle of the pith of the cut surface, insert the scion, and align it with the rootstock's cambium. If the rootstock and scion are not the same thickness, align the cambium on one side, tie tightly with plastic strips, exposing only the axillary bud, then wrap the plastic strip around the upper cut surface of the scion to form a cap to protect the scion. Promptly remove new buds sprouting from the rootstock. If grafting succeeds, the scion can sprout in 10 d.
7 Softwood grafting
Select robust, semi-lignified new shoots growing from the rootstock, leave 2-4 leaves, and cut off 2 cm from the base of the uppermost leaf. For the scion, choose robust, semi-lignified new shoots of excellent varieties; tender shoots are not easy to survive. Remove the leaves and keep the petioles, cut off 0.5-1 cm above the scion bud, leave 2-3 cm below the bud, and whittle into a double-bevel wedge shape. The bevels should be smooth, flat and uniform. Make a vertical cleft in the middle of the rootstock, insert the scion, align it with the rootstock's cambium, tie tightly with plastic strips, exposing only the axillary bud and petiole, then wrap the plastic strip around the upper cut surface of the scion to form a cap to protect the scion and prevent water loss.
During grafting, attention must be paid to the following: the plastic strips must be tied tightly and firmly, without gaps, to prevent water and air from passing through, but they must not be tied too tightly. Before and after grafting, ensure sufficient water supply and keep the soil moist. After budding, remove the plastic strips in a timely manner.