How to propagate Sinningia by cuttings? A detailed walkthrough of the whole process
The cutting propagation process for Sinningia
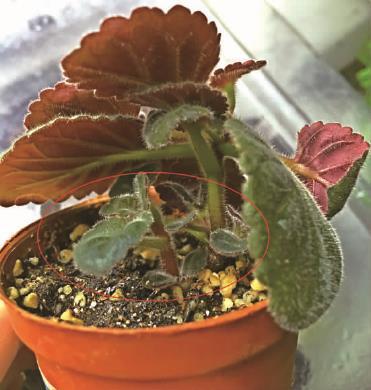
Sinningia goes dormant at low winter temperatures. My approach is to put it in a humidity box and leave it alone; it will sprout new shoots on its own in spring. Below is a Sinningia that has sprouted new shoots, and you can see several little shoots emerging.
Figure 1
Cut off the small side shoots; for the larger side shoots, cut near the "little potato" (the tuber), remove some of the lower leaves, and keep 4 to 2 leaves at the tip. (Figure 2: side shoot. Figure 3: after removing excess leaves)
Figure 2
Figure 3
Sinningia cuttings can be propagated in sphagnum moss, in a three-in-one mix (peat, perlite, vermiculite), or in water. I like using sphagnum moss best, because most of my backup cuttings are done in spring and summer (May to September), and in the hotter conditions the moss's breathability and cleanliness ensure the survival rate of the cuttings.
Below I will only use sphagnum moss for the explanation. For the three-in-one ratio, I suggest peat : perlite : vermiculite = 1 : 1 : 0.5 (my environment is an enclosed balcony with bright light and no direct sunlight; if your growing environment differs from mine, please choose the ratio carefully). The sphagnum moss must be scalded with boiling water to disinfect it; after it is fully soaked, squeeze out the excess water appropriately and set it aside (Figure 4 shows dry sphagnum moss).
Figure 4
Then insert the small side shoot into the sphagnum moss, write a label, and put it in a humidity box to keep it moist. If the "little potato" has rotted, cut off the top stem that has not turned black; even with just two small leaves, it can still survive when propagated in sphagnum moss. Isn't it simple? At a suitable temperature (around 20°C), after one or two months a tiny "potato" will have formed at the wound on the stem.
Figure 5
Generally, after about half a year, I check how big the "little potato" on the propagated Sinningia has grown. For potatoes that are too small, I suggest continuing to grow them in sphagnum moss and giving a light fertilizer appropriately (nitrogen : phosphorus : potassium = 1 : 1 : 1). If the "little potato" is 1 cm in diameter and the plant is very healthy, then let's move them into the three-in-one normal growing medium!
The Sinningia in the photo has been in sphagnum moss for almost a year. Feel the "little potato" - it is not small either. To help it bloom better, move it into the three-in-one mix right away.
Figure 6
It should be noted that the sphagnum moss must be removed as thoroughly as possible; the fibrous roots can be removed completely, but be careful not to bruise the stem when removing them. Sinningia stems are rather fragile; if a stem is broken and no new shoot buds sprout, the "little potato" will go completely dormant, and you can only re-propagate from a cutting.
Figure 7
Generally, it is best to keep only one or two main stems on the tuber, to reduce nutrient consumption and let it root and grow as quickly as possible. It is recommended to plant it in a relatively small pot. For a 1 cm "little potato", a small tasting cup with a 5 cm diameter or a 6 cm small flower pot is suitable, and no larger than 7 cm. Moist soil, dry planting - every plant grower knows this. Do not bury the tuber completely in the soil, as this is not good for side shoot sprouting. Based on my experience, it is generally best to leave one-fifth or one-sixth of the tuber above the soil surface. Once everything is ready, put it in a humidity box under high humidity for about 2 to 4 weeks, and then it can be grown normally while you wait for it to bloom.
Similarly, when repotting Sinningia, also remove the old soil as thoroughly as possible, protect the tuber and stems, put it into new soil, and keep it humid for 2 to 4 weeks before growing it normally.
A demonstration of exposing the tuber surface and shoot buds:
Photos of some Sinningia in bloom
Figure 8
Figure 9
Figure 10
Figure 11
Figure 12
Figure 13
Figure 14