Grow potted chives alongside your flowers: harvest two crops a month and never buy vegetables all year
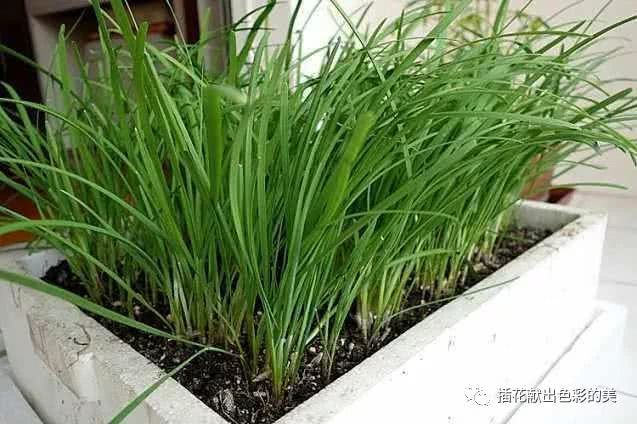
I believe many flower lovers who enjoy growing plants have also potted some vegetables, right? Especially on the balcony, potting some baby bok choy and small chili peppers is both attractive and pickable. Among all potted vegetables, potted chives are relatively popular. Why? First, easy to grow; second, fast to grow! Next, Potted Plant Stack tells you some tips for potted chives, so you won't need to buy chives for a whole year~
There are two ways to grow potted chives. One is to sow seeds. The other is to plant chive roots directly.
I strongly recommend that you do not start growing from seeds. Why? Because growing potted chives this way is simply too slow!
Chive seeds are as shown in the picture. Quite a few flower lovers have told me that they sowed seeds in balcony flower pots, and not only did the seeds germinate very slowly, but the chives that grew were also very thin.
See that? Chives grown from seed look like this, as thin as toothpicks. From germination to growing into thick, sturdy chives takes at least fifty to sixty days, but those grown from chive roots have already been harvested for several crops by then.
The reason I recommend growing potted chives from chive roots is very simple!Less hassle! They grow well, the chive leaves are wide and long, and you can cut a crop in twenty days.
The picture above shows chive roots. Growing them in balcony flower pots from chive roots has a 100% survival rate. Even flower lovers who manage to kill cacti can keep chives alive~
Next, let's talk about the techniques for growing potted chives!
First, when planting chive roots, it is best to use three to five plants per clump, keep a certain spacing between clumps, and after planting in the flower pot, cover with 3~5 cm of soil, with the depth best kept so that the tillering nodes are not buried.
For growing potted chives, the soil is naturally very important. It is best to mix your own nutrient soil. Generally, the ratio for the growing medium is 3 parts decomposed leaves, 2 parts decomposed livestock and poultry manure, and 5 parts high-quality farmland soil, or use 5 parts decomposed farmyard manure, 3 parts garden soil, and 2 parts sandy soil to make the potting soil. After all, only sufficient fertility can sustain the chives' continuous growth needs.
Next comes daily management, such as watering. I suggest flower lovers stick to the principle of "water frequently and irrigate lightly." In general, water once every 3-5 days depending on how dry or moist the flower pot is. Keeping the potting soil moist helps the chives grow quickly.
In addition, remember to fertilize too. Chives need relatively more nutrients. When they grow to about 15 cm, remember to apply some organic fertilizer. On a balcony, you can use some plant ash or decomposed soybean cake. If planting in the ground back home, there is no need to be so cautious, just use chicken and duck manure directly~
Finally, let's talk about harvesting.
Under normal conditions, when the temperature is suitable, chives can be cut once every half month. When cutting, pay attention to doing it in the morning or evening. Use scissors to cut along the potting soil. Do not worry that cutting them short will affect the next crop. After cutting, remember to loosen the soil. If you find the soil dry when loosening it, then pour in a little water. Then start applying a little fertilizer after one or two days. After that, with normal care, you can wait for the next crop.
Have you mastered the techniques for growing potted chives on a balcony? Wishing flower lovers endless crops of chives to eat~