After the flowers finish blooming, snap off a branch and stick it in the soil and it will live - no matter how cheap these flowers are, don't buy them
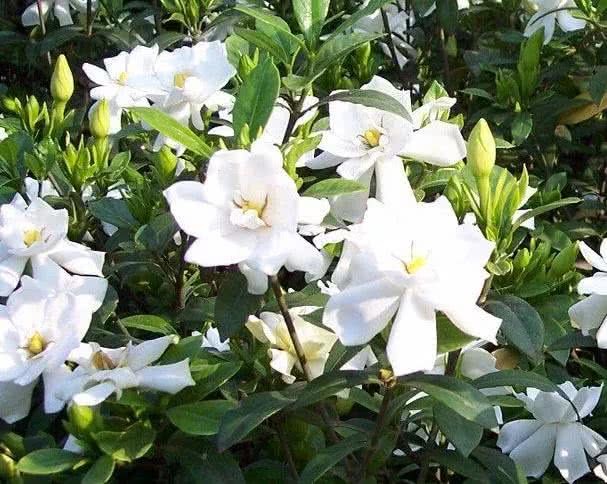
Once the season of falling flowers arrives, watching the petals wither one by one, do flower lovers' moods also sink like the drifting petals? Today Buyan tells everyone a very useful little tip: after the flowers fade, cut off the flowering branches and use them for cuttings again, so one pot becomes two, and they root very easily.
Now let's take a look at how these flowers are re-propagated from cuttings!
I. Gardenia
After gardenia finishes blooming, the branches still have some nutrients left, so cuttings taken at this time root very easily. Many friends say gardenia cuttings are hard to root, but in fact gardenia cuttings are very easy too - you can root them in water or in soil.
1. Soil cuttings
For soil cuttings, take the cut branches, trim the bottom end into a slanted cut, cut them into small sections about 10 cm long. You can keep a few leaves or keep them all. You can root them directly in soil, or use river sand for rooting. For soil, I generally mix leaf mold, coarse river sand and garden soil. This kind of soil is loose, breathable and fertile, so cuttings root easily and don't even need repotting.
If the temperature is a bit low, you can cover the pot with a plastic bag to keep it warm and moist
Water the soil thoroughly, insert the gardenia branches, place in a shaded spot, and roots will form in about twenty days
2. Water cuttings
You can also root them in water, but the water method needs a relatively high temperature, about 25°C or so for easy rooting. If your gardenia water cuttings aren't very successful, check whether the temperature is suitable
Insert the branches directly into water, place in a spot with plenty of bright indirect light, change the water once every three days, and roots will form in about twenty days. Gardenias rooted from cuttings grow very vigorously
II. Rose
Fellow flower lovers surely all know that after the gorgeous rose finishes blooming, the flowering branches must be pruned as soon as possible so the rose grows better. But taking cuttings at this time is even more suitable.
First select healthy, thick branches for cuttings. At this point note that the bottom of the selected branch must keep at least one bud point.
1. Vermiculite cuttings
When taking cuttings, be sure to use vermiculite as the medium - this is the "hitting the wall 2.0" cutting method. Use a mineral water bottle, cut it in half, drill a few holes in the bottom, fill it with vermiculite, and bury the cuttings in the vermiculite, about two cm is enough. Water the vermiculite thoroughly, and finally make sure the tray holds some clean water.
Just place it in a spot with bright indirect light, no need to keep it moist or mist it. In about twenty days, big white roots come shooting out - the roots are very good
2. Rose cuttings can be done not only in soil but also in water. At this point note one thing: you must use clean water. You can add some rooting powder to the water to make it root faster.
3. After about a month, wait for the cuttings to grow roots, and then they can be planted out. The soil must be loose and breathable. After planting out, water the pot soil thoroughly, let the seedlings recover for about a week, and gradually let them receive sunlight
III. Chrysanthemum
1. Prune after the flowers fade
The beautiful and elegant chrysanthemum also needs a pruning after the flowers fade, to preserve its nutrients. The branches cut at this time are most suitable for cuttings, because the branches now contain a lot of nutrients.
2. Choose the cuttings
Choosing the cuttings is also very important. At this point choose branches that are emerald green and healthy and sturdy - they have more nutrients and root more easily. Trim them so only two or three large leaves remain, keep one cm below the bottom leaves, and cut off all the rest.
3. Soil culture
When choosing the medium for chrysanthemums, choose a mix of peat soil and perlite. Before taking cuttings, poke a few small holes in the medium so the young plants can absorb nutrients more easily.
Sprinkle rooting powder on the base of the cuttings, bury them two cm into the soil, water thoroughly after planting, and place in a ventilated spot for care. To maintain humidity, mist them every day.
4. Planting out
After about a month, the cuttings will have grown. At this point you can see they have grown new branches and leaves and sent out fine roots, so they can be moved into flower pots and planted out.
IV. Jasmine
1. Prune after the flowers fade
When jasmine blooms in summer, its beautiful fragrance drifts through the streets and alleys. After the flowers fall is exactly the good season for cuttings - they not only grow more vigorously, but also more easily form flower buds, and the flowers that bloom are truly white and fragrant!
First cut off the jasmine branches and trim them, keeping just two leaves. For woody ones, make sure each end keeps at least one bud point - such branches sprout more easily.
2. Cuttings
Jasmine cuttings are even more convenient and simple - you can root them directly in the original jasmine pot. Poke two holes in the original pot soil and insert the cuttings, and that's it. Remember to press the surrounding soil firm, so the young plants don't fall over before they've even grown.
3. Caring for the cuttings
Caring for jasmine is also very simple. When watering, remember to water thoroughly in one go, and place it in a sunny spot for care, and it will grow very well on its own.
Do you think this makes sense? Please give it a like
If you like growing flowers, please follow the WeChat public account: Balcony Garden Vegetable Plot