Growing Camellia Bonsai: Controlling Soil and Temperature
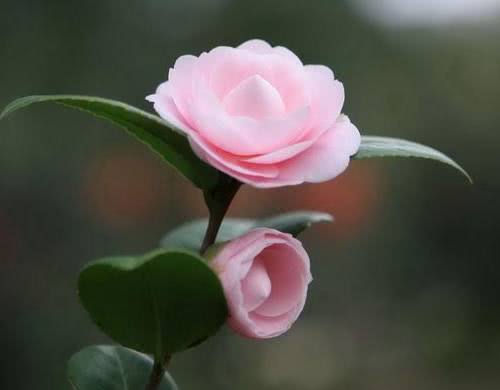
In most cases, the newly potted plants are small seedlings sold by nurseries, either in nutritional pots or sold bare-rooted with the original soil removed. Whether the original soil needs to be removed depends on the difference between the original soil and the new soil. If the newly replaced medium is not very different in composition from the original soil, you can pot it directly. For example, some people use red soil plus leaf mold plus sand; if the original soil is very loose, there is no need to remove it. But if the original soil is thick, sticky red soil and the new medium is peat and perlite, it is better to wash the roots a bit.
You can soak it in a basin of water, or rinse the surface of the root ball slightly, just enough to expose the white roots. I usually use peat mixed with akadama, and the results are decent whether or not I wash the roots. Because the medium for growing camellias is generally quite compact, you should add an extra layer of lightweight medium in the drainage layer to prevent water accumulation. When potting, check whether the new seedling has pests or diseases; scale insects are common. Spray once with pesticide after potting, and water more the first time; after watering thoroughly, water slowly once more.
This helps the new and old medium mix. Do not treat camellias the way you treat roses. Camellias grow slowly, so unless there is a special reason, it is best not to heavily prune roots or leaves when potting, otherwise the small seedling may die. I think camellias basically do not need pruning during the seedling recovery period, unless they are too leggy, and there is no need to remove all the flower buds either; just thin out some according to the age of the seedling. Camellias originated in China. They like warm, humid and semi-shaded environments. They fear high temperatures and avoid scorching sun. The suitable growing temperature for camellias is 18-25°C,
from March to September it is 13-18°C, and from September to March of the following year it is 10-13°C. When the temperature is above 12°C, they begin to sprout; above 30°C, growth stops; the temperature at which flowering begins is 2°C, and the suitable temperature for flower opening is 10-20°C. Cold-hardy camellia varieties can briefly tolerate -10°C, while ordinary varieties tolerate -3 to -4°C. When summer temperatures exceed 35°C, leaf scorch will appear. Camellias are suited to environments with sufficient moisture and humid air, and they avoid dryness. In the hot, dry summer and autumn,
water or mist them promptly; the relative air humidity is best at 70%-80%. During the plum rain season, pay attention to drainage to avoid root waterlogging and rot. Camellias like fertile, loose, airy, well-drained, slightly acidic soil. Generally, black soil, red soil, pine needle soil and sandy soil are mixed and stirred to make a nutritional soil. Red soil contains much organic matter, black soil has a coagulating effect, and humus soil has a loosening effect; through mixing, the soil is improved.
The soil pH is 6.5-7, which is most suitable for camellia growth. Since a single soil cannot meet the requirements for camellias, several soils and media need to be selected and reasonably proportioned to meet the growth requirements of camellias as much as possible. Generally, mountain soil, perlite and rice husk ash (6:3:1) are used; this formula soil is especially suitable for home potting and gives good results. After the nutritional soil is prepared, sift it once, spray it lightly with water, and bake it briefly over fire,
making sterilized soil for later use. Sterilized soil has the advantages of not breeding insects, not causing root mold, and having no odor. Camellia seedlings should be planted as soon as they are lifted, not left overnight; they must be planted into pots in the shortest possible time. This requires preparing the flower pots and potting soil (substrate) before buying camellia seedlings, otherwise the seedlings may lose water because they are not planted in time, affecting the survival rate and also affecting recovery after survival. Key planting techniques: the roots of camellias should be spread out,
not bent excessively, to prevent breaking the roots when pressing the soil above the roots after backfilling. The soil above the roots should be pressed appropriately so that the roots and soil are in close contact, improving the water absorption capacity of the roots. After potting, place them indoors to prevent wind from blowing the camellia seedlings and causing gaps between the roots and the soil, which would affect the roots' absorption of water. Newly transplanted camellia seedlings have roots that are more or less damaged, and the water absorption capacity of the roots is poor,
so appropriate pruning must be done after planting to reduce water evaporation. After planting camellias, you must water enough to settle the roots; the water should soak through. To prevent the water from not soaking through, water again on the second and third days after planting. After that, depending on the weather, water once every 1-3 days, gradually transitioning to the watering frequency of normal management.